


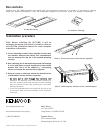
Step 2: Connecting the bracket halves together
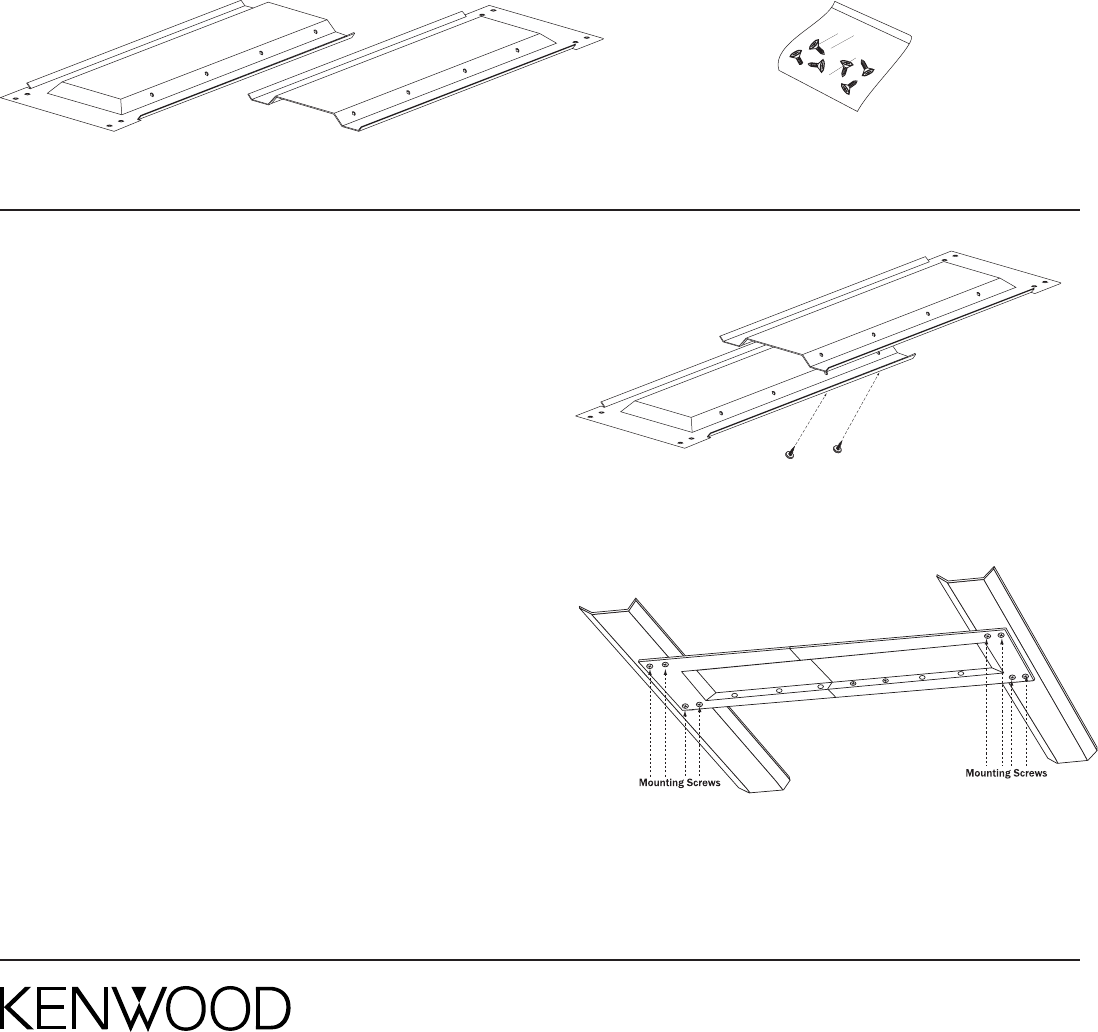
Step 3: Attaching the bracket to the crossmembers
www.kenwoodusa.com
www.kenwoodusa.com/inquiry
1-800-KENWOOD
©2003 Kenwood USA Corporation. All Rights Reserved.
Main Office
P.O. Box 22745
Long Beach, CA 90801-5745
Canada Office
6070 Kestrel Road
Mississaugua, Ontario L5T 1S8
Installation procedure
Note: Before installing the SK-70MB, it will be
necessary to remove the vehicle’s headliner. Refer to
the LZH-70W Installation Manual for more complete
installation information.
1. Fit the mounting bracket halves together so they span
the distance between the vehicle roof crossmembers
that are directly fore and aft of the console mounting
location.
2. Use a marking pen to mark the top bracket half through
2 of the pilot holes on each angled side of the bottom
bracket half. Use 4 of the supplied ½” self-tapping
screws to connect the bracket halves together.
3. Using 4 screws on each end, attach the bracket to the
crossmembers on the vehicle’s centerline
•
BBee ssuurree nnoott ttoo ddrriillll tthhrroouugghh tthhee vveehhiiccllee’’ss rrooooff
(Measure the distance from the bracket’s surface to
the roof; measure and mark the drill bit with masking
tape to prevent the bit from touching the roof when
drilling the holes)
• If the roof crossmembers are too narrow for you to use
4 screws on each end of the bracket, use 2 screws on
each end
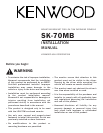
Box contents
Unpack your SK-70MB carefully and make sure that everything listed here is present. If anything is missing,
notify your dealer immediately. If your SK-70MB was shipped to you directly, notify your shipper immediately.
2 x Bracket Halves
1 x Hardware Package