


ONE TIME PROGRAM
PROGRAM 1
CHANNEL 10
TIME ON – – : – –
TO CORRECT PUSH CLEAR
TO END PUSH EXIT
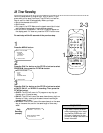
6
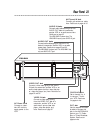
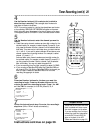
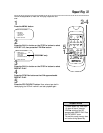
Press two Number buttons for the hour you want the
recording to begin. Press two Number buttons for the
minute you want the recording to begin. Press 1 for AM
or 2 for PM. For example, for 9:30 PM, press 09, 30, 2.
ONE TIME PROGRAM
PROGRAM 1
CHANNEL 10
TIME ON 09:30 PM
TIME OFF – – : – –
TO CORRECT PUSH CLEAR
TO END PUSH EXIT
Timer Recording (cont’d) 29
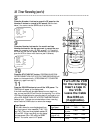
4
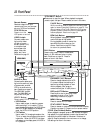
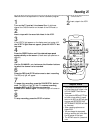
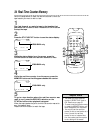
Use the Number buttons (1-8) to select a slot in which to
store the timer recording. There are eight slots. Numbers for
open slots will flash on the screen.
NOTE: If you enter a number for a slot that has already been used to store
a timer recording, PREVIOUSLY SET PROGRAM will appear on the screen
briefly. Information about the program in that slot will appear on the screen.
If this happens, press the STATUS/EXIT button, then select another number.
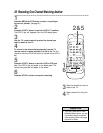
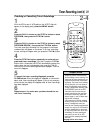
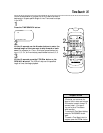
5
Use the Number buttons to enter the channel you want to
record.
● Cable Users, enter channel numbers as a two-digit number for the
quickest results. For example, to select channel 6, press 0,6. If you
only press the Number 6 button, channel 6 will be selected after a
brief delay. There also may be a brief delay when you select channels
10, 11, and 12.
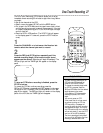
If you want to select channels 100 and above, enter
channel numbers as a three-digit number. For example, to select
channel 117, press 1, 1, 7.
Antenna Users, enter channel numbers as a two-digit number for
the quickest results. For example, to select channel 5, press 0,5. If
you only press the Number 5 button, channel 5 will be selected
after a brief delay. You may only select channels 2-69.
● If you are recording from line input, press 0,0 to select AV REAR.
● If you are using a Cable Box/DBS, select the Cable Box/DBS out-
put channel (03 or 04). Set the Cable Box/DBS to the channel you
want to record. Leave the Cable Box/DBS on for the timer
recording. See page eight for details.
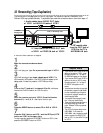
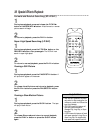
7
Follow the instructions in step 6 to enter the recording’s
stop time. (AM or PM will be set automatically.)
Instructions continue on page 30.
4-7
• Entries that do not match the VCR’s
clock or calendar will cause a ques-
tion mark to appear on the screen.
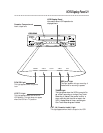
• If you are recording from line input,
connect the audio and video cables
to the AUDIO IN and VIDEO IN
jacks on the back of the VCR.
(Please see illustration on page 32.)
Helpful Hints
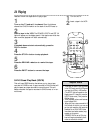
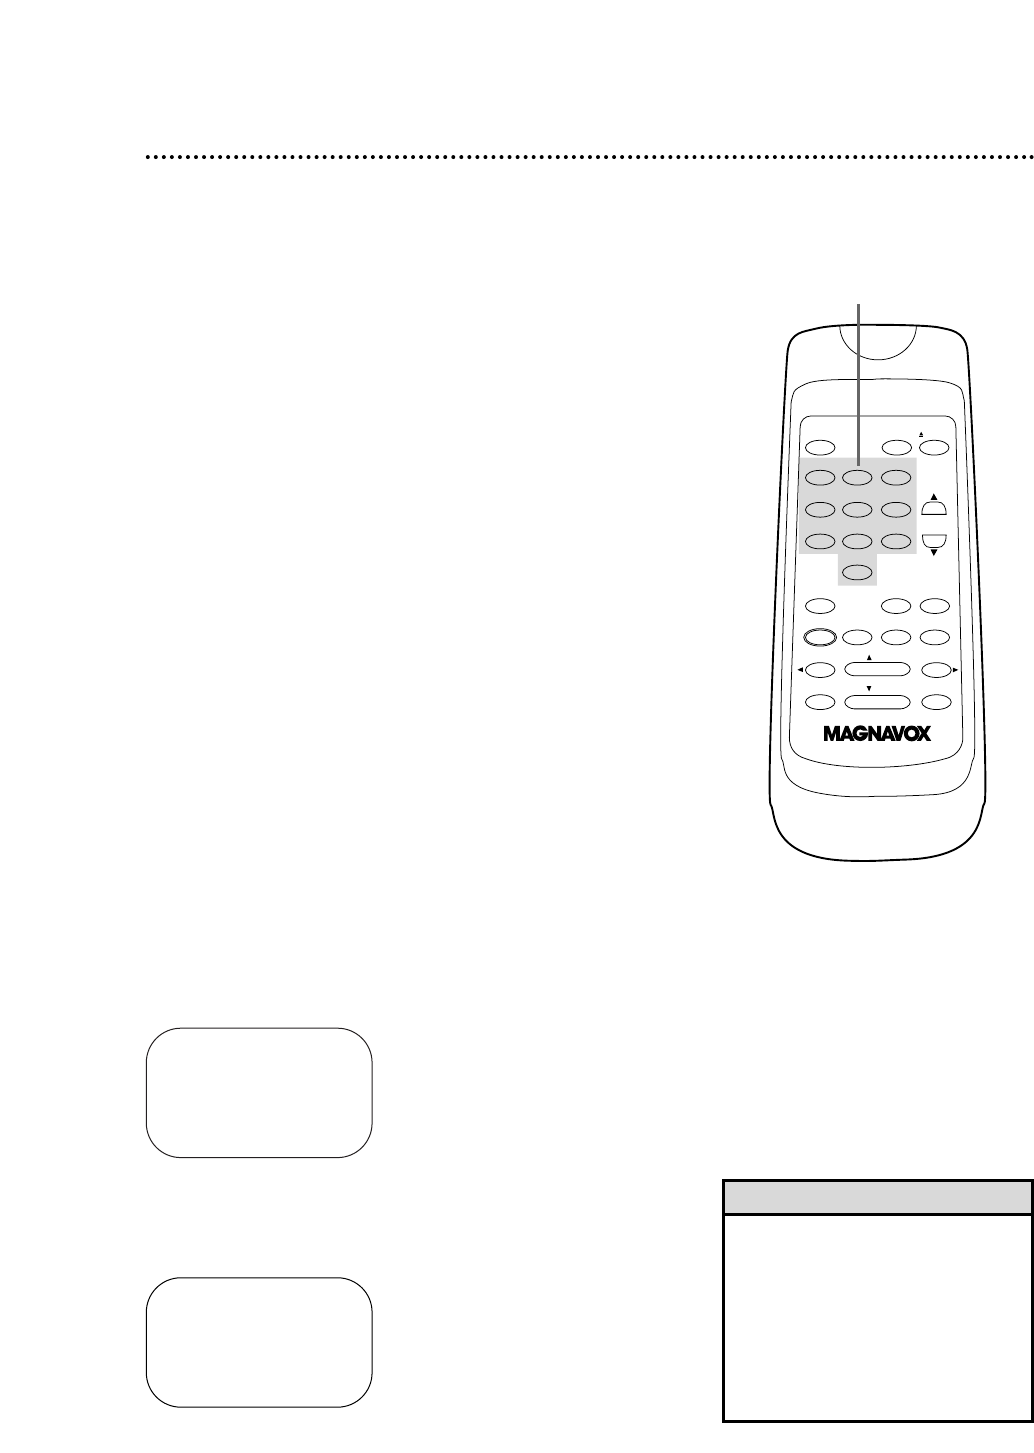
POWER EJECTVCR/TV
1 2 3
4 5 6
7 8 9
0
CHANNEL
MEMORY
STATUS/EXIT CLEAR SLOWMENU
REWIND /PLAY F.FWD
REC/OTR PAUSE/STILL
/STOP
TIME SEARCH
SPEED