


24
Initial OSD Settings
25
Initial OSD Settings
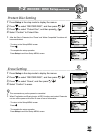
Program List (Timer Record) Setting
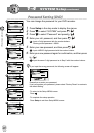
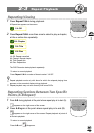
1 Press Setup in the stop mode to display the menus.
2 Press to select “TIMER” and press .
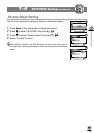
3 Press to select “Program List” and press .
4
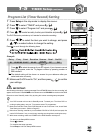
Press / to select one entry to enter your information and press .
The DVD Recorder provides up to 8 entries for schedule recording.
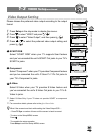
5 Press / to select the item you want to change, and press
/ or number buttons to change the setting.
Press to scroll through the following items.
Example:
6 Make sure On/Off is set to “On”, and then press to con rm
your settings.
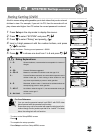
IMPORTANT:
After nishing timer setup, a warning message “Press STANDBY button for timer recording“ will
appear on the screen. Press POWER on the remote control or STANDBY on the front of the DVD
Recorder to enter Stand-By mode. Only by doing this is timer recording setup completed.
•
Your DVD recorder will now be in Stand-By mode. To watch your TV while a DVD re-
cording is taking place, use your TV remote to select TV programmes.
•
Make sure Date and Time of the DVD Recorder is true to real time. If not, check Date/
Time Setting to correct it. (Refer to Page 27)
•
Before timer recording, remember to put a recordable DVD+RW or DVD+R (with free space) disc
into the DVD Recorder. If not, you can’t do any recording even though timer recording has set up.
•
While timer recording, make sure POWER of the DVD Recorder is always on.
-To return to the Setup MENU screen
-Press or Return.
-To complete the setup operation
-Press Setup to exit from Setup MENU screen.
1-5
TIMER Setup-continued
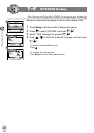
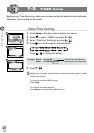
The default setting will be shown on screen for your reference after you
select and enter one entry.
Press / to select the source of your A/V signals. If you choose to record
from TV programs, enter the TV program number by pressing number or
PR-/+ buttons.
Entry Freq Start Duration Source Qual. On/Off
01 12/05/03 03:07 00:00 SCART SP Off
2
2
3
3
4
4
5
5