M-Audio MicroTrack 24/96 Bedienungsanleitung
5
Deutsch
Linke Seite
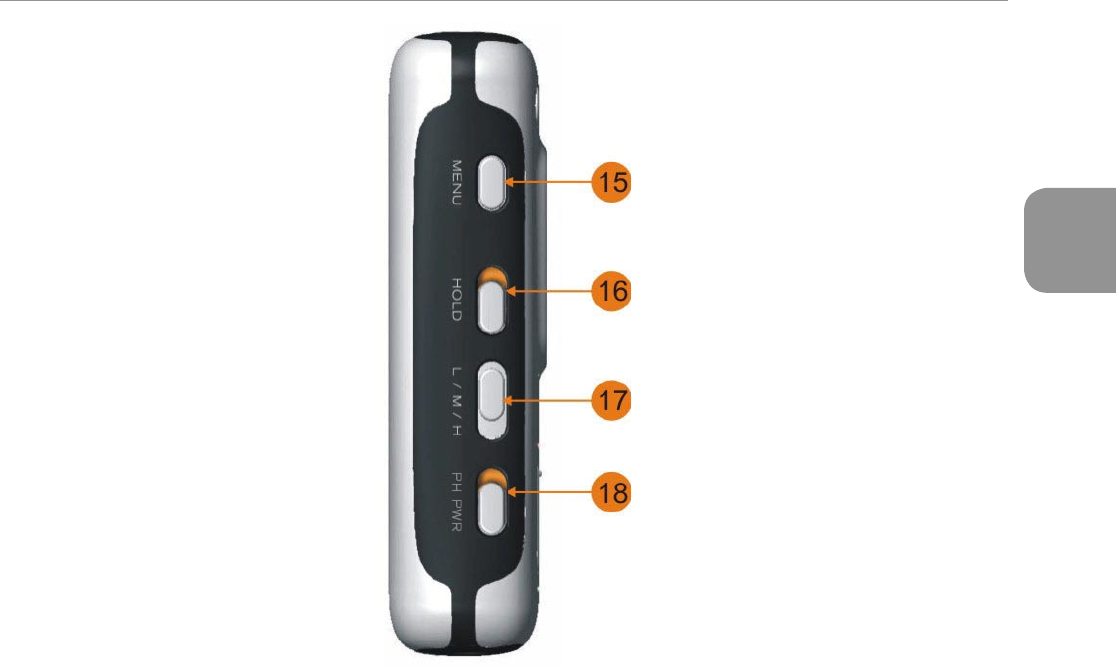
15. Menü Taster: Menüauswahl. Schaltet zwischen Haupt-Menü und Record Anzeige um oder dient als Zurück-Funktion aus einem
Untermenü.
16. Hold Schalter: Bei aktiver Hold Funktion sind alle Bedienelemente von MicroTrack 24/96 gesperrt. Das Display weist sie bei
entsprechenden Versuchen mit „HOLD switch on” auf die aktive Hold Funktion hin.
17. L/M/H Schalter: definiert den Eingangspegel für beide Eingänge (Miniklinke, TRS). Verwenden Sie [L], um Linepegel aufzuzeichnen,
[M] für Mikrofonsignale. Die Position [H] betrifft liefert eine höhere Vorverstärkung lediglich für die symmetrischen Eingänge, etwa
für Mikrofone mit leisem Ausgangspegel.
18. Ph Pwr Schalter: schaltet die Phantomspeisung an den TRS Eingängen ein. Der Hinweis „Ph” im Display erscheint entsprechend.
Nutzen Sie Phantomspeisung bitte nur in Zusammenhang mit Kondensatormikrofonen.
ACHTUNG: Um möglichen Schäden an der Mikrofon-Elektronik vorzubeugen sollte die Phantomspeisung während des Anschliessens
oder Enfernens eines Mikrofons ausgeschaltet werden.
3 - Die Bedienelemente und Anzeigen


