


11
be visible now. The three choices are “Audio
DRC”, “Virtual Surround” and “Channel Level”.
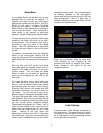
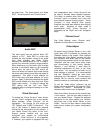
Audio DRC
This menu option has two choices’ either “Off”
(default) or “On”. Audio DRC is a circuit that
reduces the total dynamic range of the audio
from discs encoded with Dolby Digital.
Normally, this setting would be “Off” in order to
provide the maximum dynamic range possible.
When listening at very low levels, such as might
be done to not disturb others in the household
late at night, the use of the DRC control will
raise low levels and reduce high levels making
the entire audio content more even and easier to
understand. This effect is most effective for
DVD Video discs and least effective for music
content. Again, it should be noted that the Audio
DRC control affects only discs that have Dolby
Digital audio coding. In order to change the
DRC setting use the “Left” and “Right”
navigation keys to change the setting to or from
“Off” to “On”.
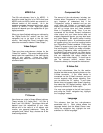
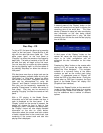
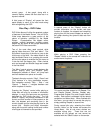
Virtual Surround
To access the “Virtual Surround” menu choice,
use the “Down” navigation key on the remote.
When selected, “Virtual Surround” will be
highlighted. The choices for this control are
“Off” (default) and “V/SRS TruSurround”. The
use of this feature is based upon personal
choice and the configuration of your system. If
your Model Eleven has either of the multi-
channel options installed and you have
configured your system for multi-channel
operation, “Virtual Surround” is not supported.
If, however, your system is equipped with only
two loudspeakers, then “Virtual Surround” can
be used to simulate lateral speaker locations.
This effect is enabled when both the “Virtual
Surround” option is selected and a disc with
multi-channel material is being played. “Virtual
Surround” is most effective when playing
theatrical discs and least effective when playing
music ones. Selection of either mode is
accomplished while “Virtual Surround” is
highlighted via the “Right” and “Left” navigation
keys.
Channel Level
See “Initial Settings” menu “Channel Level”
submenu for information on this section.
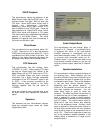
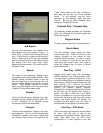
Video Adjust
Be certain that the Model Eleven is not in shift
mode (blue LED illuminated) by pressing the
“Release” button on the remote. Now, highlight
and select the “Video Adjust” submenu by using
the navigation and select keys of the remote.
There are three possible entries for this section.
“Standard” sets the video levels (white, black
and chrominance) to their factory defaults.
“Memory 1” and “Memory 2” each allow for
individual adjustments for each of the three
video levels. You can adjust and recall any of
these settings at anytime. It is recommended
that the “Standard” setting be used when
calibrating your video device. The two memory
settings can be used for video contents that
dose not conform to a calibrated video device.
To exit the “Video Adjust” submenu use the
Return remote command by first pressing “Shift”
followed by “Return”. Remember to press
release once the main menu is displayed.
Other Home Menu choices will be covered later
in this manual. You are now ready to begin to
use your Model Eleven. Despite the apparent
complexity of the setup section just covered,
day-to-day use of the Model Eleven is very
simple. You will not likely need to revisit these
setup menus unless your system configuration
changes.