


E – 35
This function reduces video noise.
On ................ The low-pass filter is applied.
Off................ The filter is removed.
Screen adjustments are possible even when the filter is On.
Factory Default
Changes all adjustments and setting to the factory preset for each source
individually except Remaining Lamp Time, Lamp Hour Meter, Filter Us-
age, Projector Usage, Language and Communication Speed. (To reset
the lamp usage time, see "Clear Lamp Hour Meter" on page E-38.)
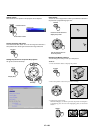
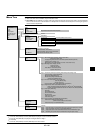
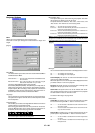
Gamma Correction
Use the
ᮤ
or
ᮣ
button to choose "Normal" when in a lighted room and
"Natural 1&2" when in a darkened room. "Natural 1" for better flesh
tone; "Natural 2" for true reproduction of middle tones.
Each mode is recommended for :
Normal......... For the regular picture
Natural 1 ...... For true color reproduction of natural tones
Natural 2 ...... For dark portions of a picture
Color Matrix
First select an appropriate color matrix to fit your component signal for HDTV
or SDTV. Then select an appropriate matrix type from B-Y/R-Y, Cb/Cr or Pb/Pr.
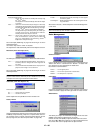
White Balance
This allows you to activate or deactivate the Advanced AccuBlend feature.
Auto ............. Turns on the Advanced AccuBlend feature. The projector au-
tomatically reduces or enlarges the current image to fit the
full screen.
Native........... Turns off the Advanced AccuBlend feature. The projector dis-
plays the current image in its true resolution.
See "Auto Adjust (RGB Only) on page E-38 for turning on or off the
Auto Adjust feature.
NOTE: While you are displaying an image with higher resolution than the
projector's native resolution, even when you are in the Native mode, the image
is displayed full screen using the Advanced AccuBlend feature.
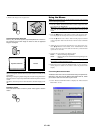
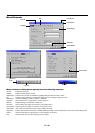
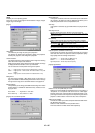
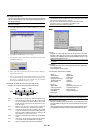
Video Filter (when Auto Adjust is off)
Horizontal/Vertical Position
.................... Adjusts the image location horizontally and vertically using
the
ᮤ
and
ᮣ
buttons.
This adjustment is made automatically when the Auto Adjust
is turned on.
Clock............
Use this item to fine tune the computer image or to remove any
vertical banding that might appear. This function adjusts the clock
frequencies that eliminate the horizontal banding in the image.
Press the
ᮤ
and
ᮣ
buttons until the banding disappears.
This adjustment may be necessary when you connect your
computer for the first time. This adjustment is made auto-
matically when the Auto Adjust is turned on.
Phase........... Use this item to adjust the clock phase or to reduce video
noise, dot interference or cross talk. (This is evident when
part of your image appears to be shimmering.) Use the
ᮤ
and
ᮣ
buttons to adjust the image.
See "Auto Adjust (RGB Only) on page E-38 for turning on or off the
Auto Adjust feature.
Use "Phase" only after the "Clock" is complete.
This adjustment is made automatically when the Auto Adjust is turned on.
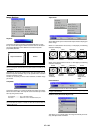
Resolution (when Auto Adjust is off)
All Data ............... Reset all the adjustments and settings for all the signals
to the factory preset.
Current Signal ..... Resets the adjustments for the current signal to the fac-
tory preset levels.
All the items in ”Picture”, ”Advanced Options” and “Color Management”
can be reset.
NOTE: The Volume, Keystone, Lamp Mode and all the items in the Projector
Options can be reset only when "All Data" is selected.
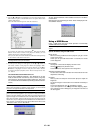
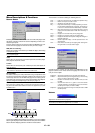
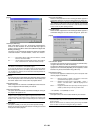
Color Management
This allows you to adjust the white balance. Brightness for each color
(RGB)is used to adjust the black level of the screen;
Contrast for each color (RGB) to adjust the white level of the screen.
First use the ▲ or ▼ buttons to select R, G, or B for the brightness and
the contrast. Next use the
ᮤ
or
ᮣ
buttons to adjust the level.