10
INSTALLATION
If you are installing the WS110R into an existing wall, take time to consider any possible
obstructions which may be hidden inside the wall, such as wood or metal studs, electrical,
telephone or other types of wiring, plumbing, AC or heating conduit, etc.
1. Locate the connector plug.
2. Strip 1/4” of insulation from the end of each wire.
3. Use a small flathead screwdriver or your thumbnail to raise the locking tabs, exposing the
holes on the removable connector plug.
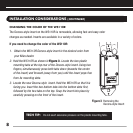
4. Insert each wire into the appropriate hole on the removable connector plug, and snap the
locking tab down. To help you, the connector plug is keyed. Insert the smooth side of the
connector plug into the smooth side of the socket. Don’t force the scalloped side of the
connector plug into the smooth side of the socket. (Figure 5)
5. Use the shorter plate screws to fasten the Decora cover plate to the WS110R. DO NOT OVER-
TIGHTEN THE PLATE SCREWS OR YOU MAY DAMAGE THE COVER PLATE. Line up all the screws
in the same direction for a finished look.
NOTE: Certain “old work” or “retro-fit” boxes, such as the Carlon B225R, have a plastic “lip” which
interferes with the Decora plate screws. This lip prevents you from being able to tighten these
screws completely. To make the clearance necessary for these screws, you must remove the parts
of the lip causing the interference. There are two ways to accomplish this:
1. Drill through the lip of the box at the screw points.
2. Cut notches into the lip with a pair of diagonal cutters.
INTELLIPAD WIRING
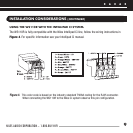
See your MSU manual if you are connecting the WS110R with an IntelliPad system.


