


11
Connecting and Setting Up
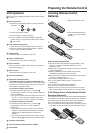
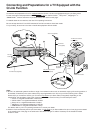
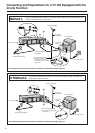
If you are connecting your VCR to a TV using Method 1,
follow the operations explained below.
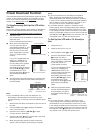
Auto Setup Function
The Auto Setup function automatically tunes all available TV
stations and sets the VCR’s clock to the current date and
time. If the tuning and time/date settings are not correct,
performing timer recordings is not possible.
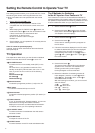
01 Switch the TV on.
02 Select the AV input on your TV.
03 Set the VCR/TV switch O to “VCR”.
04 Press the VCR-ON/OFF button
1 to switch the VCR on.
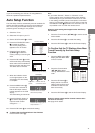
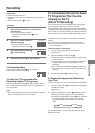
The Country setting menu
appears on the TV screen.
05 Press the Cursor buttons
(3421) Q to select the
country where you are using the
VCR.
06 Press the OK button S and the
VCR’s Auto Setup automatically
starts and tunes all available TV
stations and also sets the clock.
This takes about 5 minutes.
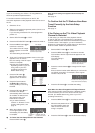
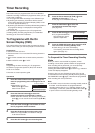
07 When the indication shown
on the right appears on the
VCR display, the Auto Setup
is complete.
08 Press the MENU button T
for more than 5 seconds so
that the RF output channel
number appears on the VCR
display.
The initial setting is channel 36.
09 Press the Numeric button “0”
2 so that the displayed RF
output channel number
changes to “jj”.
10 Press the OK button S to conclude the setting.
√ To Cancel the Auto Setup Before It Has Finished
Press the EXIT button R.
On Screen Display
Indication during Auto Setup
België
Belgique
Belgien
Danmark
España
France
Italia
Nederland
Norge
Deutschland
Österreich
Portugal
Suomi
Sverige
Schweiz
Suisse
Svizzera
others
Country
Menu for Country setting
Hint:
≥ If you select “Schweiz”, “Suisse” or “Svizzera” on the
Country setting menu, the Display setting menu appears
automatically to let you set the item “Power save” to “ON”.
In this setting, the VCR’s power consumption is minimised
when it is off (Standby mode).To turn the VCR on, keep the
VCR-ON/OFF button 1 pressed on the VCR main unit. It is
not possible to turn it on with the remote control.
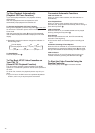
When the clock setting menu appears after Auto Setup
has finished:
1 Press the Cursor buttons (3421) Q to set the correct
time and date.
2 Press the OK button S to conclude the setting.
3 Press the EXIT button R to exit the On Screen Display.
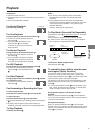
To Confirm that the TV Stations Have Been
Tuned Correctly by the Auto Setup
Function
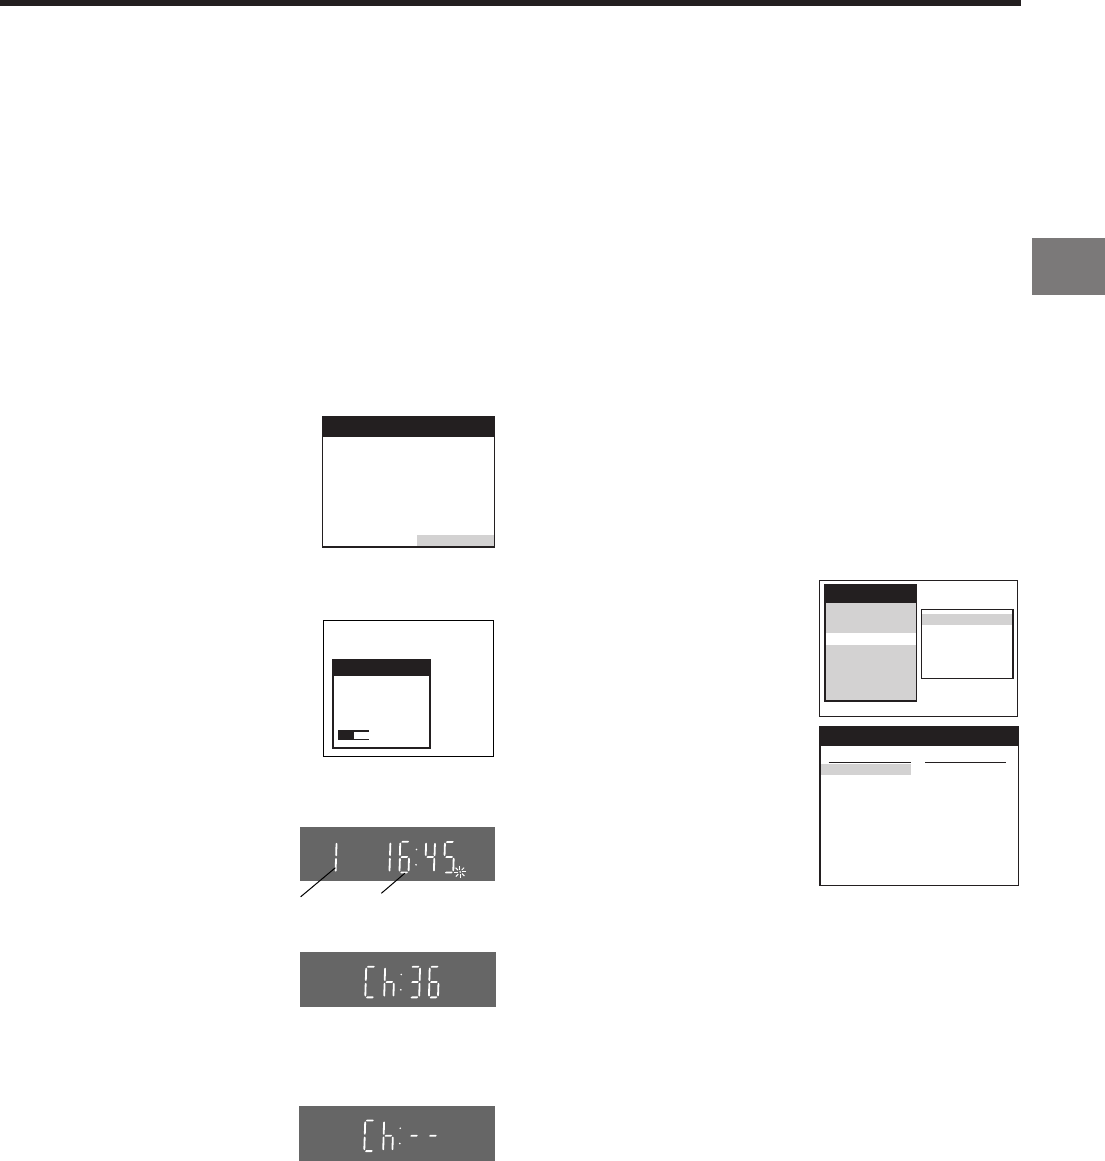
1 Press the MENU button T to
display the OSD Main menu
on the TV screen.
2 Press the Cursor buttons
(3421) Q to select
“Tuning” and “Manual” in this
order.
3 Press the OK button S to
display the list of tuned TV
stations and confirm that all
available TV stations have
been set correctly.
4 Press the EXIT button R to exit the On Screen Display.
When the station names and/or channel numbers have
not been set correctly:
See page 24 for details.
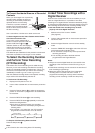
Auto-Setup
Auto-Setup
in progress,
please wait.
Ch 21
VCR display
Indication after changing the RF
output channel to “jj”
Indication when the RF output
channel is 36 (example)
Tuning
Pos Name Ch
1 ARD 1
2 ZDF 2
3N3 19
4 HR3 26
5 BR3 18
6 RB3 3
7 SFB3 36
8 SW3 29
9 WDR3 17
10 MDR3 32
Pos Name Ch
11 ORB 35
12 RTL+ 4
13 SAT1 5
14
s s s s s s s s
15
s s s s s s s s
16
s s s s s s s s
17
s s s s s s s s
18
s s s s s s s s
19
s s s s s s s s
20
s s s s s s s s
Main menu
Timer record
Display
Tuning
Clock
Functions
Language
Country
Manual
Auto-Setup Restart
Download
Shipping condition
List of tuned TV stations
(example)
Programme
position
Indication when the
current time is 16:45
CVC