


3
4
3
12 4
VIDEO IN
AUDIO OUT
L
R
HDMI
(ARC)
HDMI
OPTICAL
OUT
SUBWOOFER
3
6 5 2 1 4 3
33
RLRL
ΩΩΩΩ
3
CENTER
SURROUND
FRONT
Ω
75
AUX
FM ANT
R6/LR6, AA
OK
RETURN
Easy setup
Would you like to start easy setup?
No
Yes
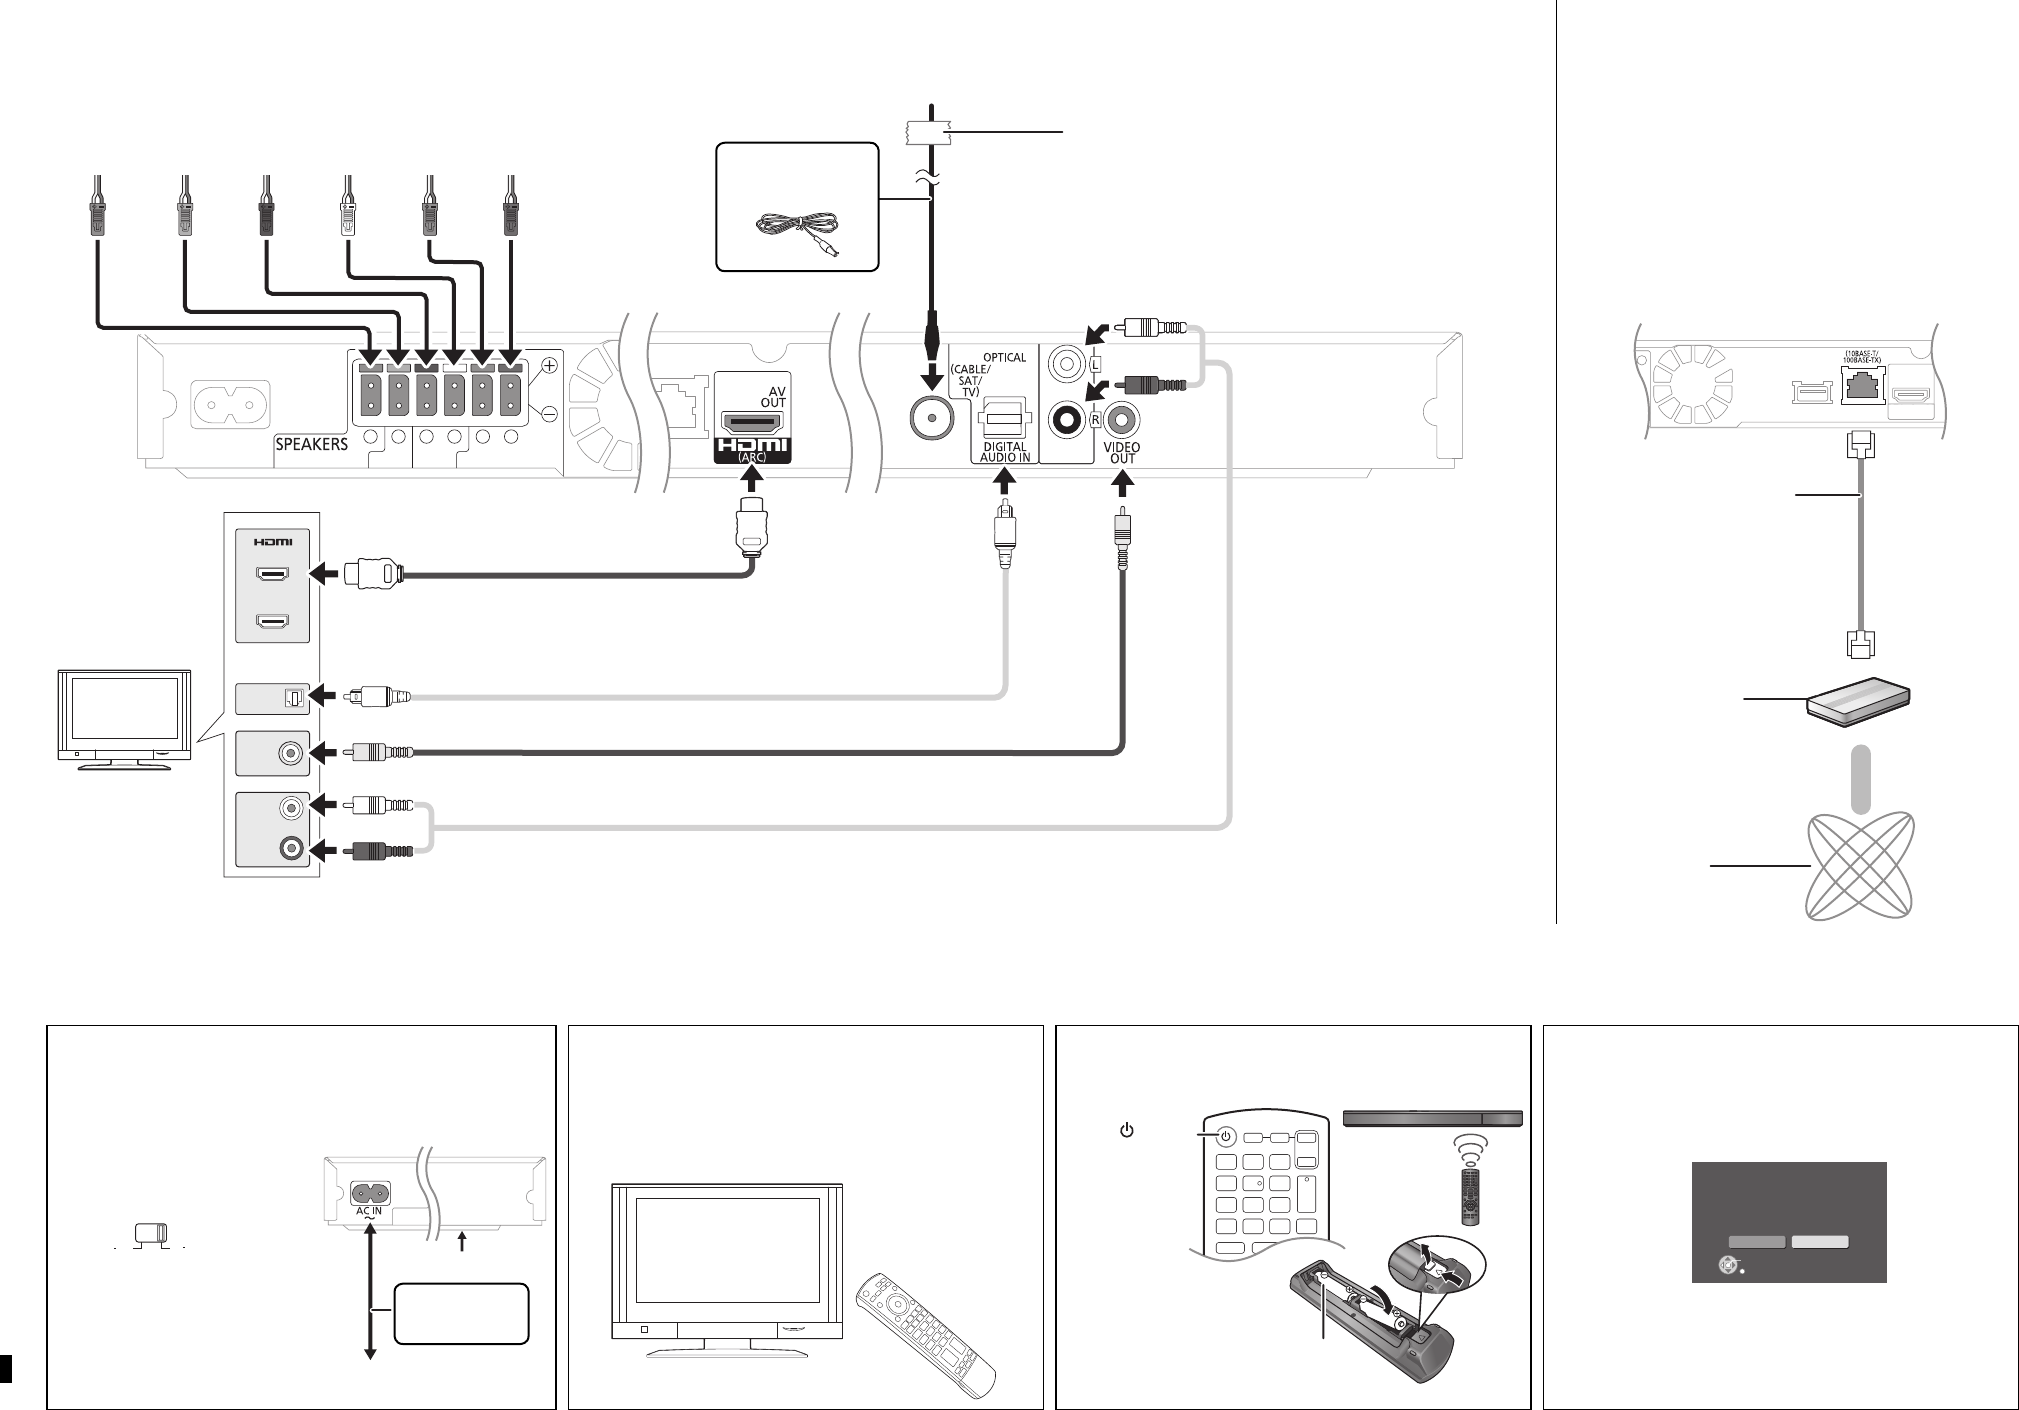
If the HDMI terminal is labeled “HDMI (ARC)”, you can enjoy TV sound and
pictures with a single HDMI cable.
If the HDMI terminal is not labeled “HDMI (ARC)”, an “Audio cable”
or “Optical digital audio cable” is required to listen to sound from the TV.
Connect the cables by colour or by the numbers indicated in the illustration
to the appropriate terminals on the rear panel of the unit.
Main unit
PURPLE GREEN RED WHITE GREY BLUE
Connect the cables
For detailed information, refer to the operating instructions.
Audio connection
For best quality audio, use the HDMI
cable (with an ARC compatible TV)
or an optical digital audio cable.
If your TV does not support the
above, use the audio cable.
*
1
Make sure that the video cable connection is
made to view photos/videos from the iPod/iPhone.
FM indoor antenna
(supplied)
Adhesive tape
TV
Video cable*
1
(supplied)
HDMI cable (not supplied)
(Recommended for highest quality picture)
Optical digital audio cable (not supplied)
Turn on the main unit
Connect the AC mains lead
Connect the AC mains lead to the main unit before connecting
to the household mains socket.
Turn on the TV
Turn on your TV and select the appropriate video input mode
(e.g., VIDEO 1, AV 1, HDMI, etc.) to suit the connections to this
unit.
Broadband Network Connections
By connecting this unit to the network, you can optimise the
internet features of this unit.
• Use category 5 or above straight LAN cables (STP)
when connecting to peripheral devices.
• When using the wireless LAN function*
2
, the LAN cable that
connected to the main unit is not necessary.
*
2
South East Asia (For Malaysia, Thailand, Singapore and
Hong Kong) only
Press [, ] to select [Yes] and press [OK].
LAN
Main unit
LAN cable
(not supplied)
Internet
Broadband router, etc.
Other connection
Audio cable (not supplied)
Press [
] to turn
on the main unit.
Installing batteries in the
remote control
The Easy setup starts
The on screen display will guide you through the steps.
Turn on the main unit
Main unit
To a household mains socket
AC mains lead
(supplied)
It is possible to play back 3D videos and 3D still pictures by connecting this unit with a 3D compatible TV.
Before connecting the AC
mains lead;
Set the voltage at the
bottom of the main unit.
VOLT ADJ
110
127V
220
240V
Use a fl at-head screwdriver to
move the voltage selector to the
appropriate position for the area
in which this system is used.
e.g., For South East Asia
AC Voltage selector