172001UA
CHAPTER 2 - SETUP AND INSTALLATION
Installation
Set the switches to match the required configurations based on the
diagrams below. The cabling between each device and the interface
converter must be terminated with male connectors. J1 is the RS-232 /
V.24 interface and J2 is the X.21 interface. The IEC connector is provided
to interface to the power plug required in the country of use. Insure the
110/220VAC switch is set correctly for the line voltage in use prior to
applying power to the interface converter.
Selection of DTE/DCE
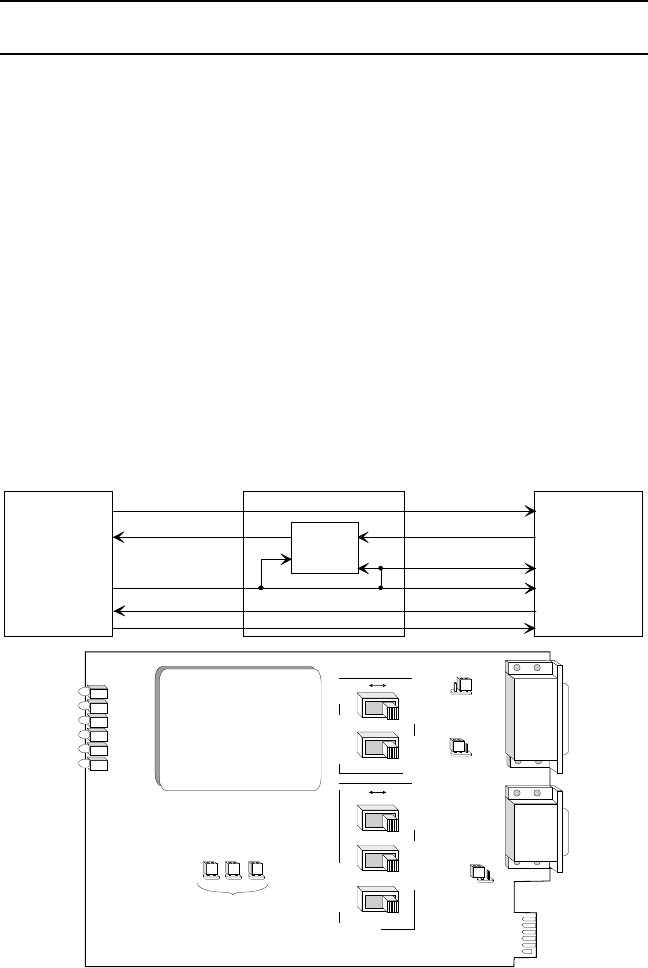
To connect an RS-232 terminal type device (DTE) to an X.21 Modem type
device (DCE), connect the terminal to J1 and the Modem to J2. Move
SW1 and SW2 to the DCE position, and SW3, SW4 and SW5 to the DTE
position, as shown in Fig. 1.
X.21 DCE V.24 DTE
RXD - 3
TXD - 2
RXC - 17
TXC - 15
S - 6, 13
T - 2, 9
R - 4, 11
X.21 DTE V.24 DCE
Buffer
RTS - 4 / DTR - 20C - 3, 10
CTS - 5 / DCD - 8
I - 5, 12
JP3JP2JP1
JP4
I
Power
T
S
R
J3
SW1
C
X.21 INTERFACE
DCE DTE
Factory Test Straps
Must be Installed for Unit To
Operate Correctly
J1 (RS-232) Is a DCE, and
MUST Connect to a
Terminal (DTE)
J2 (X.21) Is a DTE, and
MUST Connect
to a Modem (DCE)
Signal
to
Chassis
Ground
SW2
SW3
J2
X.21
J1
RS-232
JP5
JP6
DTR /RTS
DCD / CTS
SW4
SW5
DCEDTE
V.24 INTERFACE
Figure 1.
*NOTE: All clocks in the communication system must be frequency locked. One and
only one clock must be selected as master for the system. All other clocks must be
2-1
Note: Hazardous voltages are present when the equipment cover is removed.
Installation and setup shall be performed by qualified service personnel only.


