


If you have any problems setting up the
SLx link, please read the instructions again
carefully or see the common questions below:
•
I cannot view my terrestrial TV channels
on either of my televisions
Check that your terrestrial aerial is connected
to the Aerial IN/RF IN socket on the back of
your Sky™/Sky+™ receiver from your aerial
wall socket or via your VCR. The terrestrial
aerial signal will now be output from RF1 (to
your main television) and RF2 (to your second
television).
• The SLx red LED does not switch on and
my remote control is not working
The SLx link requires power from the Sky™/
Sky+™ receiver in order to power the remote
sensor. You can perform the following simple
exercise to nd where the SLx link voltage is
being lost.
1. Connect the SLx link directly into the RF2
socket on your Sky™/Sky+™ receiver. Does the
SLx Link LED light up?
YES - Sky™/Sky+™ box is OK, move to
next step
NO - your Sky™/Sky+™ box is not switched
on, or is no set up correctly (see step
three of installation instructions).
2. If you have an aerial amplier/splitter
between the Sky™/Sky+™ receiver and the
second TV, connect the SLx link directly into an
output socket on your amplier/splitter using a
short piece of coaxial cable with male to male
connections. Does the SLx Link LED light up?
YES - Aerial amplier/splitter is OK, move to
next step
NO - Your amplier/splitter is blocking the
SLx power signal. You will need to t a
digital amplier bypass kit (available
from your local electrical retailer).
3. If you have any wall plates tted in either
the main or second TV locations, connect
the SLx link directly into the wall plate in the
second TV location. Does the SLx Link LED
light up?
YES – Wall plates are OK, move onto next step
NO – One or more of your wall plates are
isolated and are blocking the SLx link
power signal. Replace with non-isolated
wall plates (available from your local
electrical retailer).
4. If the red LED still does not switch on after
performing the above excercise, it is likely that
there is a problem with the coaxial cabling or
connectors. Please check that all cables are free
from kinks, twists or tight bends and that all
Troubleshooting
coaxial connectors are tted correctly.
Once you have found the problem and
rectied as detailed above, reconnect the SLx
link in the second TV location as instructed in
step two of the installation instructions
•
The SLx link LED is on but my remote
control is not working
1. Fit an additional small length of coaxial
cable between the SLx link and your Sky™/
Sky+™ receiver to resolve a possible phasing
problem caused by the length of the cable
being used.
2. Check the batteries in your remote control.
3. Ensure there is a clear line of sight between
your remote and the SLx infrared eye.
If you are experiencing problems with
your Sky™/Sky+™ receiver, please press the
SERVICES button on your Sky™/Sky+™ remote
control and select the TELEPHONE NUMBERS
option to view a list of helpful telephone
numbers.
If you still have problems installing your SLx
link please call our:
Customer Careline: 0901 293 0038
Calls are charged at £1 per minute from a BT landline
Call charges from other networks may vary
Technical Support: http://technical.philex.com
Step Three
Setting up the SLx link
IMPORTANT – read carefully
Before you begin using the SLx link you must
provide power to it from your Sky™/Sky+™
receiver. The following instructions must be
performed from your Sky™/Sky+™ receiver
location using your
Sky™/Sky+™ remote control:
1. Switch on your Sky™/Sky+™ receiver and
view on your main television.
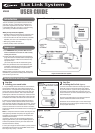
2. Press the SERVICES button (Figure 4.1).
3. Select the SYSTEM SETUP option.
4. Press the following buttons in sequence:
0, 1, SELECT.
You should now see the installers’ menu. If
not,
repeat the above steps.
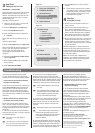
5. Select the RF OUTLETS option (Figure 4.2).
Make a note of the RF channel number in this
menu as you may require this information
when tuning your second television,
depending on tune operation on your
television.
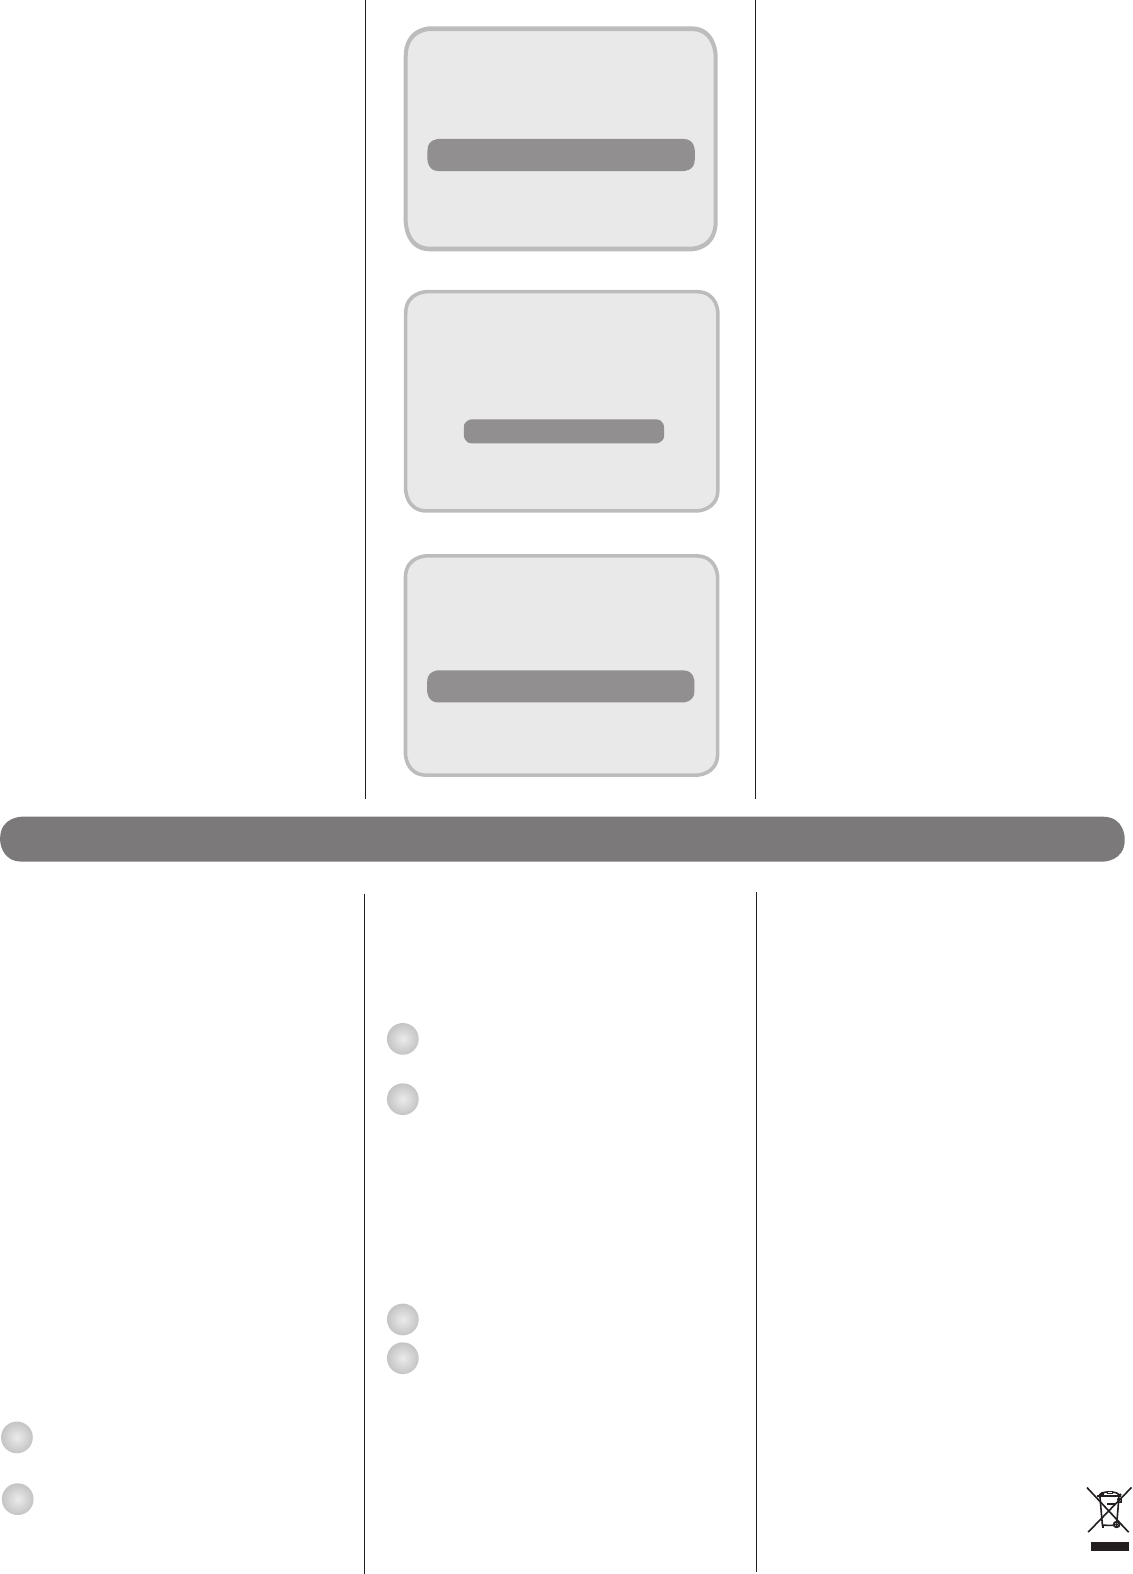
6. Highlight the RF OUTPUT POWER SUPPLY
option (Figure 4.3).
7. Set this option to ON using the left/right
arrow buttons.
8. Select SAVE NEW SETTINGS.
3
Step Four
Using the SLx link
1. Switch on your second TV and select an
empty channel.
2. Tune and store this channel to the Sky™/
Sky+™ receiver. Depending on your
television, you may be able to tune to the RF
channel number displayed in the installers’
menu. Please consult your TV user manual
for details of how to tune your television.
3. Once tuned to your Sky™/Sky+™ receiver you
should now be able to use your Sky™/Sky+™
remote control to control your Sky™/Sky+™
receiver and view your Sky™/Sky+™ channels
on your second TV.
Additional Sky™/Sky+™ remote controls are
available for purchase should you wish to use
a separate remote control for each viewing
location. These should be available from your
local electrical retailer.
Note: You cannot view a dierent Sky™
channel in each location without the use of
additional Sky™ receivers and subscriptions.
Please contact Sky™ for details.
4
9.
Press the SKY button to return to normal
viewing.
10. Check that the red LED on the SLx link is
lit to indicate that the settings have been
performed correctly. If this LED is not on,
repeat the above instructions or check
the troubleshooting guide.
Figure 4.1
Figure 4.2
Figure 4.3
1. Using your Sky Digibox
2. Telephone Numbers
3. Parental Control
4. System Setup
5. Favourite Channels
6. Other Channels
1. LNB Setup
2. Default Transponder
3. Telephone Settings
4. RF Outlets
5. Manual Tuning
6. New Installation
RF Channel Number 60
RF Outlet Power Supply ON
Save New Settings
Installers set up
RF Outlets
Waste electrical and electronic products must
not be disposed of with household waste.
Please recycle where facilities exist. Check with
your Local Authority for recycling advice.
© Philex Electronic Ltd. 2009 V3.1