7
Information for users in the UK
(Not applicable outside the UK)
Positioning the TV
For the best results, choose a position where light does
not fall directly on the screen, and at some distance
away from radiators or other sources of heat. Leave a
space of at least 5 cm all around the TV for ventilation,
making sure that curtains, cupboards etc. cannot
obstruct the air flow through the ventilation apertures.
The TV is intended for use in a domestic environment
only and should never be operated or stored in
excessively hot or humid atmospheres.
General Points
Please take note of the section 'General Information' at
the end of the English section in this booklet.
Interference
The Department of Trade and Industry operates a Radio
Interference Investigation Service to help TV licence
holders improve reception of BBC and IBA programmes
where they are being spoilt by interference.
If your dealer cannot help, ask at a main Post Office for
the booklet "How to Improve Television and Radio
Reception".
Mains connection
Before connecting the TV to the mains, check that the
mains supply voltage corresponds to the voltage printed
on the type plate on the rear panel of the TV. If the
mains voltage is different, consult your dealer.
Important
This apparatus is fitted with an approved moulded 13
Amp plug.
To change a fuse in this type of plug proceed as follows:
1. Remove fuse cover and fuse.
2. Fit new fuse which should be a BS1362 5A, A.S.T.A.
or BSI approved type.
3. Refit the fuse cover.
If the fitted plug is not suitable for your socket outlets, it
should be cut off and appropriate plug fitted in its place.
If the mains plug contains a fuse, this should have a
value of 5A.
If a plug without a fuse is used, the fuse at the
distribution board should not be greater than 5A.
Note : The severed plug must be destroyed to avoid a
possible shock hazard should it be inserted into a
13A socket elsewhere.
How to connect a plug
The wires in the mains lead are coloured in accordance
with the following code : BLUE - "NEUTRAL" ("N")
BROWN - "LIVE" ("L")
1.
The BLUE wire must be connected to the terminal
which is marked with the letter "N" or coloured BLACK.
2. The BROWN wire must be connected to the terminal
which is marked with the letter "L" or coloured RED.
3.
Do not connect either wires to the earth terminal in the
plug which is marked by the letter "E" or by the safety
earth symbol l or coloured green or green-and-yellow.
Before replacing the plug cover, make certain that the
cord grip is clamped over the sheath of the lead - not
simply over the two wires.
Connecting the aerial
The aerial should be connected to the socket marked g
at the back of the set. An inferior aerial is likely to result
in a poor, perhaps unstable picture with ghost images
and lack of contrast. Make-shift loft or set-top aerials are
often inadequate. Your dealer will know from experience
the most suitable type for your locality.
Should you wish to use the set in conjunction with other
equipment, which connects to the aerial socket such as
TV games, or a video camera it is recommended that
these be connected via a combiner unit to avoid repeated
connection and disconnection of the aerial plug.
Loop aerial (if provided)
The loop aerial packed with the set will give satisfactory
reception under good signal conditions. Fit the aerial
bracket and lead by pushing the peg into the square
hole in the backcover until it latches in place. Attach the
ends of the loop to the mounting studs on the bracket
and fit and tighten the knurled nuts. Then insert the plug
on the lead into the aerial socket.
Fitting the stand (if provided)
Use only the stand provided with the set, making
sure that the fixings are properly tightened. A
diagram showing how to assemble the stand is
packed in the castor bag. Never use a make-shift
stand, or legs fixed with woodscrews.
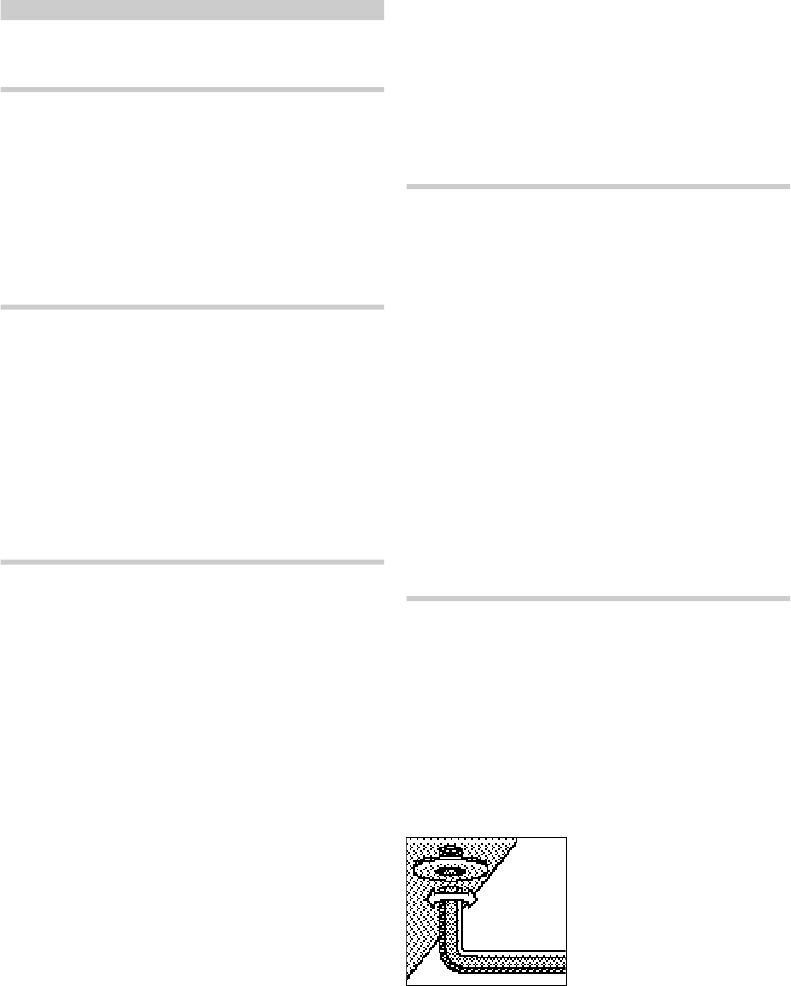
In some models only, in order to fit the stand it may be
necessary to remove the feet with the key provided (see
illustration).
To fit the stand remove the feet on the TV using the
key supplied (see illustration).


