


2
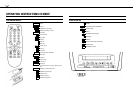
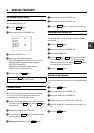
Connecting the cables
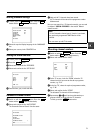
1 Insert the aerial plug into the
2
socket.
If you use the auxiliary aerial supplied, push the aerial into
the mounting on the back panel until it snaps into place.
Pull out the telescopic rod(s) as far as required. Tilt and
rotate the aerial until you have got the best picture quality.
2 Insert the plug of the mains cable into the wall socket.
3 Switch the set on. The power switch
m
is located on
the left side panel of the set.
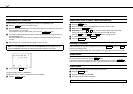
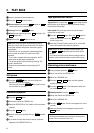
Important notes for operation
• We advise you, from now on, to switch the set to standby
using the
STANDBY m
button on the front of the set or
on the remote control.
• When the set is in the standby mode, a small red lamp on
the left of the front of the set will be alight.
• You can switch on with the
STOP h
button, the
0-9
buttons or by inserting a cassette.
• Attention: When you use the power switch
m
on the
side panel, you have completely switched off the set from
the mains power supply. No programmed recordings will
then be made. The red lamp on the left of the front of the
set will not be alight. After a few hours, the date and
clock settings will be lost.
• Attention: Before you switch off the appliance with the
power switch
m
, remove the tape by pressing the
J
button.
• Keep your TV Combi connected to the mains and the
power switch in ’on’ position at all times to ensure that
programmed recordings can be made and that the
television functions normally. The power consumption
required is low.
• Back-up power supply: TV channel storage - typically 1
year, Clock/Timer - typically 7 hours.
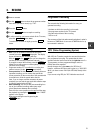
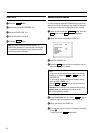
Connecting additional equipment
You can also connect additional equipment to the
EXTERNAL
socket, for instance, a decoder satellite receiver
or camcorder.
Emergency interrupt
Both the set and the remote control have an ’Emergency
interrupt’ button. You can use the
STANDBY m
button to in-
terrupt any function.
Whenever you have operating problems you can simply
interrupt the function and start again.
You can practise operating your set without any worries. No
matter which buttons you press, you cannot damage it.
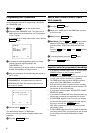
User guide
With OSD (On Screen Display) the corresponding functions
appear on the TV-screen. The most important button-func-
tions are displayed at the bottom of the screen.
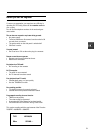
Throughout this instruction manual, use the following buttons
for the functions ’Call up’, ’Select’, ’Enter’/’Adjust’, ’Confirm’
and ’Exit’:
• Call up: Use the
MENU
button.
• Select: Select a line with the
A
or
B
button. Use
the
0-9
buttons or the
D
or
C
menue button
to select within a line.
• Enter/Alter: With the
D
or
C
or with the
0-9
button.
• Confirm: With the
OK
button.
• Exit: With the
MENU
.
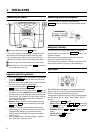
1. INSTALLATION