1
Connections
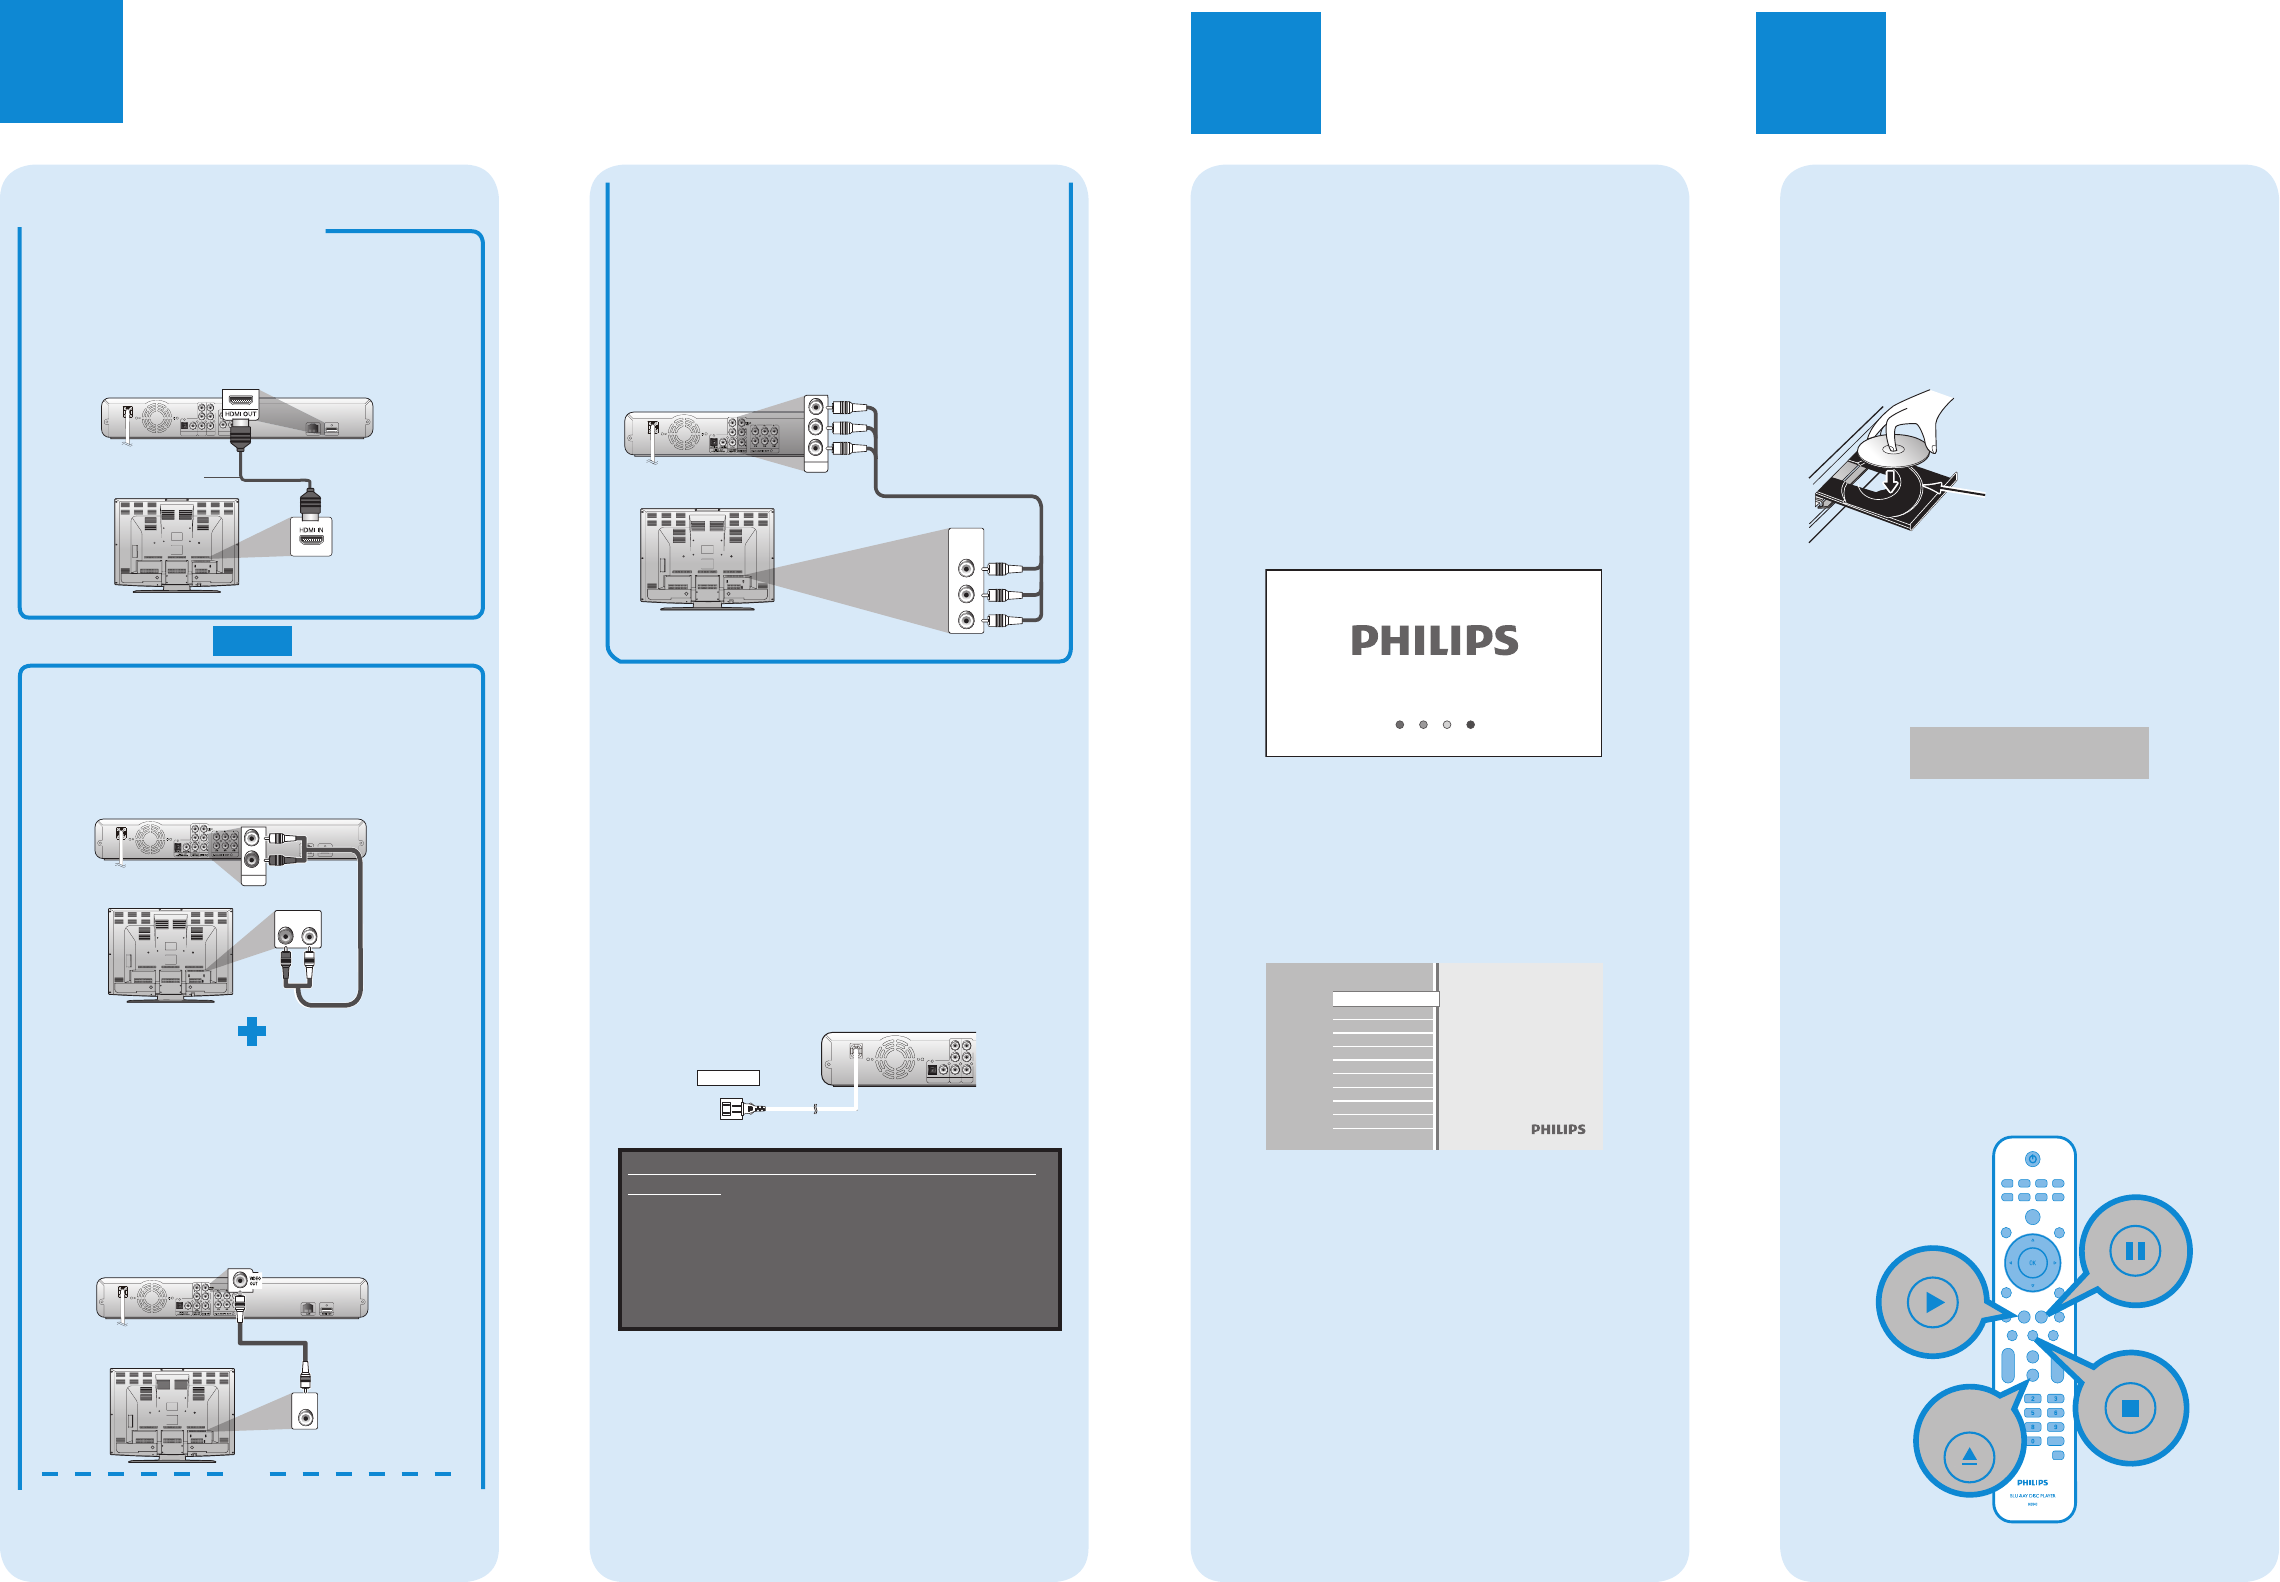
Option 2 - Using Component Video
(better quality)
*1
A Take a green, blue, and red component video
cable.
B Plug the component video cable into the
COMPONENT VIDEO OUT jacks of this unit.
C Plug the other ends of the component video cable
into the component video input jacks of your TV.
COMPONENT
VIDEO IN
Y
PB/CB
PR/CR
COMPONENT
VIDEO OUT
P
R
/C
R
P
B
/C
B
Y
*1) This unit is compatible with the progressive scan
system. The feature provides you with the higher
quality pictures than traditional output system does.
To utilize this feature, a component or an HDMI
connection is required. Refer to the “HDMI Video
Resolution” or “Component Output” on page 32 in the
user manual to set the resolution.
*2) HDMI connection requires no analog audio
connection.
CONNECTING THE AC CORD
After you made all necessary connections,
connect the AC cord to the AC outlet.
Insert the plugs securely. Incomplete connections will
result in the generation of noise.
VID
OU
AUDIO OUT
L
R
DIGITAL OUT
COAXIAL
OPTICAL
PCM/BITSTREAM
COMPONENT
VIDEO OUT
P
R
/C
R
P
B
/C
B
Y
Supplied cables used in these connections are
as follows:
RCA audio cable (L/R) x 1
RCA video cable x 1
HDMI cable (High Speed HDMI Cable) x 1
Please purchase the rest of the necessary cables at
your local store.
Note: Refer to the user manual for other possible
connections and important safety instructions.
Basic Setup
2
Start Disc Playback
A
Press [OPEN/CLOSE A] to open the disc
tray.
B
Place the disc on the disc tray with its label
side facing up.
* Make sure the disc is compatible with this unit.
(Refer to page 18 in the user manual for the list
of compatible discs.)
C Press [OPEN/CLOSE A] to close the disc tray.
It may take a while to load
the disc.
D
Playback may start automatically.
If not, press [PLAY
B
].
To pause playback:
Press [PAUSE F].
To return to the normal playback:
Press [PLAY B].
To stop playback:
Press [STOP C].
To eject the disc:
Press [OPEN/CLOSE A] to open the disc tray.
Remove the disc.
Press [OPEN/CLOSE A] to close the disc tray.
Finding The Viewing Channel On
Your TV
A After you have made all the necessary
connections, press [STANDBY-ON
] to
turn on the unit.
B Turn on your TV.
C Press the button on the TV’s remote control
that accesses the external input channel. It
may be labeled “SOURCE”, “AV” or
“SELECT” (refer to your TV’s user manual).
Or press “2” on the TV’s remote control, then
press channel down button repeatedly until
you see the PHILIPS splash screen.
This is the correct viewing channel (external input
channel).
If a certain amount of time has passed since you
turned on the unit, you may see the home menu
instead of the PHILIPS splash screen.
Home menu:
Blu-ray Disc Player
Disc Tray
SD Card
Settings
Product Info
The BDP5012 is now ready for use.
Enjoy
3
Pause
Play
Open/
Close
Stop
Align the disc to
the disc tray guide.
AC outlet
AC 120V, 60 Hz
Connection To The TV
Using HDMI (best quality)
*1
A Take the supplied HDMI cable.
B
Plug one end of the HDMI cable into the HDMI OUT
jack of this unit.
C
Plug the other end of the HDMI cable into the
HDMI input jack of your TV.
HDMI OUTLAN
VIDEO
OUT
5.1ch AUDIO OUT
AUDIO OUT
FL
SL C
L
R
FR
SR
SW
DIGITAL OUT
COAXIAL
OPTICAL
PCM/BITSTREAM
COMPONENT
VIDEO OUT
P
R
/C
R
P
B
/C
B
Y
ANALOG AUDIO CONNECTION
A Take the supplied RCA audio cable.
B Plug the red and white RCA audio cable into
the AUDIO OUT (L/R) jacks of this unit.
C Plug the other ends of the RCA audio cable
into the audio input jacks of your TV.
HDMI OUTLAN
AUDIO IN
LR
R
L
AUDIO OUT
ANALOG VIDEO CONNECTION
Option 1 - Using Composite Video
(standard quality)
A Take the supplied RCA video cable.
B Plug the yellow RCA video cable into the
VIDEO OUT jack of this unit.
C Plug the other end of the RCA video cable
into the video input jack of your TV.
C
COAXIAL
OPTICAL
VIDEO
IN
OR
*2
OR
(Red)
(Green)
(Green)
(Red)
(Blue)
(Blue)
E5K16UD_BDP5012_QG_EN.indd 2 4/27/2010 10:05:31 AM


