


3 – 2 Timer Recording
3
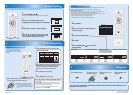
– 1 Basic Recording
3 DVD Recording
4 Playback
Recording Mode
Good
Poor
18 min
36 min
45 min
54 min
72 min
108 min
60 min
120 min
150 min
180 min
240 min
360 min
8cm Disc 12cm Disc
HQ (1Hr)
SP (2Hr)
SPP (2.5Hr)
LP (3Hr)
EP (4Hr)
SLP (6Hr)
Video/sound
quality
Recording
mode
Recording
time
To set one-touch timer recording (OTR)...
This is a simple way to set the recording time in blocks
of 30 minutes.
Press [REC I] repeatedly until the desired recording
time (30 minutes to 6 hours) appears on the TV screen.
One-touch timer recording will start.
• To cancel one-touch timer recording within the
specified time, press [STOP C].
2
Press [REC MODE] to select a recording mode.
4
Press [REC I] to start recording.
1
Press [OPEN/CLOSE A] to open the disc tray and
insert your disc with its label facing up.
5
Press [STOP C] to stop recording.
3
Press [SOURCE] to select the appropriate external
input position (E1/E2) to which your external
tuner is connected. Then select the desired
channel to record on the external tuner.
2
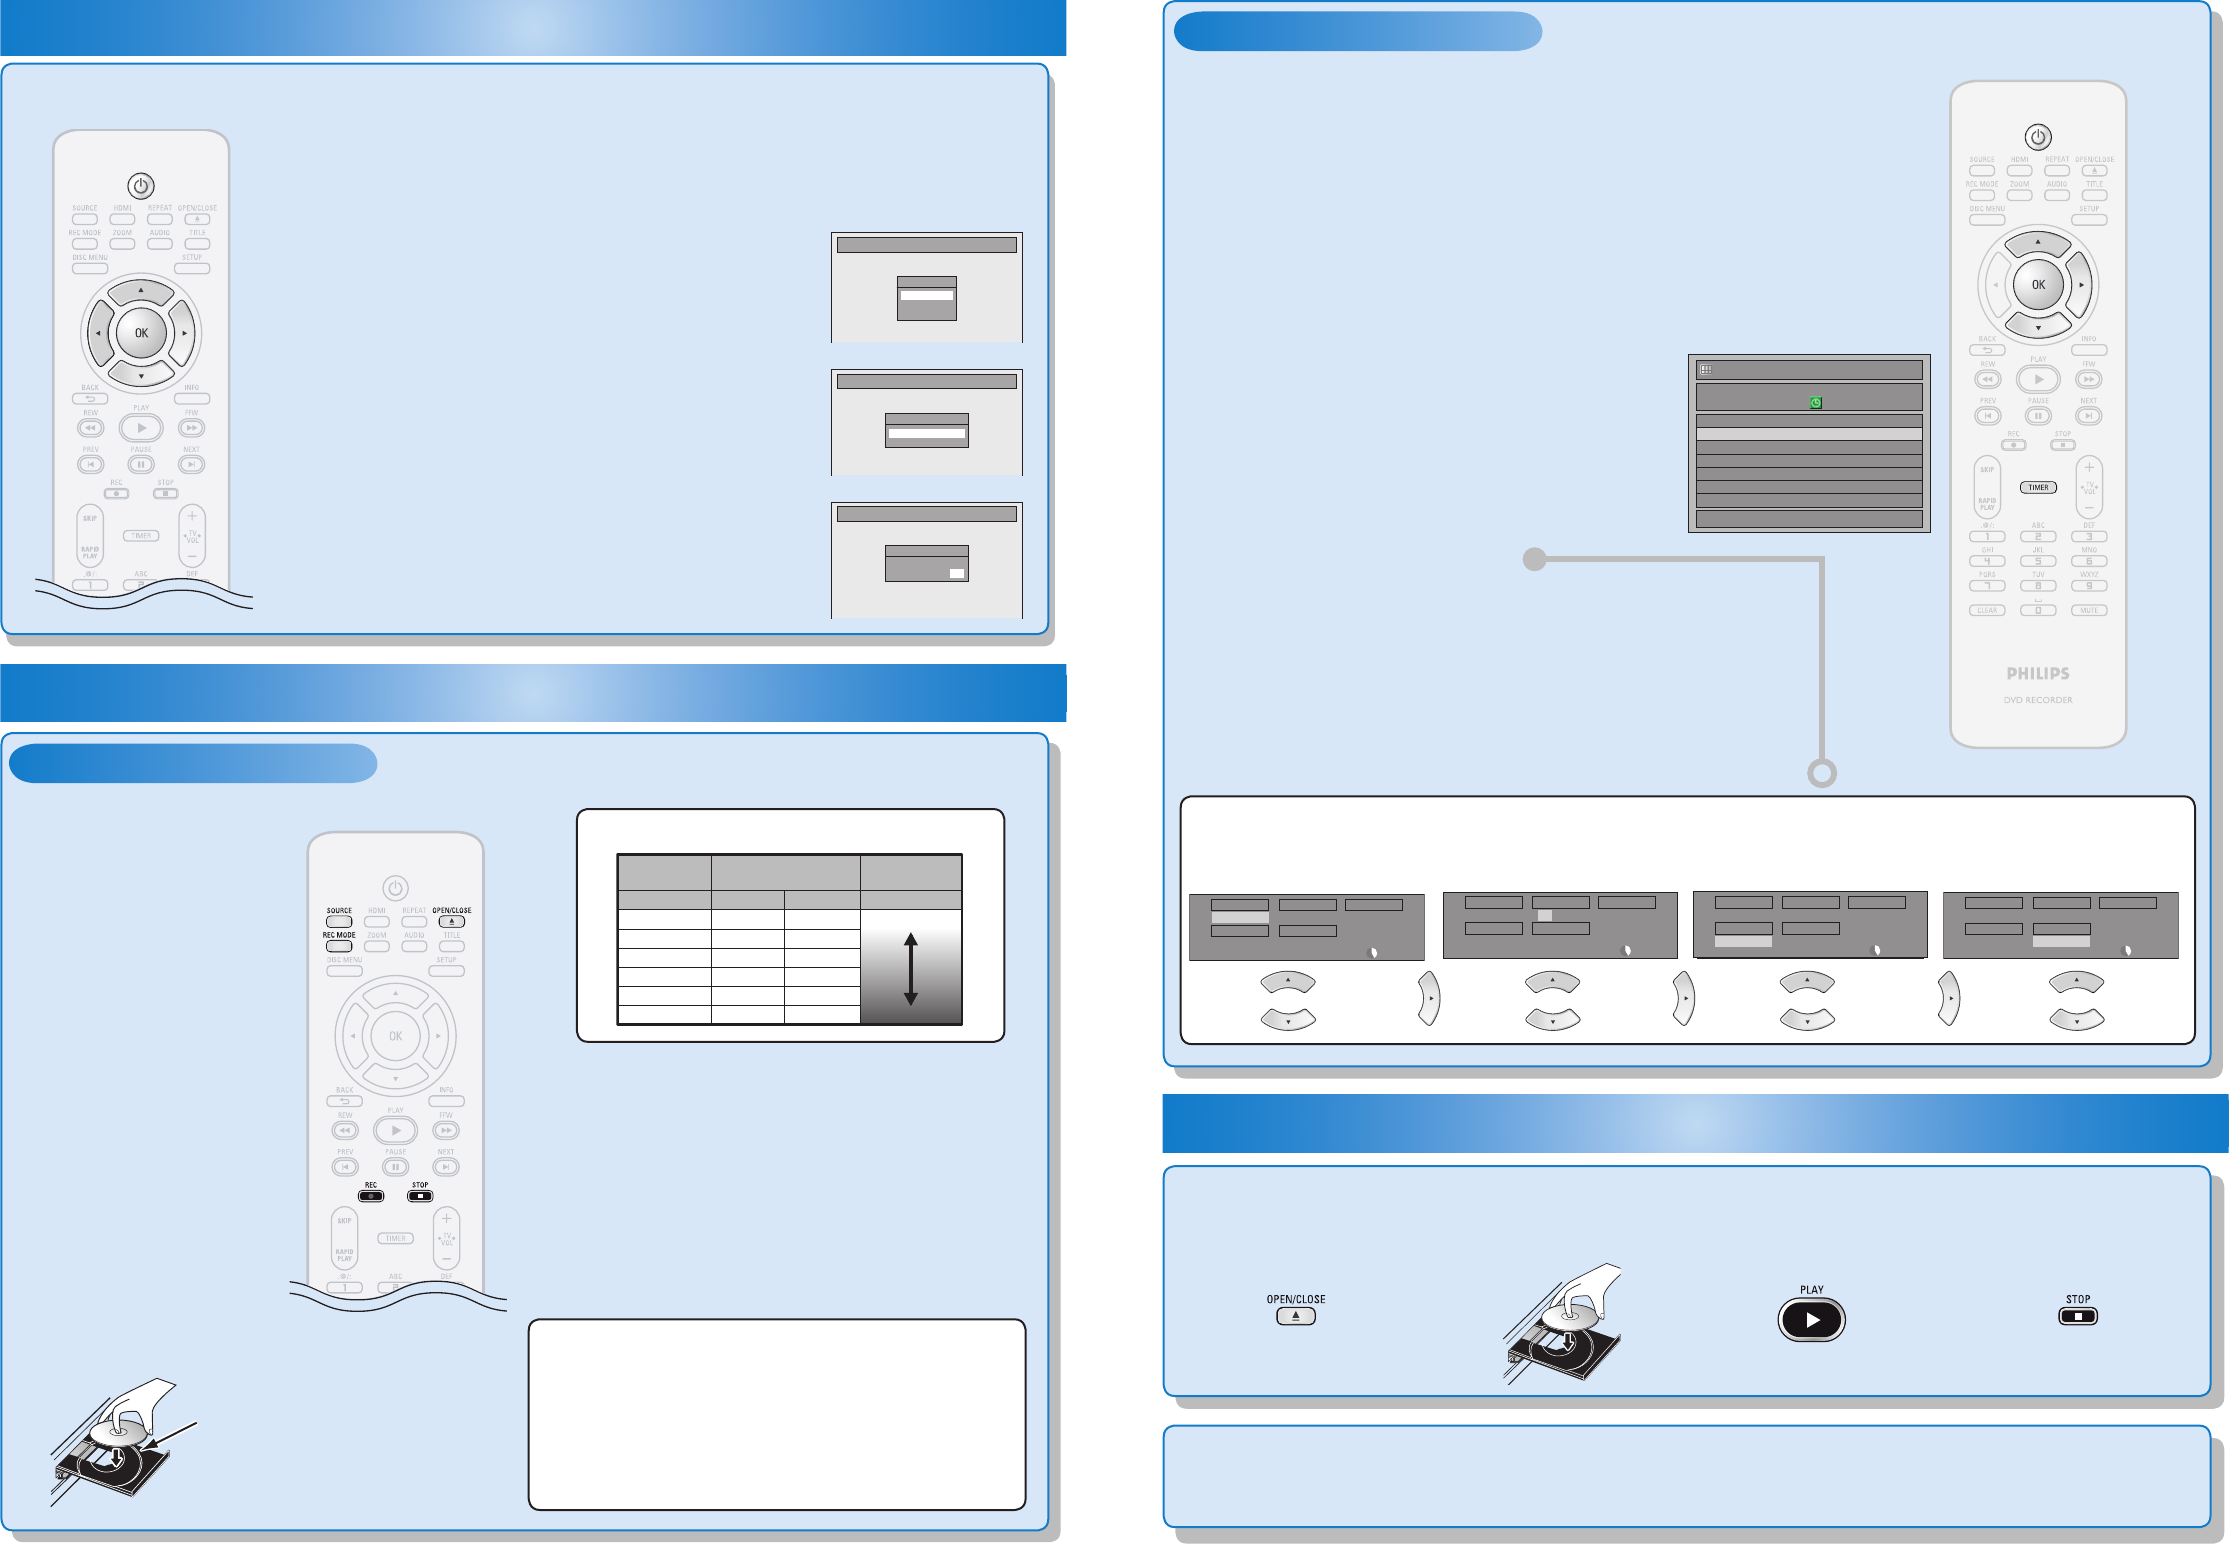
Insert your disc with
its label facing up.
1
Press [OPEN/CLOSE A].
3
Press [PLAY B] to start
playback.
4
Press [STOP C] to stop
playback.
Align the disc to the disc tray guide.
* Make sure the disc is compatible
with this unit. (Refer to page 24 in the
user manual for the list of compatible
discs.)
2 Initial Setting
You need to follow these steps when you turn on this unit for the first time.
E7E4AUD_QG ★★★★★
1VMN23519/ 8239 300 55611Printed in China
You can program the unit to record up to 12 programs within a month in
advance. Daily or weekly program recordings are also available.
Before recording, make sure
• Connect the external tuner to either E1 or E2 and set it to output audio/video
signals when it comes to the time you want to start recording.
• Do not change the external tuner’s channel while you are recording. You cannot
watch one channel and record another at the same time.
• Set the clock before setting a timer programming.
• Insert a recordable disc with enough recordable space.
2
Use [
K
/
L
] to select “New Program”,
then press [OK].
4
Press [OK].
5
Press [STANDBY-ON y] to set a timer
programming.
1
Press [TIMER].
3
Set a timer programming.
Timer Programming
1/1
MON JAN/01 11:00AM
Date Start End E1/E2
New Program
Set the date. Set start and end time.
Select the appropriate
external input position (E1/E2).
Then select the desired channel
to record on the external tuner.
Select a recording mode.
Date
JAN/02
E1/E2
E1
Mode
SP
SP 2 : 00
Start
- - : - -
End
- - : - -
Date
JAN/02
E1/E2
E1
Mode
SP
SP 2 : 00
Start
12 : 00AM
End
- - : - -
Date
JAN/02
E1/E2
E1
Mode
SP
SP 1 : 00
Start
12 : 00AM
End
1 : 00AM
Date
JAN/02
E1/E2
E1
Mode
SP
SP 1 : 00
Start
12 : 00AM
End
1 : 00AM
Initial Setup
OSD Language
English
Français
Español
Initial Setup
Clock Setting
- - - / - - / - - - - ( - - - )
- - : - - - -
Initial Setup
Clock Setting
JAN / 01 / 2007 ( MON )
12 : 00 AM
This unit has no tuner system
so cannot receive TV broadcasts
without external tuner or such
devices.
1
Press [STANDBY-ON y].
Turn the TV on. Select the input to which the unit is connected.
2
Use [K / L] to select your desired
language, then press [OK] to set language.
3
Press [OK] to activate “Clock Setting”.
4
Use [{ / B] to select an item to set, and
use [K / L] to select the contents to suit
your preference, then press [OK].
You will need to finalize DVD+R, DVD-RW or DVD-R to play them back on other DVD players (see
page 40 in the user manual).
E7E4AUD_QG.indd 2 2007/02/09 17:08:40