


1
Connect
2
Set up
D
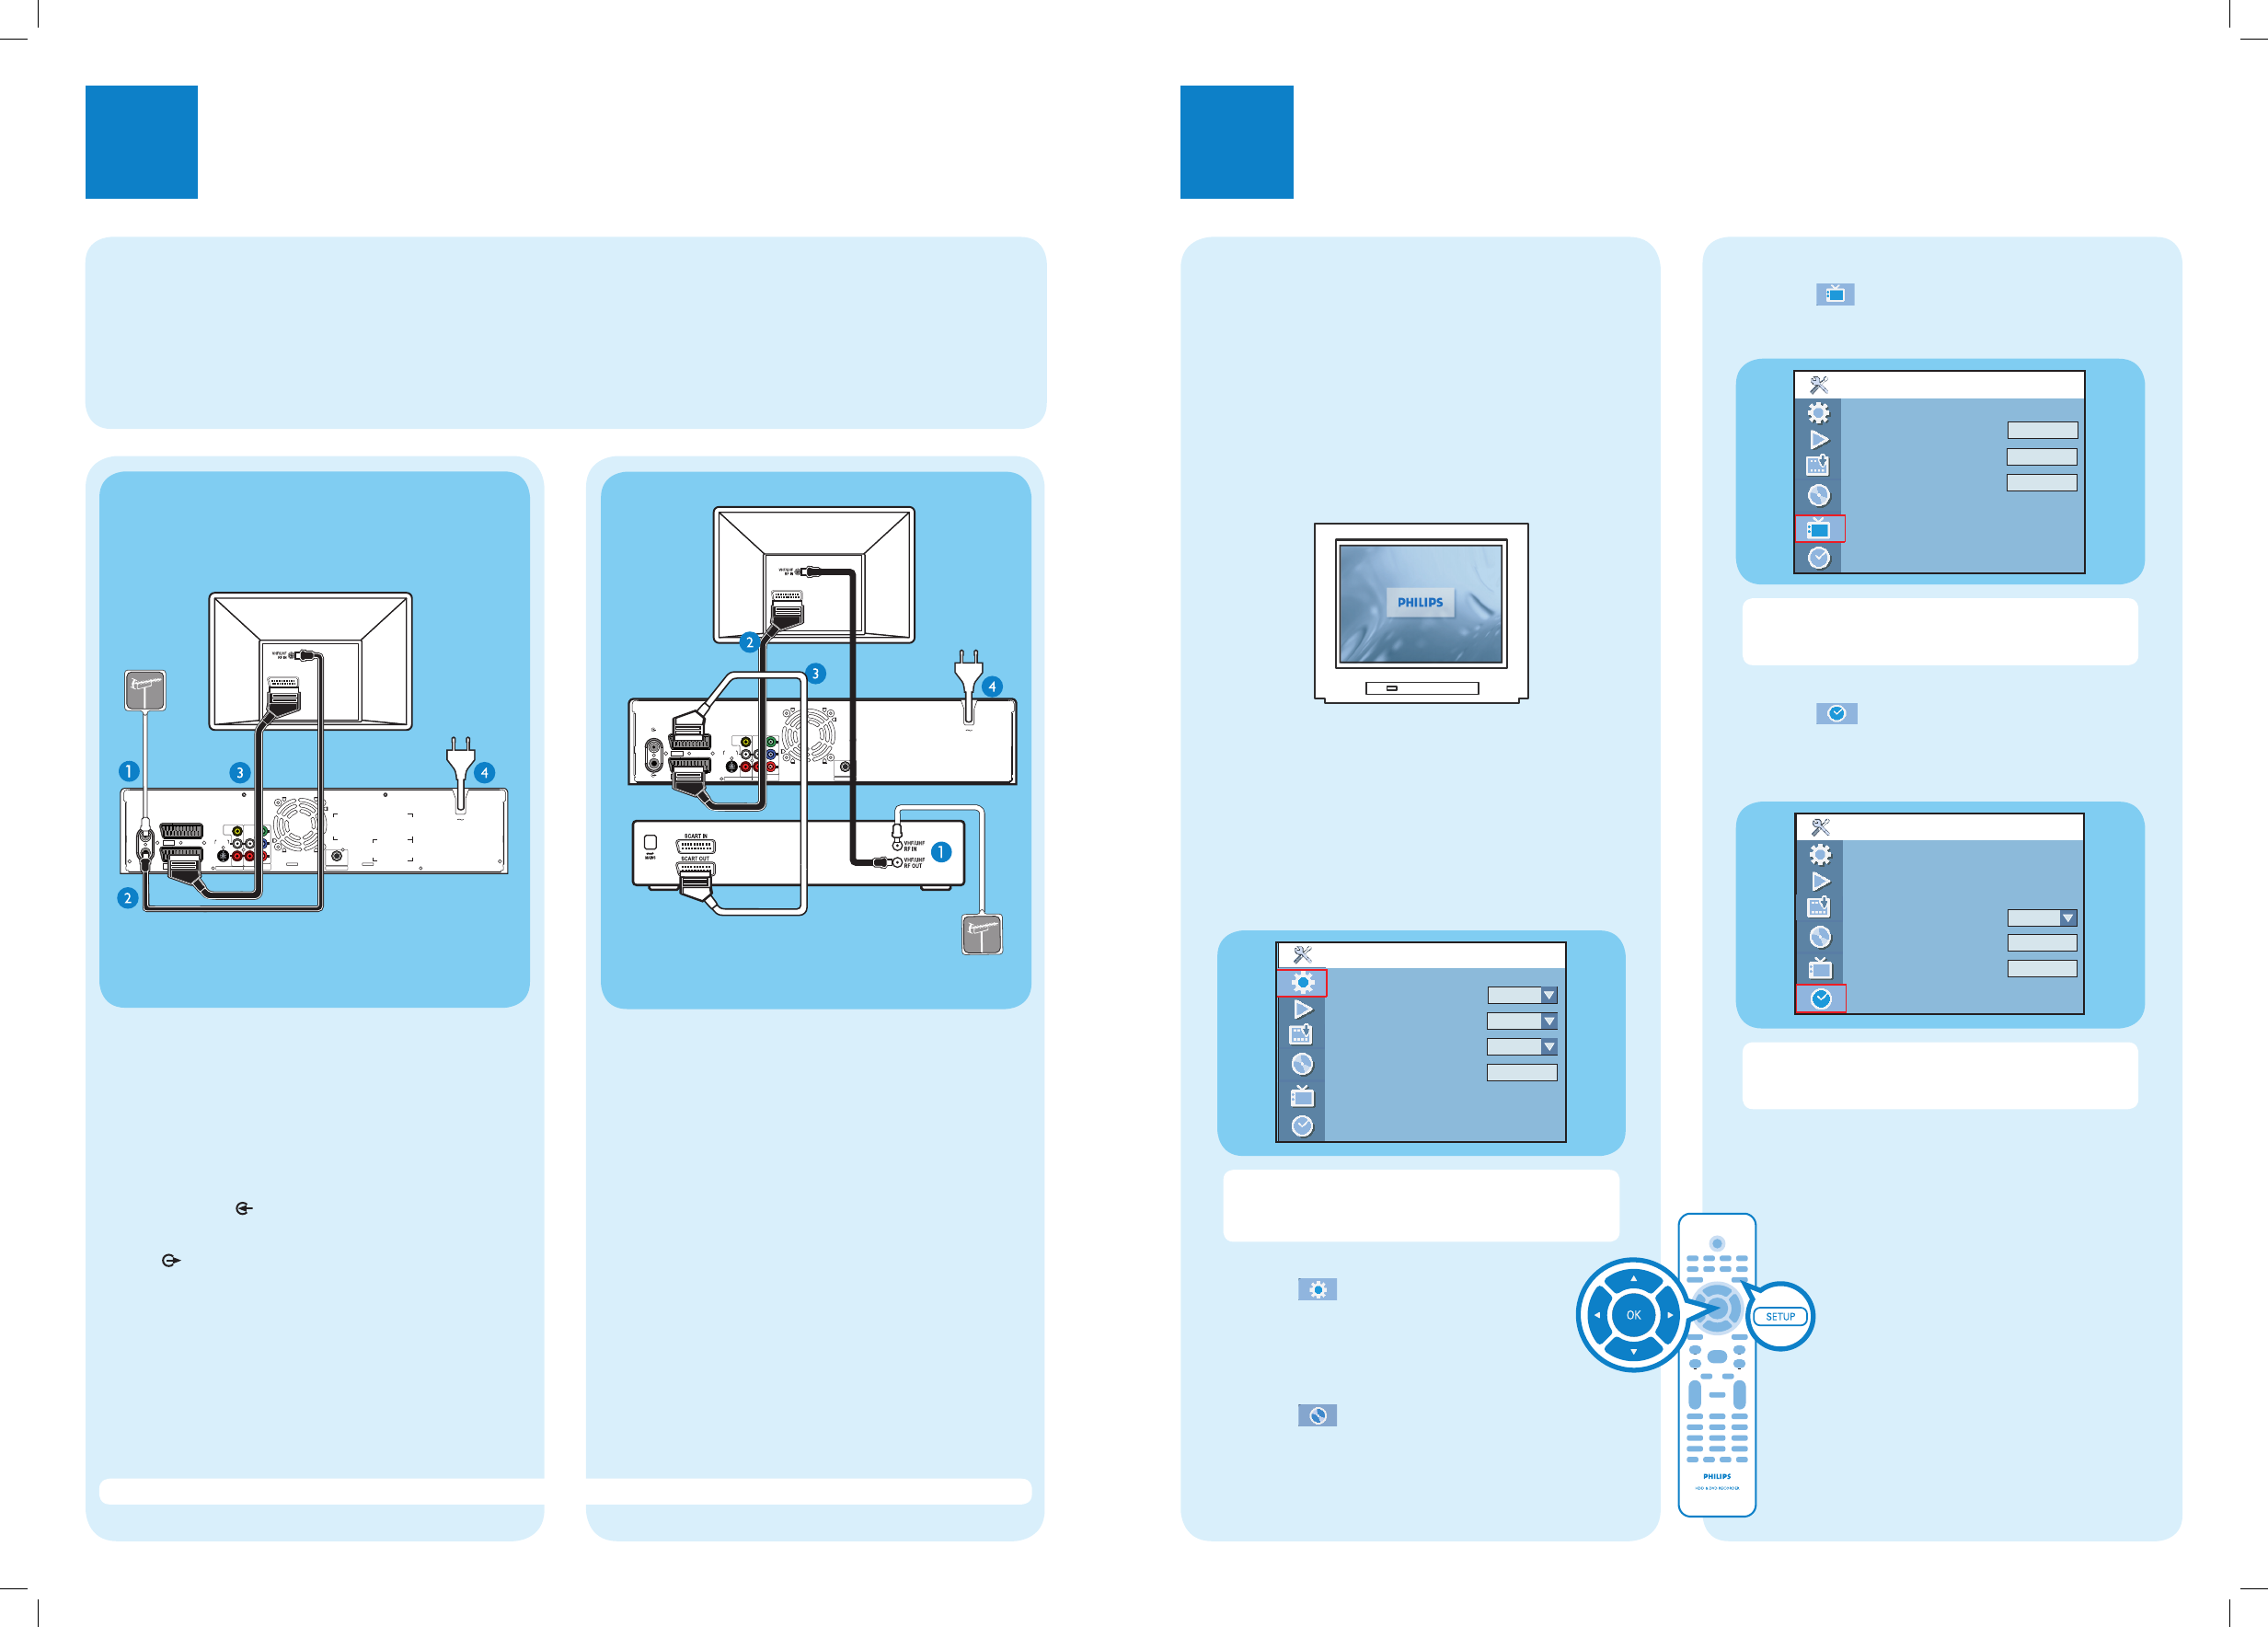
Setup and install TV channels.
Highlight and press right X.
Select { Channel Search } and press OK to start
automatic TV channel search.
Channel Search
Modify Channel Information
Sort Channels
Setup - Channel Setup
Search
Edit
Sort
Note This process may take several minutes. Once
complete, the total number of channels found and
stored appears on the TV.
E
Set the date and time.
Highlight and press right X.
Select { Date (dd/mm/yy) } or { Time (hh:mm:ss) }
and press OK. Use the numeric keypad 0-9 to
input the date/time, then press OK to confirm.
Setup - Clock
01/01/07
00:01:08
Auto
Date (dd / mm / yy)
Time (hh : mm : ss)
Date - Time Setting
Date - Time Preset
Show DivX® Registration Code
P001/Ch003
OK
Note The settings will be updated according to the
broadcast channel information of preset Programme
Number 1.
F
Press SETUP to exit.
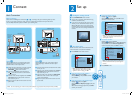
Basic Connection
Before Connecting
Select one of the following basic connections ( A or B ) according to the type of connecting devices you have.
If your TV is currently connected to a VCR, you have to unplug all the connections from your VCR and TV.
Your new Philips Recorder replaces the VCR for your recording needs.
Option A
Use this connection if you are connecting the antenna
cable directly from the antenna wall socket or from a
Cable Box without a Scart output socket.
A
Unplug the antenna cable that is currently connected
to your TV and plug in the antenna cable to the
ANTENNA socket on this recorder.
B
Connect the supplied RF coaxial cable from the
TV socket on this recorder to the Antenna In
socket on the TV.
C
Connect a scart cable (not supplied) from the EXT1
TO TV-I/O socket on this recorder to the Scart
input socket on your TV.
D
Plug in the power cable from the recorder to an AC
power outlet.
3139 241 26501
TO TV - I
/
O
EXT1
AUX - I
/
O
EXT2
S-VIDEO
(Y/C)
AUDIO
R
L
AUDIO / VIDEO OUT AUDIO OUT
COMPONENT
VIDEO OUT
VIDEO
(
CVBS
)
ANTENNA
TV
COAXIAL
DIGITAL AUDIO OUT
MAINS
P
R
P
B
Y
SCART IN
From an off-
air antenna
wall socket or
cable box
Television ( rear)
Note See the accompanying user manual for other possible connections (e.g. Composite Video, Component Video, S-VIDEO).
Option B
Use this connection if your current antenna cable is
connecting through a Cable Box with Scart output
socket.
A
Keep the existing antenna connection from the Cable
box to your TV.
B
Connect a scart cable (not supplied) from the EXT1
TO TV-I/O socket on this recorder to the Scart
input socket on your TV.
C
Connect another scart cable from the EXT2 AUX-
I/O socket on this recorder to the Scart output
socket on the Cable Box.
D
Plug in the power cable from the recorder to an AC
power outlet.
TO TV - I
/
O
EXT1
AUX - I
/
O
EXT2
S-VIDEO
(Y/C)
AUDIO
R
L
AUDIO / VIDEO OUT AUDIO OUT
COMPONENT
VIDEO OUT
VIDEO
(
CVBS
)
ANTENNA
TV
COAXIAL
DIGITAL AUDIO OUT
MAINS
P
R
P
B
Y
SCART IN
Philips Recorder (rear)
From an off-air
antenna wall socket
Television ( rear)
Philips Recorder
(rear)
Cable Box (rear)
A
Finding the viewing channel
A
Press STANDBY-ON on the recorder.
B
Turn on the TV and other connected devices (e.g.
Cable Box, Satellite Receiver).
C
If your TV does not switch to the correct viewing
channel, press the Channel Down button (or AV,
SELECT, ° button) on the TV’s remote control
repeatedly until you see the blue DVD background
screen. This is the correct viewing channel for the
recorder.
B
Start basic setup
Use the recorder’s remote control and follow the on-
screen instructions to complete the installation.
A
Press SETUP on the remote control.
Setup - General
Screen Saver
Country
Video Output Selection
Restore Factory Settings
On
Germany
SCART RGB
OK
Note Use up S and down T keys to toggle
through the options. Select an item by pressing
right X. To con rm a setting, press OK.
B
Select the country of your residence.
Highlight and press right X.
Select { Country } and press OK to confirm
your selection.
C
Select the recorder’s menu display language.
Highlight and press right X.
Select { On Screen Display Language } and press
right X.
Select the desired language option and press
OK
to
con rm your selection.
DVDR3510V_qsg_eng_26222.indd 2DVDR3510V_qsg_eng_26222.indd 2 2007-07-26 4:53:59 PM2007-07-26 4:53:59 PM