


DVP3005&3000/69_1
English
14
Getting Started
Setting up Progressive Scan feature
(for Progressive Scan TV only)
The progressive scan display twice the
number of frames per seconds than
interlaced scanning (ordinary normal TV
system). With nearly double the number
of lines, progressive scan offers higher
picture resolution and quality.
IMPORTANT!
Before enabling the progressive scan
feature, you must ensure:
1) Your TV can accept progressive signals,
a progressive scan TV is required.
2) You have connected the DVD player to
your TV using Y Pb Pr (see page 7.)
1 Turn on your TV.
2 Turn off your TV progressive scan mode
or turn on interlaced mode (refer to your
TV user manual.)
3 Press POWER on the remote control to
turn on the DVD player.
4 Select the correct Video Input channel.
(See page 13).
➜The DVD background screen appears
on the TV.
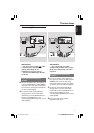
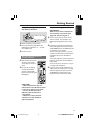
5 Press SYSTEM MENU.
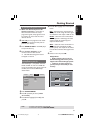
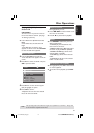
6 Press 2 repeatedly to select {VIDEO
SETUP PAGE}.
General Audio Video Preference
TY Type
TV Display
Progressive On
Sharpness Off
Brightness
Contrast
- - Video Setup Page - -
7 Select {PROGRESSIVE} to {ON}, then OK
to confirm.
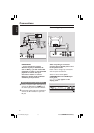
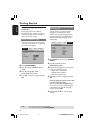
➜The instruction menu appears on the
TV.
1. ENSURE YOUR TV HAS PROGRESSIVE SCAN.
2. CONNECT USING YPBPR (GBR) VIDEO CABLE.
3. IF THERE IS DISTORTED PICTURE
Cancel
OK
ACTIVATING PROGRESSIVE SCAN:
WAIT 15 SECONDS FOR AUTO RECOVERY.
8 Press 1 to highlight
OK
in the menu
and press OK to confirm.
There will be a distorted picture on
your TV at this state until you turn
on the progressive scan mode on
your TV.
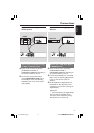
9 Turn on your TV progressive scan mode
(refer to your TV user manual.)
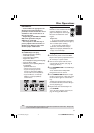
➜The below menu appears on the TV.
CONFIRM AGAIN TO USE PROGRESSIVE
SCAN. IF THE PICTURE IS GOOD,
PRESS OK BUTTON ON REMOTE
Cancel
OK
0 Press 1 to highlight
OK
in the menu
and press OK to confirm.
➜The set up is complete now and you
can start enjoy the high quality picture.
TIPS:
To return to the previous menu, press 1.
To remove the menu, press SYSTEM MENU.
01-31 DVP3002_Eng_93 14/02/06, 3:46 PM14