


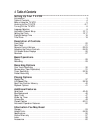
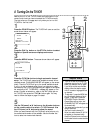
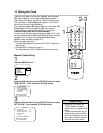
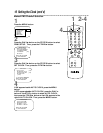

POWER
EJECT
SPEED
MEMORY
1 2 3
4 5 6
7 8 9
0
CH. VOL.
SLEEP/
WAKE UP
ALT.CH
REW
PLAY
F.FWD
REC
/OTR
PAUSE
/STILL
STOP
MUTE
TRACKING
MENU
STATUS/EXIT
CLEAR
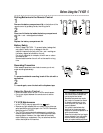
12 Setting the Clock
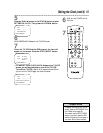
• Entries that do not match the
TV/VCR’s calendar will cause a
question mark (?) to appear on the
screen.
• To make corrections while you are
setting the clock, press the CLEAR
button until the space for the num-
ber you want to correct is flashing.
Then enter the correct number.
Helpful Hints
There are three ways to set the clock: Manually, with Automatic
PBS Channel Selection, or with Manual PBS Channel Selection.
With manual clock setting, you tell the TV/VCR the current time.
With Automatic or Manual PBS Channel Selection, the TV/VCR
gets the time from your local PBS station.
If you use either Manual PBS Channel Selection or Automatic PBS
Channel Selection, follow the steps on page 19 to have the
TV/VCR maintain the clock according to your Time Zone.
Cable Box users must set the clock manually.
To set the clock manually, follow the steps on pages 12-13. To set
the clock using Automatic PBS Channel Selection, follow the steps
on pages 14-15. To set the clock using Manual PBS Channel
Selection, follow the steps on pages 16-17.
Before you begin, make sure:
● You have connected and turned on the TV/VCR. Details are on
pages six-eight.
● Channels are set. Details are on page 10.
● You make each entry within 60 seconds of the previous entry.
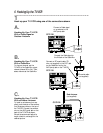
Manual Clock Setting
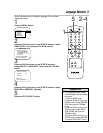
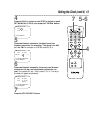
1
Press the MENU button.
2
Press the PLAY/▲ button or the STOP/▼ button to select
PRIM. SETUP. Then, press the F.FWD/B button.
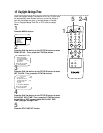
PRIMARY SETUP
> SELECT LANGUAGE
AUTO PROGRAMMING
CH MEMORY REVIEW
VOLUME BAR [ON]
SET CLOCK
SELECT KL CHOOSE B
TO END PRESS EXIT
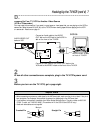
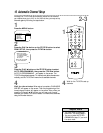
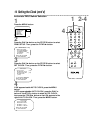
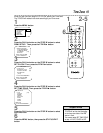
> PRIM. SETUP
VCR PROGRAM
VCR SETUP
CAPTION
REMINDER
BRIGHTNESS
PRESS B
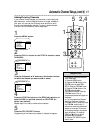
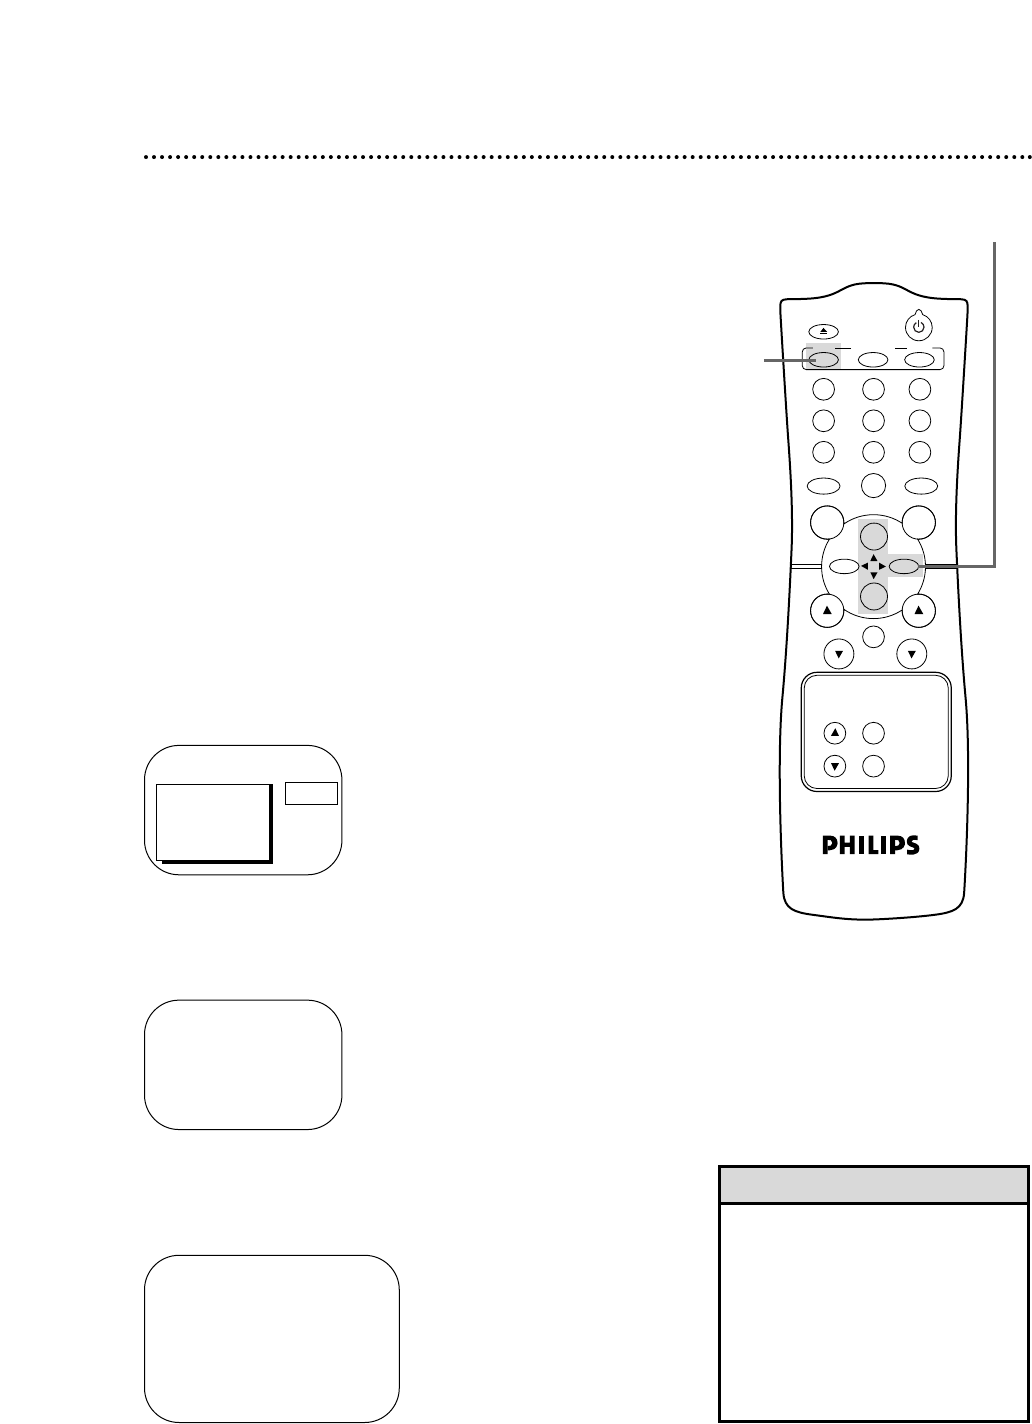
SET CLOCK
> AUTO CLOCK [ON]
SET MANUAL CLOCK
DAYLIGHT SVG.TIME [ON]
SET TIME ZONE
[AUTO]
TO CONTINUE PRESS MENU
SELECT KL CHOOSE B
TO END PRESS EXIT
3
Press the PLAY/▲ button or the STOP/▼ button to select
SET CLOCK. Then, press the F.FWD/B button.
2-3
1