


To Transfer Gameplay Recordings to DVD-R.
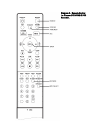
1. Press HDD/DVD (on the remote or the unit) until ‘HDD’ appears on the screen.
2. Press HOME MENU on the remote control and select ‘Copy,’ then press ENTER
3. Select ‘HDD - > DVD’ and press ENTER
4. If you are asked to select a type of Copy List, select ‘Create New Copy List’ and
press ENTER
5. When prompted, insert a recordable disc (DVD-R) in the tray. It will take a few
seconds for the disc to be read.
6. Select the titles from the list and press ENTER to add to the copy list. If you
receive a message about ‘edit points’, please ignore.
7. When finished selecting titles, highlight ‘Next’ and press ENTER
8. The copy list will appear. You can highlight ‘Next’ and press ENTER.
9. On the next screen, make sure Recording Mode is set to ‘High Speed’ and that
Finalize is set to ‘On.’ If you need to change the settings, select ‘Recording
Mode’ or ‘Finalize’ and select ENTER, highlight ‘High Speed’ or ‘On’ respectively
and press ENTER.
10. Highlight ‘Start Copy’ and press ENTER
11. Select a menu template and press ENTER
The recording process will take a few minutes. If again prompted to Finalize the
DVD, select ‘Yes.’
12. When completed, press HOME MENU to exit.
13. Remove and Label the DVD with the following information:
(Title of Game) VOB files,
Disc #
Date
Your Name
14. Transfer files (VOB files on the DVD) to one of the computers in W700 that has
the program MPED Video Wizard.
15. Quickly check the quality of each file in MPEG Video Wizard. If each file is of
suitable quality, then delete the titles on the DVD Recorder.
SPECIAL NOTES: Moving the DVD Recorder
Do not move the recorder immediately after switching it off. If you need to move the
recorder, please follow the steps below:
1 After the message POWER OFF is shown on the front panel display, wait at least two minutes.
2 Unplug from the wall socket.
3 Move the recorder.