


9
En
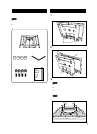
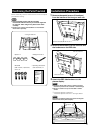
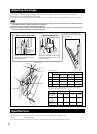
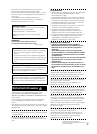
Confirming the Parts Provided
Before assembly, check to make sure that none of the parts
provided are missing.
Note
The hexagonal wrench and the operating
instructions will be necessary to reset the angle and
for removal. After using them, please retain them
carefully.
Screws to be used for wall installation are not included.
Obtain them separately.
Hung on wall unit
Bolts M8
(M8 × 40 mm (1-9/16 inch):
silver) ×4
Spacer ×4
Hexagon wrench ×1
Operating instructions
(this document) x 1
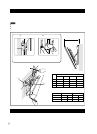
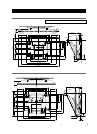
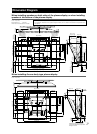
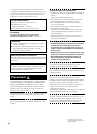
Installation Procedure
1 Remove the special screws (2 locations)
from the bottom of the hung on wall unit.
Special screws (M6)
2 Remove the hardware on the wall side and
the hardware on the PDP side.
Wall side hardware
PDP side hardware
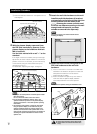
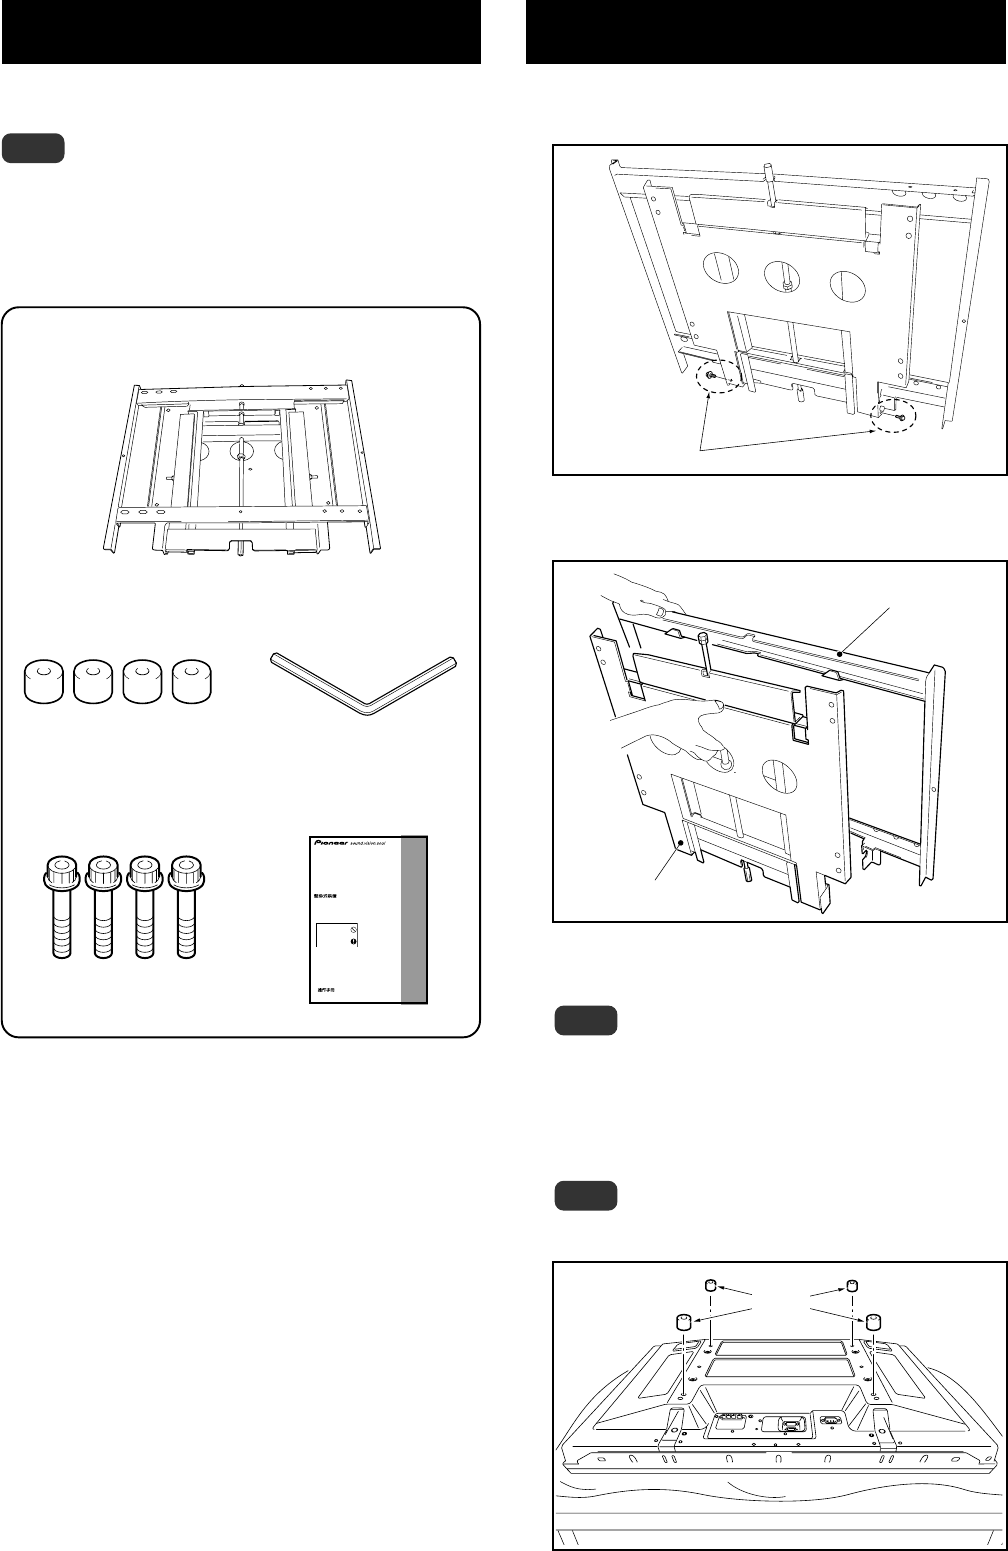
3 Attach the PDP side hardware to the
plasma display.
Note
Cover the display with a sheet or similar protective
material to protect it from scratches or other damage.
Be sure to attach it on top of a flat table or similar
surface.
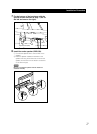
1 Place the spacers (4 locations).
Place the spacers as shown in the figure below.
Note
Place them so that the holes in the spacers are aligned
with the holes in the plasma display.
Spacer
Operating instructions
Mode d’emploi
Bedienungsanleitung
Istruzioni per l’uso
Gebruiksaanwijzing
Manual de instrucciones
HUNG ON WALL UNIT
ECRAN MURAL
WANDBEFESTIGUNGSEINHEIT
UNITA DA PARETE
EENHEID VOOR WANDBEVESTIGING
UNIDAD PARA COLGAR DE LA PARED
PDK-WT02
K042_Ja