


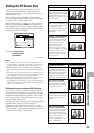
38
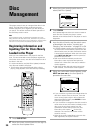
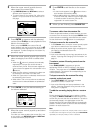
3 Move the cursor control joystick down to
select one of the custom files.
• Use PREVIOUS 4 and NEXT ¢ to select a
different set of custom files.
• To input a name for the custom file, refer to the
section ‘To input a name for the custom file’ on
this page.
4 Press ENTER to create or edit the selected
custom file or PLAY 3 to start playback of the
discs in the custom file.
When you press ENTER, the custom file edit
screen appears with the cursor at the top of the
R
column and the discs registered in the custom file
are displayed. To make changes to the custom file,
proceed to step 5.
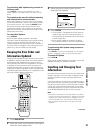
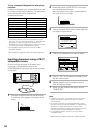
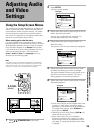
5 Move the cursor control joystick right or left to
select a category from which to select discs
from.
• When the
R
column is selected, discs already
registered in a custom file can be viewed or
removed from the file. Discs that are registered
in the custom file appear with a checkmark in the
R
column.
• When the Disc column is selected, the discs can
be selected in their order in the disc rack.
• When the Type column is selected, the discs can
be selected by their format.
• When either Title or Artist columns are selected,
the discs can be selected based on alphabetical
order.
6 Press ENTER to sort the discs according to
the column selected.
7 Move the cursor control joystick up and down
to select a disc.
If the disc you want to add to the custom file is not
on the screen, use PREVIOUS 4 and NEXT ¢
to select a different group of discs.
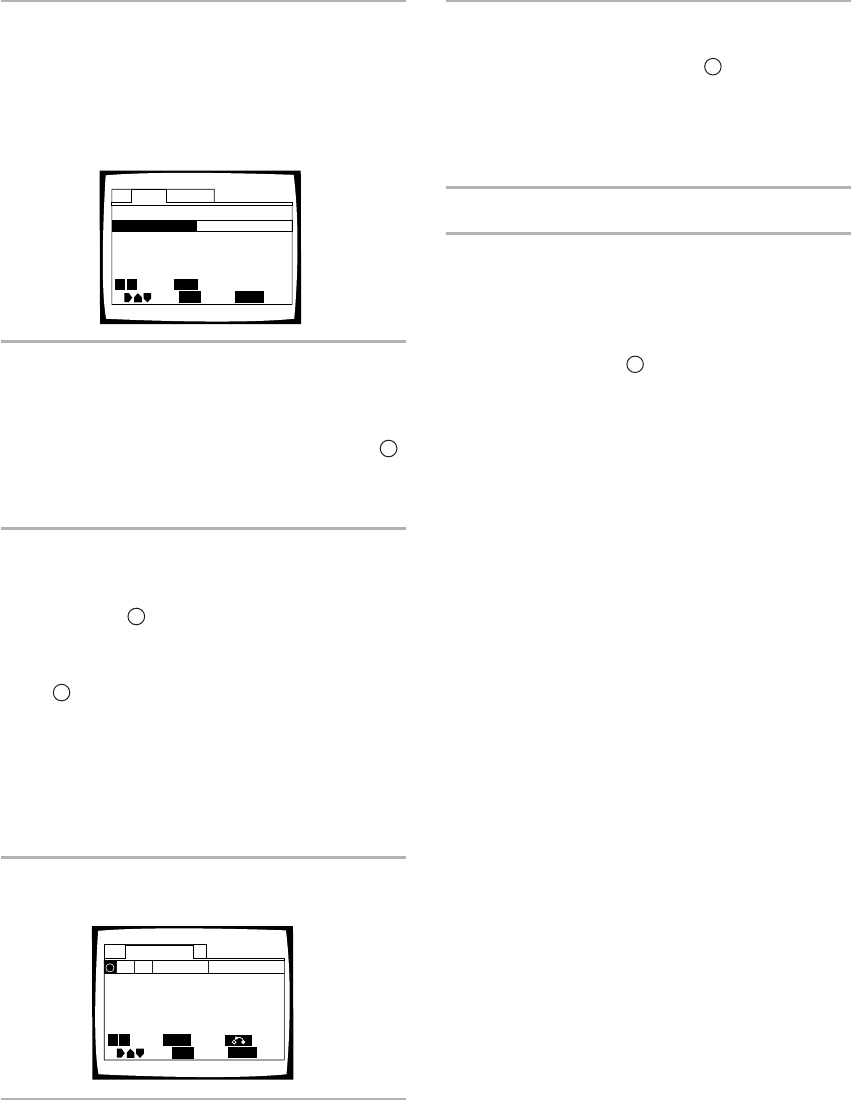
Text
Auto Update
Title
Artist
1
√
√
√
√
√
DVD
Silver Skies
Matt Jones
2 DVD Someone2Hold S. Benak
3 VCD
Dance Coll.
Various
4 DVD Rook James Wilson
68DVD Luna LaLa
Rina Selene
Type
Disc
R
Return
Move
SUB SETUP
Exit
ENTER
Sort
Page
SEARCH
MODE
Search
4 ¢
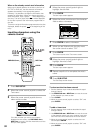
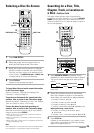
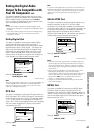
Custom: Video 4
Text
Auto UpdateCustom
Type No. Title
Video
Video
Video
Video
1
2
3
5
Video 4
Move
SUB SETUP
Exit
ENTER
Select
Page
Play
4 ¢
PLAY
8 Press ENTER to add the disc to the custom
file.
• A check mark appears in the
R
column when a
disc has been successfully added.
• When adding discs to a custom file, please note
that only DVDs and Video CDs can be registered
in a video custom file and only CDs can be
registered in an audio custom file.
9 When you are finished, press SUB SETUP.
To remove a disc from the custom file
Follow the procedure above to locate the disc you want
to remove from the custom file and press ENTER. When
a disc has been successfully removed from the custom
file the checkmark in the
R
column is not displayed.
To input a name for the custom file
1 In the Custom menu, move the cursor control joystick
up or down to select one of the custom files.
2 Move the cursor control joystick right to highlight the
title field for the selected custom file.
3 Press ENTER.
4 Input a title following the text input procedures in the
section “Inputting and Changing Text Information” on
page 31.
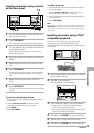
To select a custom file using controls on the
front panel.
Press AUDIO/VIDEO if necessary to light the
appropriate AUDIO or VIDEO indicator in the display
window. Then press one of the DIRECT CUSTOM
number buttons. The custom file corresponding to the
number pressed begins.
To input a name for the custom file using
controls on the front panel
1 Press TEXT INPUT after following the above
procedure to select a custom file.
2 Input a title following text input procedures in the
section “Inputting characters using controls on the
front panel” on page 33.
To add the currently playing disc to a custom
file
During playback of a disc you want to add to a custom
file, press the DIRECT CUSTOM number button of the
custom file you want the disc to be added to. The disc is
automatically placed in the appropriate custom file.
Please note that DVDs and Video CDs are automatically
placed in a video custom file and CDs are automatically
placed in an audio custom file.
Note
During playback of a custom file, the play mode is set to custom.
To select either the single or ALL play mode, press PLAY MODE
repeatedly until the play mode you want is selected.