17
Changing a Lamp
Changing a Lamp
1 Using the remote, turn off the lamp and allow the cooling
fans to stop (about one minute) before proceeding.
WARNING! Never remove a lamp that is still lit.
Caution: In the dual-lamp system, it is possible to remove and replace
the lamp that is not being used while the other lamp is on. Be careful.
Use UV protective eye wear. Also, be aware that lamps are very hot and
can stay hot for some time after they are turned off.
2 Do one of the following:
• For front access units, open the screen.
• For rear access units, remove the rear panel.
3 Turn off the power switch and remove the power cord.
(For front access units, reach through the opening next to
the control board).
4 Lift the light shield.
5 If you have a dual lamp system and want to change the
front lamp, remove the three thumb screws and bracket
above the lamps.
6 Loosen the three captive thumb screws on top of the
lamp.
7 Lift the wire handle and pull the lamp straight up and out.
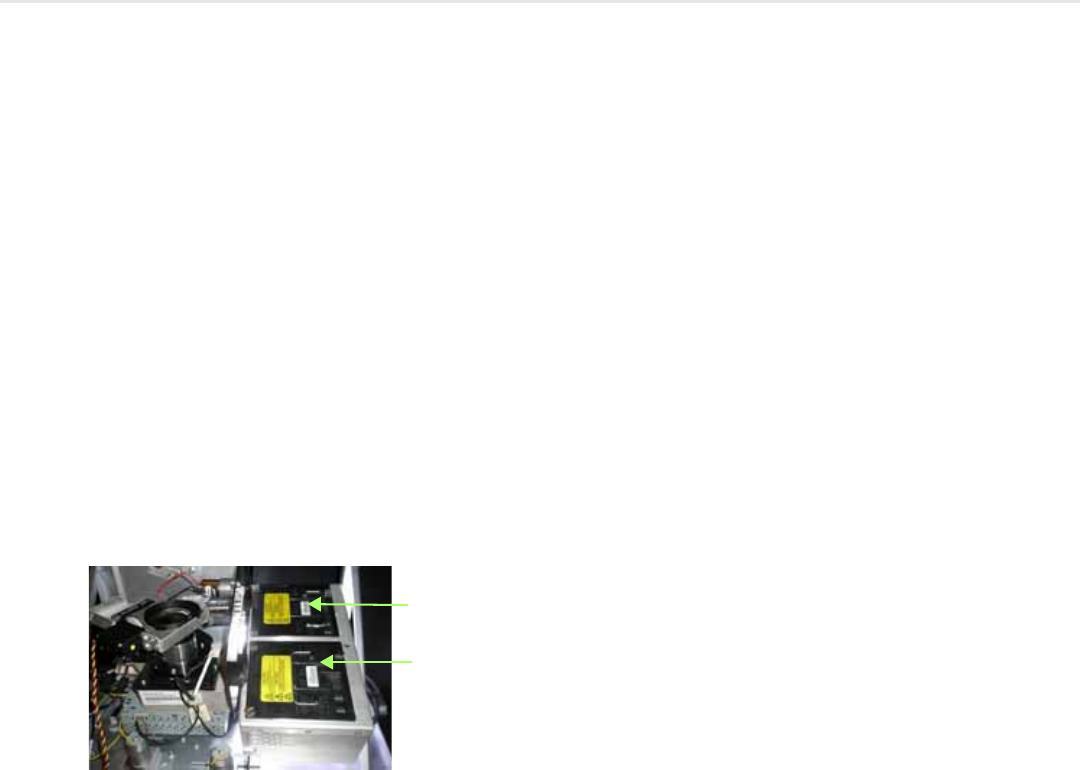
8 The picture (see below) shows a dual lamp system viewed
from the back. In this picture the front lamp is in the cor-
rect position for use, so you would probably want to
replace the rear lamp in this case.
9 Remove the new lamp from its packaging and plug it into
this space. Push it all the way down. Tighten the three
screws finger tight.
Note:
If the lamp is not pushed all the way down, the light path will
not be correct. This may cause a poor picture.
10 Close the light shield.
11 Reinstall the power cord and turn the unit on.
12 Do one of the following:
• For front access units, close the screen.
• For rear access units, replace the rear panel.
13 Reset the lamp hours (MAIN MENU > DIAGNOSTICS >
HOURS).
14 Color balance the wall (page 15).
Front lamp
Rear lamp
This picture shows two lamps in a dual-lamp system


