


Installing the Display | 5
Installing the Display
Before you install the display controller, remove any existing graphics
card and its driver from your system. Also disable any onboard
graphics capability on the motherboard.
Warning
• In locations where 240V outlets are used, connect the Dome E2c
display only to a center-tapped, 240V, single-phase supply (only for
Canada and the United States).
• Turn off the computer before installations. If you leave the computer on,
you could suffer electric shock or cause damage to system components.
• Remove the display controller slowly from its package and static-shielding
bag to prevent electrostatic discharge.
• Static electricity can damage the controller. When touching the board or
parts of the motherboard, take these precautions:
- Wear an antistatic wrist strap.
- Discharge your body’s static electricity repeatedly by touching the
power supply or the metal surface of the computer chassis.
Tips
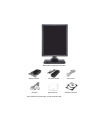
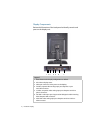
• Access to ports. For displays mounted on a desk stand, rotate the LCD
panel from portrait to landscape for access to the ports.
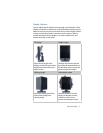
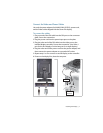
• Threading cables. Remove the stand cover and thread the DVI cable and
power cord through the stand column. Make sure the cable and cord run
inside the notches. To reattach the cover, align the hooks with the slots on
the stand. Press the cover into place. A click sound signals a secure
connection.
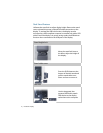
• Multiple displays. Connect the first display of a two-headed system, or the
only display of a one-headed system, to the Video 1 port. Connect all
displays to the controller before you turn on the computer and install the
driver. Use two displays to view two images simultaneously or one image
across both displays.