


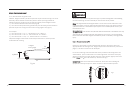
After determining the height of stand, follow the installation instructions in below
to install wall mount to different kinds of wall -wooden, concrete.
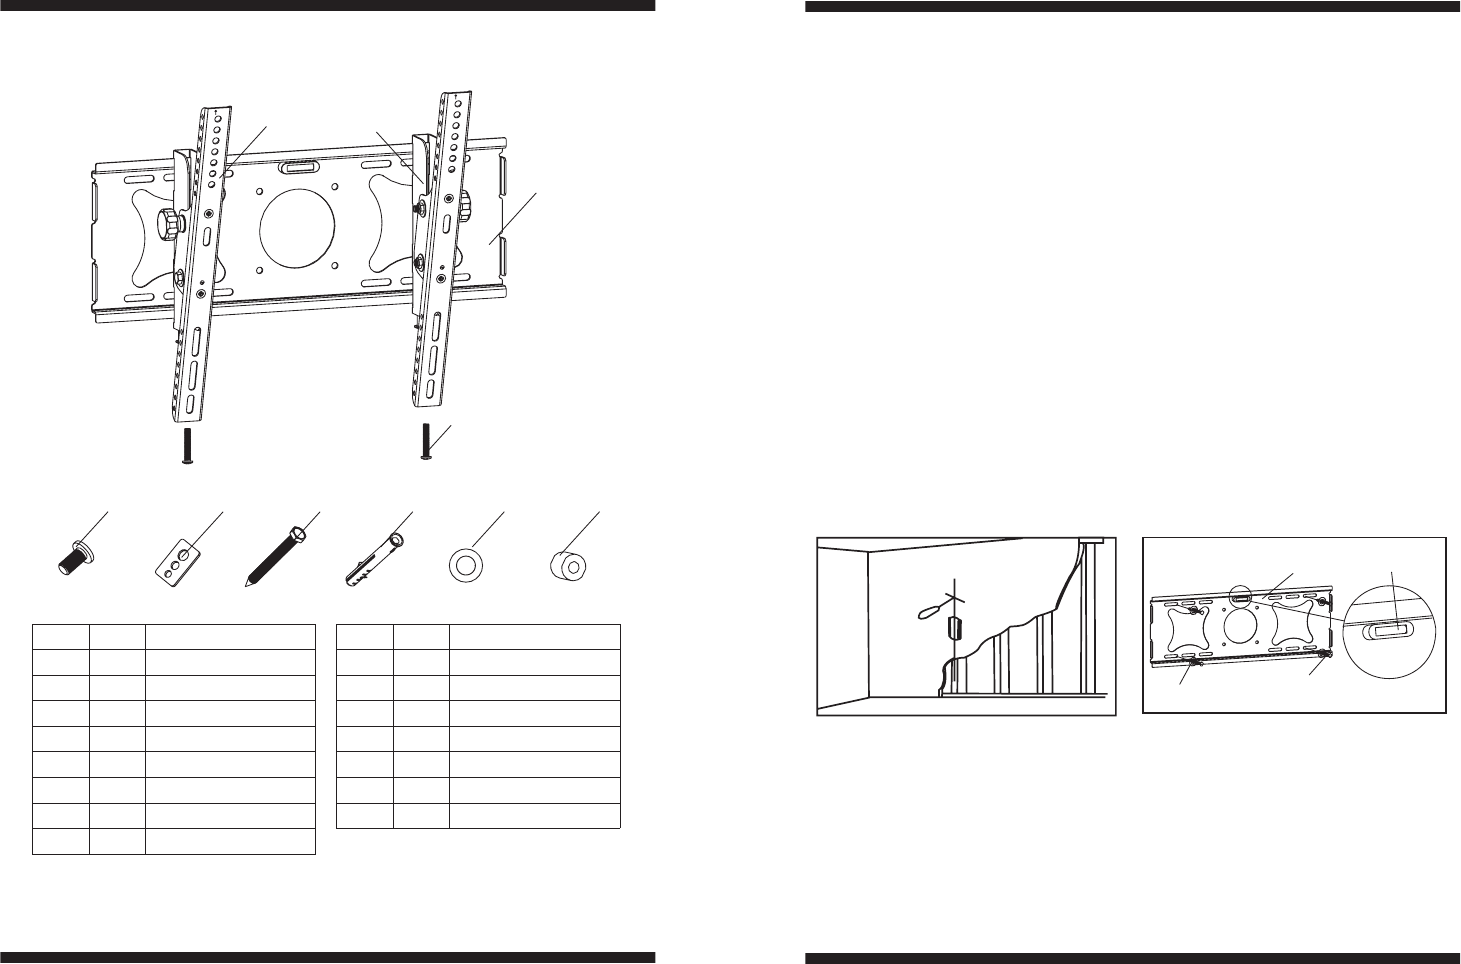
Using a awl or nail to make where the nails are located, as shown as fig.2b. Distance
between two nails for fixing wall mount must not less than 12”. Pre-drill these holes
with a 5mm drill bit to at least 50mm in deep hole. Please make sure these holes are
level and located at center. Use wall mount as a template to mark the location of other
three holes and drill the same holes. Fix the wall mount to the wall with 4 long bolts(H)
and washers(J).
Wooden wall:
Wooden wall:
-2-
-7-
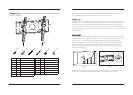
Hardware List: Actual parts appearance and the quantity may different
with illustrated.
Hardware List:
6
6
H
I
J
K
6
4
Square washer
Long bolt
Wall anchor
Long bolt washer
Spacer
ID Description
1
2
A
3
B
C
1
1
4
1
4
4
Wall mount
Left bracket
Right bracket
M4 mm×12 bolt
M4 mm×16 bolt
M5× mm16 bolt
M6×16mm bolt
M5×36mm bolt
M6×36mm bolt
Qty
D
4
4
4
4
E
F
G
42
Safe bolt
A-F
J
G
I
H
K
ID
Description
Qty
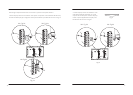
Fig 2b
Fig 2c
Concrete wall:
Using the wall mount as template to mark 6 holes location on the wall. There holes are
located at the top row of the slots and three more are located at the bottom row. The
outer holes must be fall to the left and right of the two holes in the middle of the
mount. Please make sure these holes are level and at least 6” between any two lines.
Pre-drill these holes with a 10mm drill bit to at least 50mm deep hole. Insert wall
anchors(I) into each of these holes. Attach the wall mount to the wall using 6 long
bolts(H) and washers(J).
Concrete wall:
1
2
3
4
J
1
H
Balance-adjusting
Using balance-adjusting system on the plate, make sure whether wall plate is installed
balance. If not, then slide the wall plate let pointer level in the center position.
UP
UP