


Chapter 3: On-Screen Menus
Chapter 3 17
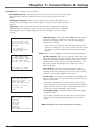
If you ever need to change some of the
settings in any of the menus that appear
in the setup procedure, choose Setup
(press 5 on the remote) from the VCR
MAIN MENU. Note that the VR546 does
not have the Audio menu, as it is a
mono model.
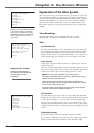
Explanation of the Menu System
The on-screen menus you saw the first time you turned on your VCR
were explained in Chapter 1. This chapter lists other menus that you
can access through the VCR MAIN MENU (press MENU on the remote
control). The quickest way to select a menu is to press the number
button on the remote control that matches the number next to the
item. Some menus have on-screen instructions for more complicated
settings.
VCR MAIN MENU
1 Timer Recordings
2 Time
3 Channels
4 Setup
5 Preferences
6 Audio
7 Language
0 Exit
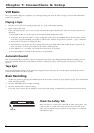
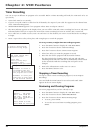
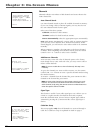
TIME
1 Set Time and Date
2 Auto Clock Set: ON
3 Set Time Zone
4 Set Daylight Saving
Time Data was found
on channel 20.
0 Exit
Timer Recordings
The Timer Recordings feature programs the VCR to record
automatically. This feature is explained in detail on page 14.
Time
Set Time and Date
Set Time and Date allows you to manually set the VCR’s time and
date information instead of using the Auto Clock Set feature. When
the SET TIME AND DATE menu is on the screen, use the number
buttons on the remote to enter the information — you must press 0
before single digits (for example, 03/17/02 for March 17th, 2002).
Auto Clock Set
Using Auto Clock Set enables the time to be updated each time the
VCR is turned off.
Press the 2 button repeatedly to go back and forth between on and
off. If you turn Auto Clock off, you’ll need to manually set the time
and date in order for the VCR’s recording features to work.
Notes: Auto Clock Set is available only in limited areas.
You must set available channels, time zone, and Daylight-Savings
settings for Auto Clock Set to work.
When using Auto Clock Set with a cable box, the VCR will not
reset the clock after a power outage unless the cable box is tuned
to the channel carrying time data.
If the time doesn’t automatically set after trying for ten minutes,
manually set the time and date information.
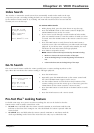
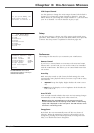
Set Time Zone
Set Time Zone sets the time zone you are in. When the SET TIME
ZONE menu is on the screen, use the number buttons on the remote
to enter the information — you must press 0 before single digits.
If you select Automatic for your time zone, the VCR sets the clock
using the first time information it finds. If the time set is not correct,
select another time zone or set the time and date through the menu
system.
Set Daylight-Savings
Adjust this setting to allow for daylight savings time (DST).
If you choose Automatic for the time zone, the VCR sets the clock
using any DST information broadcast in the channel’s signal.
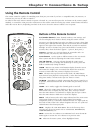
SET TIME ZONE
What is your Time Zone?
1 Eastern
2 Central
3 Mountain
4 Pacific
5 Alaska
6 Hawaii
7 Automatic
Press MENU to continue
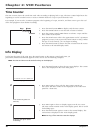
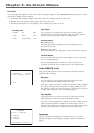
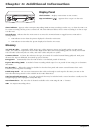
Displaying Time and Date
Pressing the INFO button on
the remote control displays the
time and date on screen
temporarily.