


Inserting the Batteries
in the Remote
1
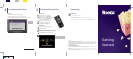
IR receiver
Status light
AudioComposite
video
Optical
audio
Component video
S-Video
Home
Up
RightLeft
Select
Down
PowerEthernetHDMI
Reverse scan
Play/Pause
CMYK
4c/4c
Forward scan
Reset
button
23
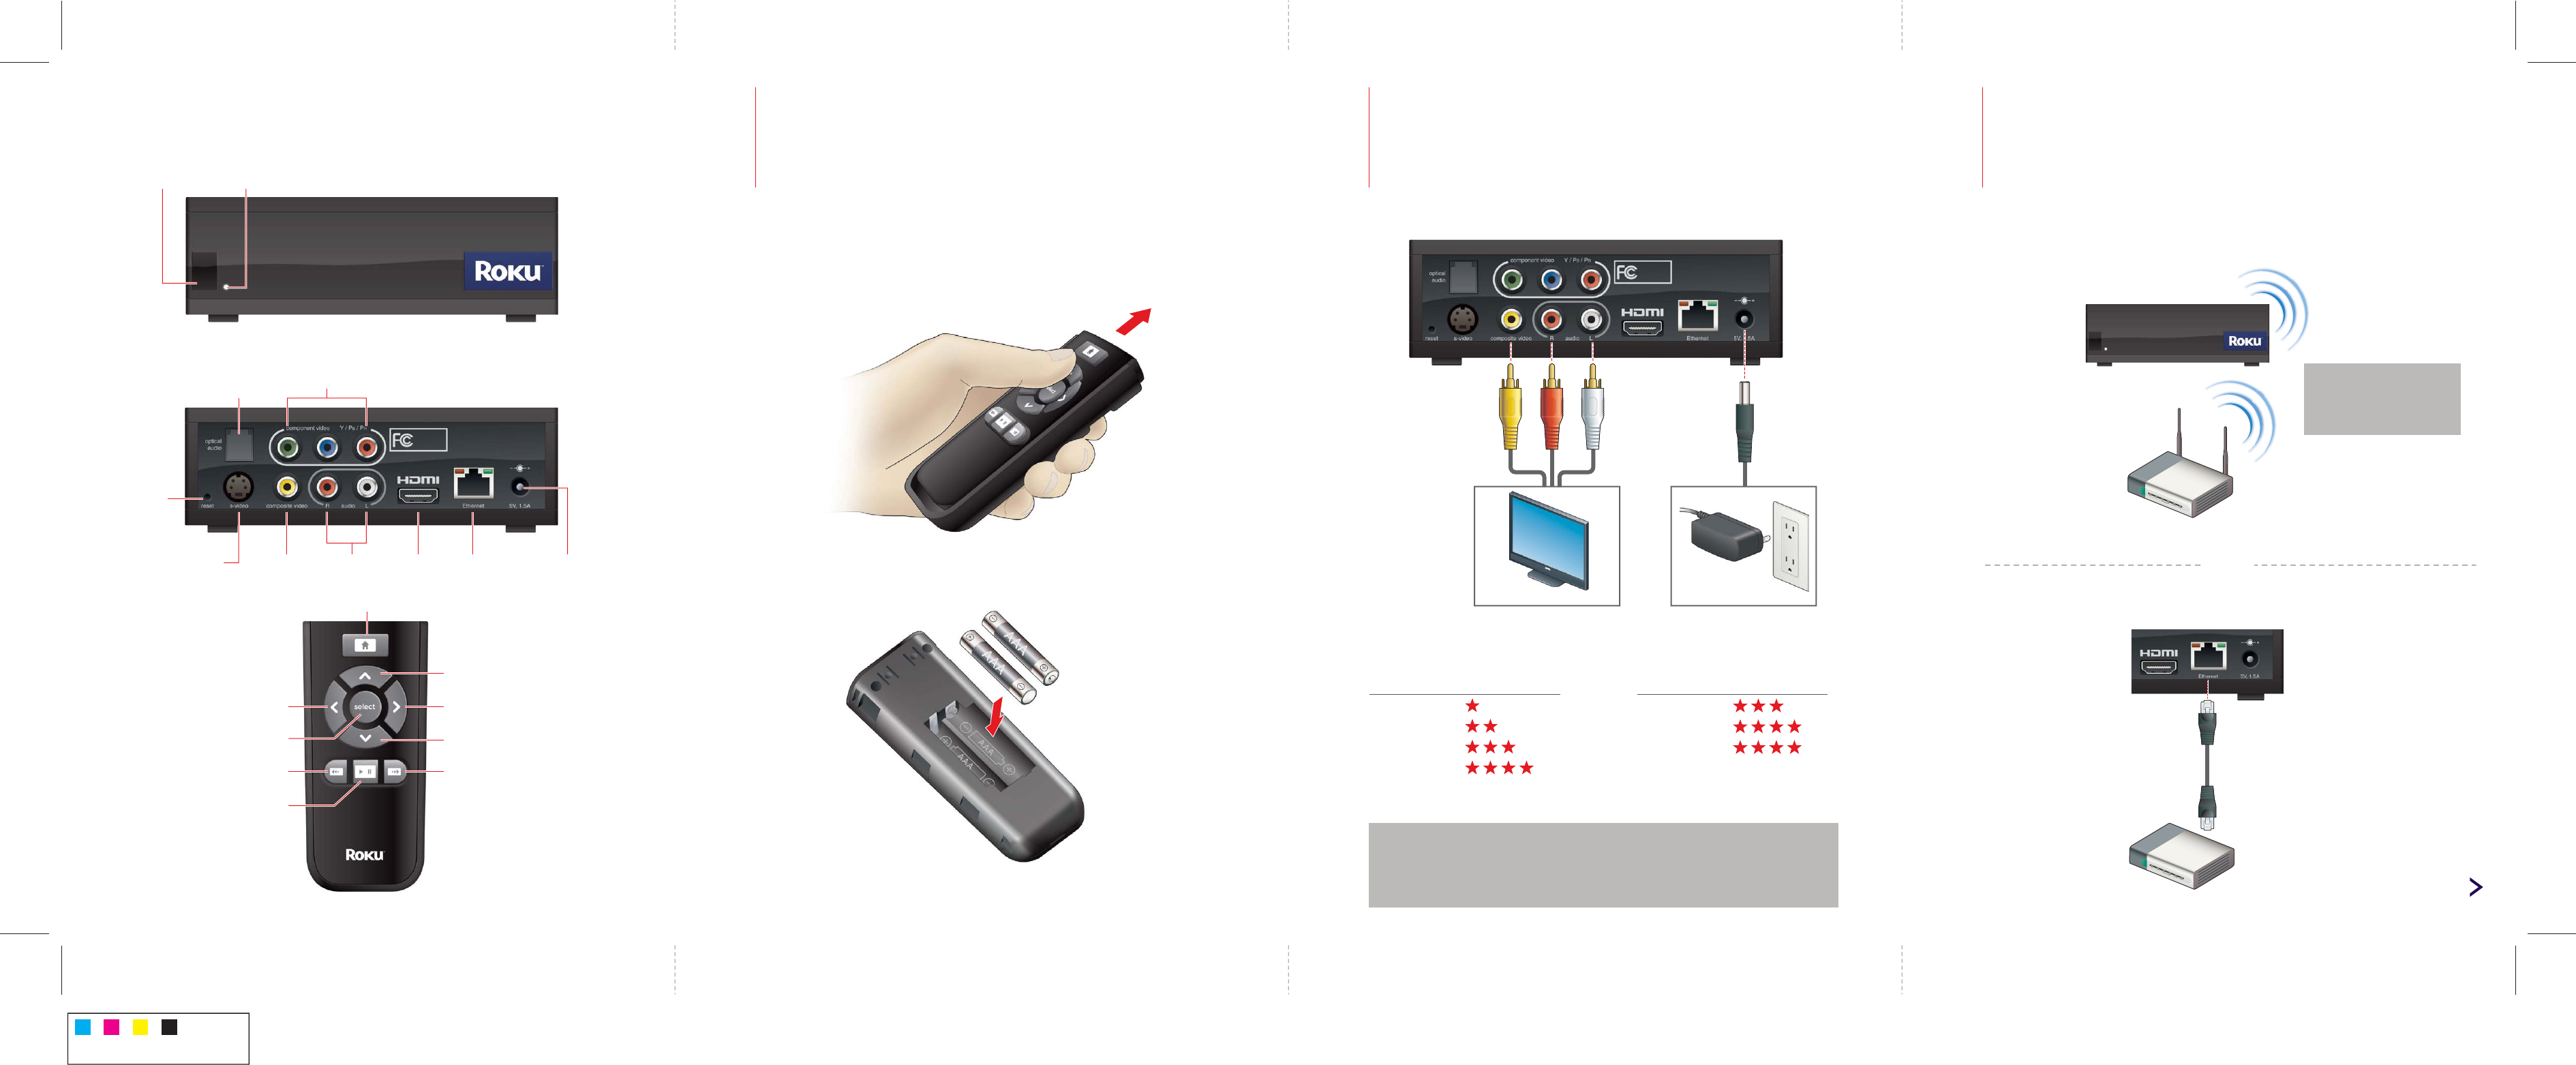
If your TV supports other audio/video inputs and you purchased the required cables,
you can set up your player for better resolution. The following chart ranks the resolution
for each setup option:
Your Roku Digital Video Player
Slide the top panel upward to open the remote.
Put two AAA batteries (included) in your remote.
Make sure your TV is on and is set to display the correct video input.
TIP:
For Wireless you need:
• Wireless Network name (SSID)
• Security Key or Passphrase
Or
Continued
Internet router
Internet router
Wired: Use an Ethernet cable (not included) to connect your player to your router.
Video
Composite
S-Video
Component
HDMI
Audio
Stereo
Optical
HDMI
Connecting Your Player
to Your TV
Connecting Your Player
to Your Home Network
TV
Your player supports both wireless and wired networks. Choose the setup that is best
for your network.
Wireless: Place your player within range of your wireless network.
NOTES:
• If you use an HDMI video cable, you don't need a separate audio cable.
• Video/Audio quality may be compromised based on the speed of your broadband Internet
connection.
• For additional information on alternate setups, see the Roku Digital Video Player User Guide at
roku.com/support.
On your TV
• Use the remote to follow the onscreen instructions.
• When prompted, select the channel you want to activate.
4
Completing Guided Setup