OPERATION
STEP 1. Connect coax from LNBF to receiver.
STEP 2. Plug in the receiver and TV.
STEP 3. Turn TV and receiver ON.
STEP 4. Tune TV to ch. 3 or 4.
STEP 5. Determine azimuth and elevation required for
your position. Refer to Quick Reference Card or receiver
manual.
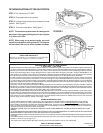
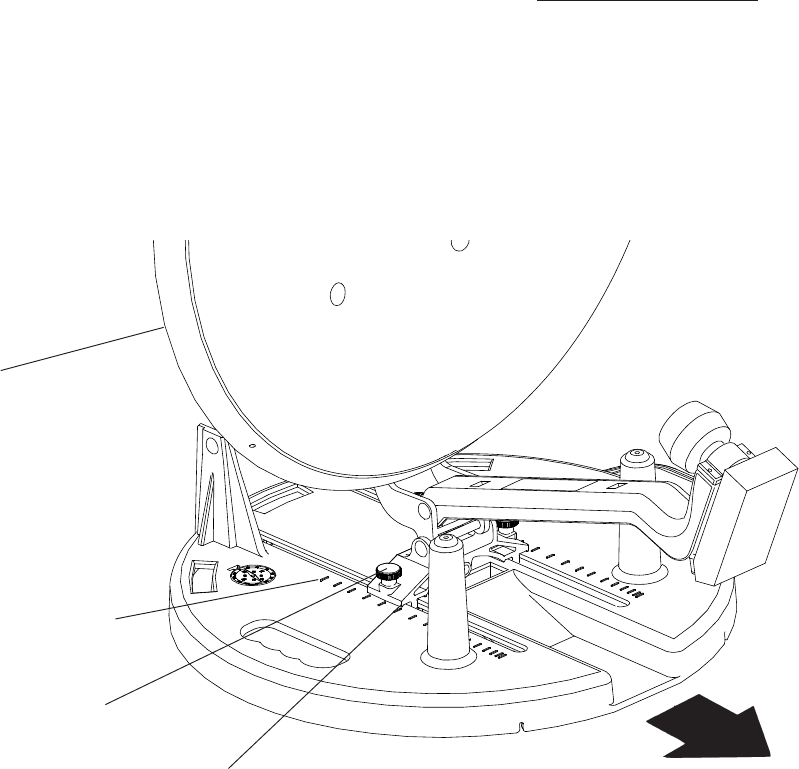
STEP 6. Loosen clamp knobs. Elevate reflector to the
correct elevation. Align degree of elevation required with
front of the slide bracket. Each mark indicates 5 degrees
of elevation with the first mark being 0
0
(mark closest to
compass/level). See Figure 1. Tighten clamp knobs.
STEP 7. Level base using bubble level recessed into the
base.
STEP 8. Using compass recessed into base, rotate the
base
slowly
to the desired azimuth (direction) for the high
power satellites.
NOTE: Disregard the compass markings, the red
compass needle
always points North
. Rotate the
base so that the other end of the needle points at the
correct heading (direction) on the compass decal.
DO NOT USE THE DEGREE MARKINGS ON THE
COMPASS.
Clamp Knobs
0 Degrees Elevation
(Next Mark Indicates 5
0
)
Use Front of Slide Bracket
for Proper Degree of
Elevation Required.
FIGURE 1
NOTE: If you have the unit sitting on a tailgate or on
other metal items, it is recommended that you
remove the compass from the base and stand away
(15' min.) to find the correct azimuth. Compass is
attached to base with velcro.
STEP 9. Adjust azimuth (direction) and elevation (up/
down) for best picture.
NOTE: If you do not get a picture, check the
following:
1. Make sure antenna has clear view of the high
power satellites, no buildings, trees, etc.
blocking the view.
2. Make sure coax connections are good.
3. Check coax for breaks, crimps, cuts etc.
4. If base is not level, you will have to adjust the
elevation to compensate.
5. Check that TV is tuned to correct channel.
CAUTION:
DO NOT DROP SYSTEM. IF ANTENNA IS
DAMAGED, IT WILL REDUCE THE GAIN (HOW MUCH
SIGNAL THE ANTENNA SENDS TO THE RECEIVER)
OF THE ANTENNA. THIS CAN RESULT IN A
DEGRADED PICTURE.
Point Towards Satellite
Reflector


