


9
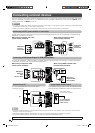
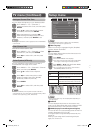
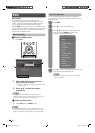
TV menu
Video Audio TV Setup Parental
StereoAudio Channel
Channels
H
Audio Channel (ATV only)
You can switch between multiple audio modes
when watching a multiple audio or stereo broadcast
programme. (Stereo, Dual1, Dual2, Mono)
H
Channels
Channel Scan
You can also automatically scan channel by performing
the procedure below.
1
Go to “MENU” > “TV” > “Channels” > “Channel
Scan”, and then press ENTER.
2
Press
c
/
d
to select “Australia”, “Singapore”
or “IRAN” for your country channels.
3
Press
a
/
b
to select “TV System” (ATV only).
4
Press
c
/
d
to select the optimum TV systems
(Broadcasting system) to receive.
(Auto, B/G, A2 B/G, I, D/K, A2 D/K, A2 D/K1,
A2 D/K2, M) (ATV only)
5
Press ENTER.
6
Press
c
/
d
to select “OK”, and then press
ENTER. Channel Scan will start.
You do not need to do anything during the
channel scan.
NOTE
• Check the TV System if the sound output is not correct.
Update Scan
You can add channel by performing Update Scan. Use
this menu to add new services automatically after the
initial auto installation has been completed.
• Start searching channels after selecting the colour system
and sound system.
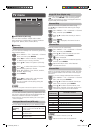
Analogue Manual Scan (ATV only)
You can adjust the frequency to your desired position.
Start
Frequency
(MHz)
Set by directly entering the frequency
number of the channel with 0 – 9 on the
remote control.
Scan Up
The higher frequency channel will be
searched in order.
Scan Down
The lower frequency channel will be
searched in order.
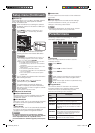
Single RF Scan (Digital only)
Select RF Channel that you want to scan by pressing
c
/
d
, then press ENTER to start scanning. When
channel programmes are found, the Signal Level and
Signal Quality will be displayed.
Channel Skip
Selected channels are passed over when using
CH
a
/
b
even if selected while watching the image
from the TV.
1
Go to “MENU” > “TV” > “Channels” > “Channel
Skip”, and then press ENTER.
2
Press
a
/
b
to select the channel you want to
skip.
3
Press ENTER.
When
is displayed, the channel is set to
SKIP.
Channel Sort
Channel position can be sorted freely.
1
Go to “MENU” > “TV” > “Channels” > “Channel
Sort”, and then press ENTER.
2
Press
a
/
b
to select the channel you want
to move, and then press ENTER.
will be displayed.
3
Press
a
/
b
to move it to the desired position,
and then press ENTER.
4
Repeat the step 2 and 3 until all desired
channels are sorted.
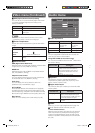
Channel Edit
When a TV channel sends its network name, the initial
auto installation detects the information and assigns a
name to it.
However, you can change individual channel names.
1
Go to “MENU” > “TV” > “Channels” > “Channel
Edit”, and then press ENTER.
2
Press
a
/
b
to select the desired channel you
want to edit, and then press ENTER.
3
Press
a
/
b
to select “Channel Name”, then
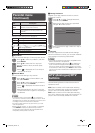
select each character of the new name for the
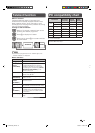
channel using keys as in the table below.
Press and
continuously
Selectable character
1
A
B
C
1
A
- - -
2
D
E
F
2
D
- - -
3
G
H
I
3
G
- - -
4
J
K
L
4
J
- - -
5
M
N
O
5
M
- - -
6
P
Q
R
6
P
- - -
7
S
T
U
7
S
- - -
8
V
W
X
8
V
- - -
9
Y
Z
9
Y
- - -
0
+
–
•
0
+
- - -
NOTE
• If you want to delete a character, press
c
.
4
Repeat until the name is fully spelt out.
LC24LE430X_EN.indb 9LC24LE430X_EN.indb 9 7/19/2011 9:38:13 AM7/19/2011 9:38:13 AM