


E
25
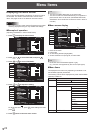
Menu Items
BRIGHTNESS SENSOR
(When connected to the PN-ZR01 (optional) only)
WhensettoONorON:DISPLAY,thebrightnesswill
automatically change according to the lighting and
surrounding brightness. Performs operation with the primary
monitor.IfsettoON:DISPLAY,theeffectwillbedisplayed
with a
.
If connecting to multiple monitors, the brightness of all the
monitors will change.
The
will be displayed on the primary only.
WhensettingBRIGHTinSCHEDULEontheOPTIONmenu,
setBRIGHTNESSSENSORtoOFF.
BRIGHTNESS SENSOR SETTING
(When connected to the PN-ZR01 (optional) only)
Performsadjustmentstothebrightnesssensor.Performs
operation with the primary monitor.
Set the surrounding brightness and the current screen
luminancetoAMBIENTBRIGHTNESSandSCREEN
BRIGHTNESS.
IndividuallysetWHENLIGHT:andWHENDARK:.
EvenifbrighterordarkerthanthesetAMBIENT
BRIGHTNESS,thescreenbrightnesswillnotchange.
CURRENTAMBIENTBRIGHTNESSisshownforreference.
COPY SETTING VALUE
Whenthemonitorhasbeenconnectedtomultiplemonitors
withRS-232C,youcancopytheprimarysettingdetailsto
the secondary. Perform operations with the primary monitor.
SelectsthesettingstocopywithCOPYSETTINGVALUE
TARGET.
“PICTURE”ONLY
...CopiesthePICTUREmenusettings.*
ALL ........................Copiesallthesettings.*
SelecttheIDNo.ofthemonitorthatyouwouldlikecopyto
withCOPYTOIDNo.,thenselectCOPYandpress
MENU
.
If you select ALL, settings will be copied to all monitors.
WhenyouwouldliketoconrmtheIDNo.thatissettothe
monitor,selectIDNo.andpress
.TheIDNo.willbe
displayed on the screen.
*CertainsettingdetailssuchasANALOGGAIN,ANALOG
OFFSET,andDISPLAYCOLORPATTERNcannotbe
copied.
LOGO SCREEN
Sets whether or not to display the logo screen.
STANDBY MODE
WhenSTANDARDisselected,startuptimefromstandby
mode is reduced. Note, however that, more power will be
consumed in standby mode.
WhenLOWPOWERisselected,currentconsumption
is reduced while the monitor is in standby mode. Note,
however, that the startup time from standby mode becomes
longer.
IfsettoLOWPOWER,certainRS-232Ccommandscannot
be used in standby mode, and control via LAN will be
disabled.
OFF IF NO OPERATION
Determineswhetherornottosetthemonitortogointo
standby mode when there is no operation from the remote
controlunit,RS-232Ccommands,orLANforover4hours.
HOT PLUG CONTROL
SetswhethertousehotplugcontrolforthePC/AVHDMI
andPC/AVDVI-Dinputterminals.
RS-232C/LAN SELECT
Selects the method with which to control the monitor from
the computer.
ID No. SET
AssignsIDnumberstomonitorsconnectedinadaisychain
(seepage34),usingtheremotecontrolunitorRS-232
cables.
Thenumbers1to255areavailableforIDnumbers.
If“0”isset,thesystemregardsthisasthestatewherenoID
number is set.
AUTO ASSIGN ID No.
IDNo.tobeusedwillbeautomaticallyassignedwhen
multiplemonitorsareconnectedwithRS-232C.
Select ON, then press
MENU
. Perform operations with the
primary monitor.
BAUD RATE
SelectsthecommunicationspeedusedforRS-232C
communication.
LAN SETUP
Conguresthesettingstocontrolthemonitorfromthe
computerviaLAN.(Seepage45.)
AUTO ASSIGN FIXED IP ADDR.
CanbeenabledwhenRS-232C/LANSELECTisLANand
theDHCPCLIENTisOFF.
SettheDHCPCLIENTforsecondarymonitorsconnected
byRS-232CtoOFFandaxedIPaddressisautomatically
allocated.
If the IP address is a duplicate with a network device other
than a monitor, individually change the IP address.
OPTION DC OUT SETTING
Normally,leavethissettingasOFF.
Whenusinganoptionalpart,ifinstructionappears,change
the setting accordingly.
HDMI AUTO VIEW
WhenONisselected,thescreensizeisadjusted
automaticallyaccordingtothescreensizecontrolsignal
includedinthevideosignalinputfromtheAVHDMIinput
terminal.