NOTE:
1
2
3
4
5
6
7
5
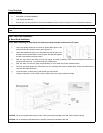
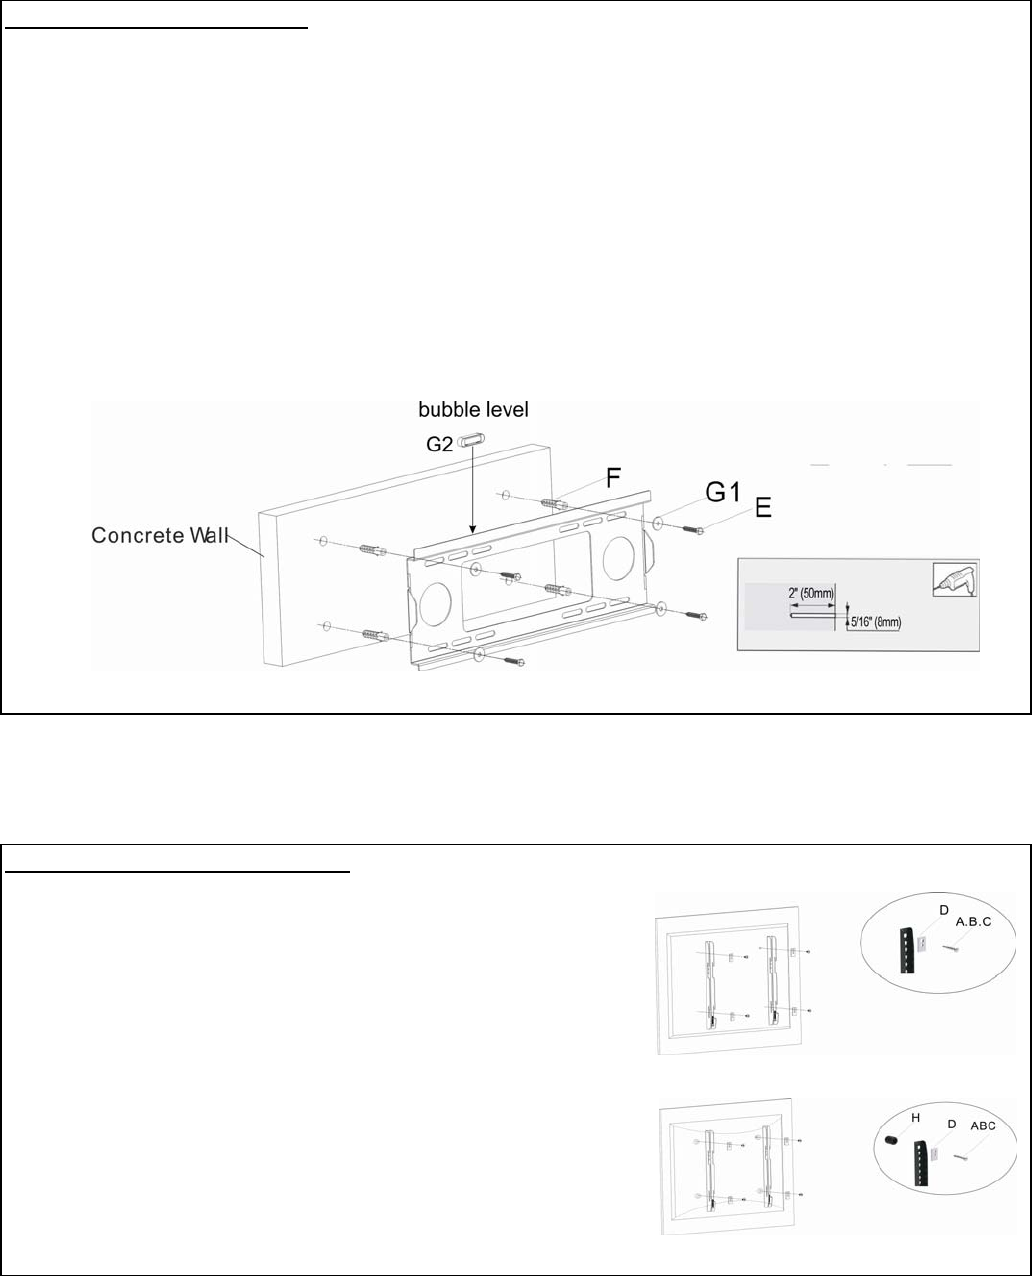
The concrete anchors must be used for concrete installation.
4
Tighten the bolt with a 7/16" socket or open ended wrench by turning clockwise until tight.
Attach the bubble level (G2) to the wall plate, with the help of an assistant place the wall plate into position against the
wall, using the bubble level to keep it level.
Mark four holes to be used for securing the mount and place the wall plate aside.
Next, drill holes using an electric drill and 5/16" masonry bit to a depth of approximately 2".
Insert a concrete anchor (F) into each hole. If necessary, a hammer can be used to lightly tap each anchor into place
so that they are flush with the wall.
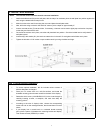
According to the size of display's hole, choose the corresponding
screw and hole on the rectangle washer, then thread them in line as
shown.
Determine which screw (A1/A2/B1/B2/C1/C2) is the correct length by
carefully inserting a straw, or toothpick, and mark how deep the
mounting point is.
3
Insert bolt (E) with washer (G1) into each concrete anchor in the wall. Do not tighten until all bolts are in place.
If your display has a curved back or a recessed thread mounting
point, place a spacer (H) between the mounting bracket and display.
Then choose a screw (A2/B2/C2) to match.
2
1
Once all of the anchors are in place, move the wall plate back into position. Check the bubble level to verify that the
wall plate is level.
Step 2 Display Bracket Installation
B) Concrete / Brick Installation
To ensure optimal installation, this kit includes various screws of
different diameters and lengths.
Place your TV screen down on a soft, flat surface, and locate the
threaded mounting points that are located on the back of the display.
4


