


36
GB
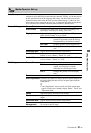
Subtitle Set-up Subtitle Setting When “For Hard Of Hearing” is selected, some visual aids
may also be displayed with the subtitles (if TV channels
broadcast such information).
Subtitle
Language
Allows you to select the language of the subtitles.
Audio Set-up Audio Type Switches to broadcast for the hearing impaired when “For
Hard Of Hearing” is selected.
Audio Language Selects the language used for a programme. Some digital
channels may broadcast several audio languages for a
programme.
Audio
Description
Provides audio description (narration) of visual information if
TV channels broadcast such information.
Mixing Level* Adjusts the unit main audio and Audio Description output
levels.
Dynamic Range Compensates for differences in the audio level between
different channels. Note that this function may have no effect
for some channels.
Optical Out Selects the audio signal that is output from the DIGITAL
AUDIO OUT (OPTICAL) terminal on the rear of the media
receiver. Set to “Auto” when equipment compatible with
Dolby Digital is connected, and set to “PCM” when non-
compatible equipment is connected.
z
* This option is only available when “Audio Description” is set to “On”.
Radio Display Displays the screen wallpaper when you listen to a radio broadcast after 20 seconds
without pressing any buttons.
You can select the screen wallpaper colour, display a random colour or view a
slide show (page 27).
To cancel the screen wallpaper display temporarily, press any button.
Parental Lock Sets an age restriction for programmes. Any programme that exceeds the age
restriction can only be watched after a PIN Code is entered correctly.
1 Press the number buttons to enter your existing PIN Code.
If you have not previously set a PIN, a PIN Code entry screen appears. Follow
the instructions of “PIN Code” below.
2 Press F/f to select the age restriction or “None” (for unrestricted watching),
then press .
3 Press RETURN.
PIN Code To set your PIN for the first time
1 Press the number buttons to enter the new PIN Code.
2 Press RETURN.
To change your PIN
1 Press the number buttons to enter your existing PIN Code.
2 Press the number buttons to enter the new PIN Code.
3 Press RETURN.
z
• PIN Code 9999 is always accepted.
Technical Set-up Auto Service
Update
Enables the unit to detect and store new digital services as
they become available.
~
• For the service update to be able to take place the unit should be left in standby
mode from time to time.