


Chapter 4 Adjusting and Setting Through Menus
54 Chapter 4 Adjusting and Setting Through Menus
Selects the noise reduction level for the luminance signals when a tape is played.
OFF : No noise reduction
LOW : Low noise reduction
HIGH : High noise reduction
Notes
• When you use noise reduction, there may be an afterimage depending on the condition of
the picture.
• Noise reduction is also available with pictures output from
HDV/DV jack. Use caution
when dubbing and editing a picture in HDV/DV.
Selects the noise reduction level for the chrominance signals when a tape is played.
OFF : No noise reduction
LOW : Low noise reduction
HIGH : High noise reduction
Notes
• When you use noise reduction, there may be an afterimage depending on the condition of
the picture.
• Noise reduction is also available with pictures output from
HDV/DV jack. Use caution
when dubbing and editing a picture in HDV/DV.
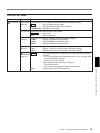
1 Press J/j buttons to adjust the number, then press K/k buttons to set the month,
day, hour, and minute.
2 Press EXEC button to execute.
Notes
• 12:00 AM stands for midnight and 12:00PM stands for noon when [TIME DISPLAY] is set
to [12H].
• If you do not use the unit for 3 months or more, the built-in rechargeable battery will
become completely discharged, and the settings of the day and the time may be cleared
from the memory. In this case, charge the built-in rechargeable battery and set the clock
again
(page 67).
Displays the accumulated time counts (by the digital hours meter) in units of 10 hours or 10
counts.
OPERATION : Power on duration
DRUM RUN : Drum rotation duration
TAPE RUN : Tape run duration
THREADING : Tape unthreading count
Switches the state into which the unit goes when the unit is connected to the AC outlet.
STANDBY : Makes the unit go into the standby mode.
ON : Turns the unit on.
PB YNR
PB CNR
CLOCK SET
HOURS
METER
AC ON MODE
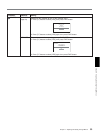
Icon/Menu Submenu Setting
OTHERS
Operating the Menus