


9
GB
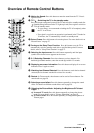
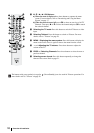
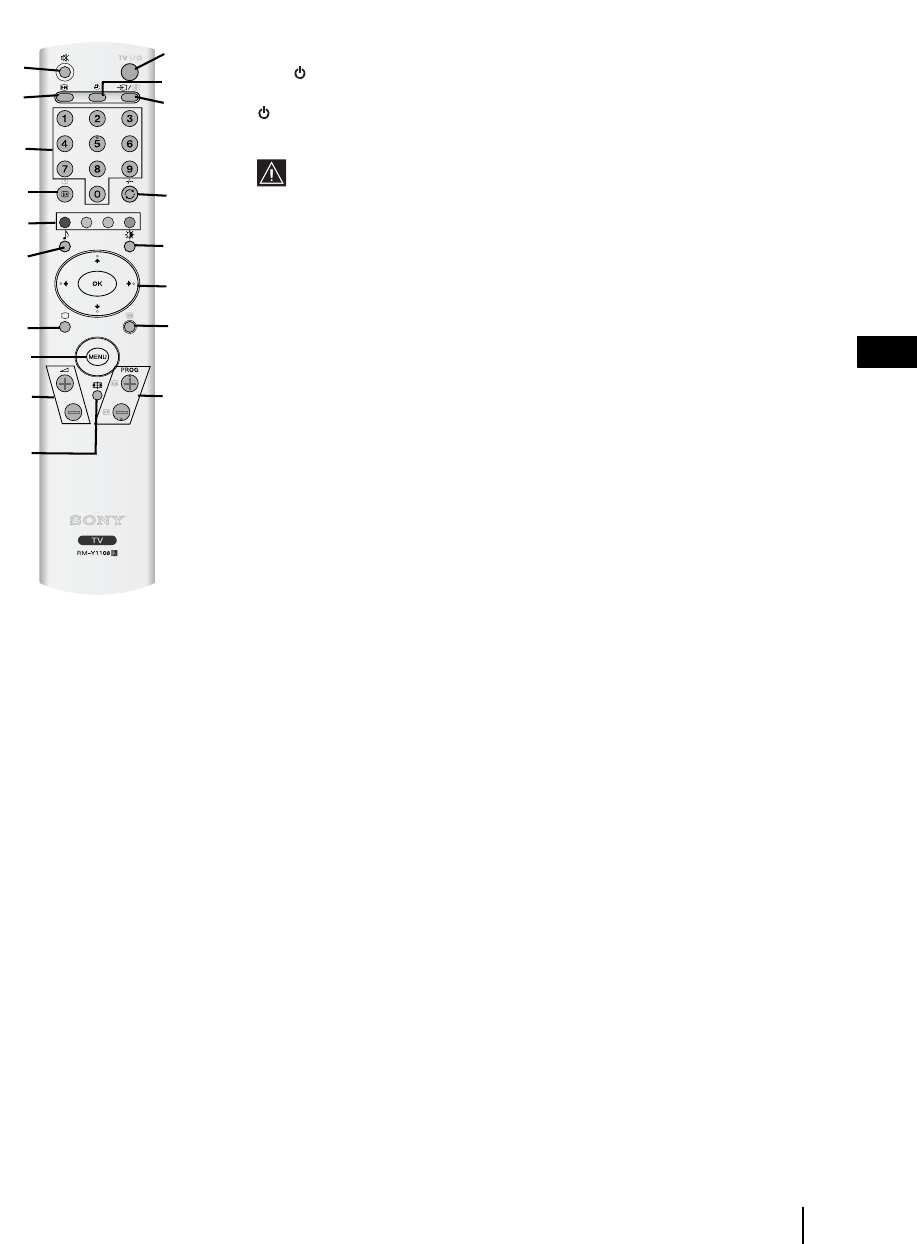
Overview of Remote Control Buttons
1 Muting the Sound: Press this button to mute the sound from the TV. Press it
again to cancel.
2 TV I/ -
Switching the TV to the standby mode:
Press this button to temporarily turn off the TV and switch it to standby mode (the
(Standby/Sleep) indicator on the TV lights up in red). Press again to switch on
the TV from standby mode.
• To save energy, we recommend switching the TV off completely when
the TV is not in use.
• If no signal is received or no operation is performed in the TV mode for
15 minutes, the TV automatically switches to standby mode.
3
Picture Freeze: Press this button to freeze the picture. For more details refer to
"Picture Freeze" on page 27.
4
Turning on the Sleep Timer Function: Press this button to set the TV to
automatically switch to standby mode after a specified time period. For more
details, refer to "Sleep Timer Function" on page 27.
5
Selecting the input source: Press this buttons repeatedly until the input
symbol of the desired source appears on the screen.
6 0 - 9
Selecting Channels: Press these buttons to select channels. For
double-digit channel numbers, enter the second digit within 2.5 seconds.
7
Displaying on-screen information: Press this button to display all on-screen
indicators. Press it again to cancel.
8
Watching Last Channel Selected: Press this button to watch the last channel
selected (the last channel watched for at least five seconds).
9
Fastext: In Teletext mode, these buttons can be used as Fastext buttons. For
more details see page 28
q; Selecting a sound effect: Press this button repeatedly to change the sound
effect. For details on different sound effects refer to page 20
qa Selecting the Picture Mode / Adjusting the Brightness Of Teletext
Pages.
a)
In normal TV mode: Press this button repeatedly to change the picture
mode. For more details, refer to "Picture Adjustment" on page 18.
b) In Teletext mode: Press this button repeatedly to change the brightness of
Teletext pages.
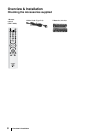
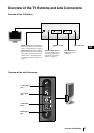
Overview & Installation
1
3
2
4
5
7
8
9
q;
6
qa
qs
qd
qf
qg
qh
qk
qj
continued...