


Chapter 6 Maintenance 89
Chapter 6 Maintenance
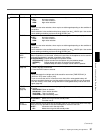
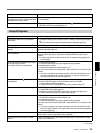
When you set the AUDIO INPUT LEVEL
switch:
• You do not know how to adjust the input
level.
• The recorded level is too low.
• The recorded sound is distorted.
Confirm the level of the sound output from the player by referring to the player’s
instruction manual. According to that output level, set the AUDIO INPUT LEVEL
switch on the rear panel of the unit so as to obtain an optimum level (page 16).
If you are not clear about the player’s output level, try the following procedures.
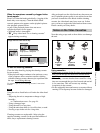
1 Set the AUDIO INPUT LEVEL switch by types of audio output connectors
available on the player.
• If the player is equipped with phone jacks: –10.
• If the player is equipped with XLR connectors: +4 or –2.
2 Set the AUDIO INPUT switch on the front panel to AUTO and play back the
tape which you intend to use for playback. When the playback audio level is at
its maximum, if the audio level meters exceed 0 dB, set the AUDIO INPUT
LEVEL switch to the lower step (+4). Or, set AUDIO INPUT switch to MANU and
turn the AUDIO REC LEVEL control knobs to adjust the recording level. The
recorded sound at the portion where the meters exceed 0 dB will be distorted.
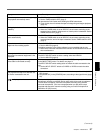
Audio dubbing cannot be done.
Audio dubbing is interrupted.
• You are trying to dub the sound onto an HDV or DV-formatted tape.
t Sounds can be dubbed only onto a DVCAM-formatted tape (recorded) in the
32 kHz audio mode (4-channel) (page 63). If the unit detects the following,
audio dubbing will automatically abort, an alarm message will be
superimposed on the LCD monitor and on an external monitor (page 91).
– A blank portion
– A section recorded in other than 32 kHz audio mode (4-channel)
– A portion recorded in other than DVCAM format
• You have tried to dub the sound onto channels 1 and 2.
t Only channels 3 and 4 can be used for dubbing. You cannot dub the sound
onto channels 1 and 2.
No sound or undesired sound is output
from the HDMI OUT jack, AUDIO OUT
jacks, or i (phones) jack.
• Set the AUDIO OUTPUT SELECT switch depending on the audio channel you
want to output the sound to (page 7). For the output from the HDMI OUT jack, i
(phones) jack or speaker, also check the setting of [AUDIO MONI] in the [AUDIO
SET] menu (page 76).
Cannot hear CH3 and CH4 audio. t Set the AUDIO OUTPUT SELECT switch to MIX or CH-3/4.
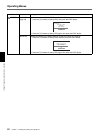
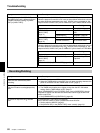
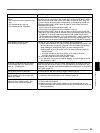
If an i.LINK cable is connected when you
edit the dubbing, the monitor does not
display any image.
t Use the correct setting for [HDV/DV SEL] in the [IN/OUT REC] menu in
accordance with the equipment to be connected (page 70).
The unit does not function as part of a
digital non-linear editing system. The
functions on the unit do not operate.
• The INPUT SELECT switch is set to a setting other than HDV/DV.
t Set it to HDV/DV (page 8).
• The editing controller or the editing software is not compatible with the unit.
t Refer to the instruction manuals of the controller or the software and consult
their manufacturers.
Symptom Cause/Remedy