


21
Basic Hookups and Settings
7 Press CHANNEL+/– to select the minute, then press SET.
The minute is set. The clock starts and the time is displayed.
Step 6: Performing the Setup Using
Your CLIÉ
TM
Handheld
After completing the first 5 steps, install Video Utility from the supplied
Installation CD-ROM and make initial settings for timer REC presets
(tuner, channels, etc.) using your CLIÉ handheld.
Installing the software on your CLIÉ handheld
Follow the procedure below to install Video Utility on your CLIÉ
handheld from the supplied Installation CD-ROM.
Note
Before installing, it is necessary to connect your CLIÉ handheld to your computer using a
cradle or a USB HotSync cable to perform the HotSync operation. For details on how to
connect your CLIÉ handheld to your computer, refer to the “Handbook” of CLIÉ
handheld.
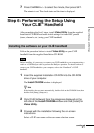
1 Insert the supplied Installation CD-ROM into the CD-ROM
drive of your computer.
The Install CD-ROM window is displayed.
z Hint
If the installer does not start automatically, double-click on the CD-ROM icon, then
double-click [Setup] (Setup.exe).
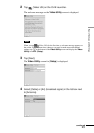
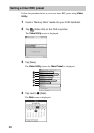
2 Click [CLIÉ Software] from the categories displayed on the
left side of the Install CD-ROM window and click [Install] for
Video Utility.
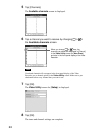
3 Proceed with the installation following the on-screen
instructions.
Select a CLIÉ user name on the user name selection screen.
continued