


75
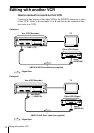
Editing with another VCR
Additional Operations
Notes
• If you connect this VCR to both the LINE IN and LINE OUT jacks of the other
VCR, select the input correctly to prevent a humming noise.
• If the other VCR does not have a Scart (EURO-AV) connector, use the VMC-
2106HG cable instead and connect the cable to the line out jacks of the other VCR.
• When you connect another VCR to the DECODER/LINE-2 IN connector, set
DECODER/LINE2 to LINE2 in the OPTIONS-2 menu.
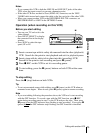
Operation (when recording on this VCR)
Before you start editing
• Turn on your TV and set it to the
video channel.
• Press INPUT SELECT to display
the connected line in the display
window.
• Press SP/LP to select the tape
speed, SP or LP.
To stop editing
Press the
x
(stop) buttons on both VCRs.
Tip
• To cut out unwanted scenes while editing, press
X
(pause) on this VCR when an
unwanted scene begins. When it ends, press
X
(pause) again to resume recording.
Note
• If you start editing following the procedure above, the VCR won’t start recording
with the OPC function. To record a tape with the OPC function, press
z
REC
again during recording pause in step 3 so the VCR analyses the tape. Then, press
X
(pause) after
the OPC indicator stops flashing to start recording. If you press
X
(pause) before
the OPC indicator stops flashing, the OPC function is cancelled.
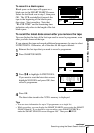
1
Insert a source tape with its safety tab removed into the other (playback)
VCR. Search for the point to start playback and set it to playback pause.
2
Insert a tape with its safety tab in place into this (recording) VCR.
Search for the point to start recording and press
X
(pause).
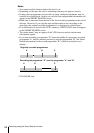
3
Press
z
REC on this VCR to set it to recording pause.
4
To start editing, press the
X
(pause) buttons on both VCRs at the same
time.
X
z
zz
z
REC