45
SETUP SETUP SETUPRemote Control SETUPSETUP
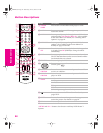
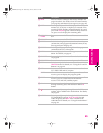
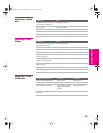
qg RESET Press to reset the settings to the factory defaults. See
pages 63 and 65. Also used to clear Favorite Channels,
(see page 58), and Manual Convergence (see page 42).
qh SLEEP Press repeatedly until the TV displays the time in
minutes (15, 30, 45, 60, or 90) that you want the TV to
remain on before shutting off automatically. To cancel
press until Sleep Off appears. While the Sleep feature is
set, press once to display the remaining time.
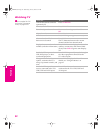
qj SAT/CABLE
POWER
Press to turn on and off the satellite receiver or cable
box.
qk TV POWER Press to turn on and off the TV.
ql DISPLAY Press once to display the current channel number,
current time, and program information banner (if set).
Press again to turn Display off.
w; TV/VIDEO Press repeatedly to cycle through the video equipment
connected to the TV’s video inputs.
wa MENU Press to display the Menu. Press again to exit from the
Menu. For details, see page 61.
ws FAVORITES Press to display the Favorite Channels list. For details,
see page 58.
wd TV FUNCTION Press to have the remote control operate the TV.
wf F1/F2 Functions only while the remote control is in DVD/VCR
FUNCTION mode. For details, see “Using the F1 and F2
Buttons” on page 49.
wg ANT Press to switch between the sources connected to the
TV’s VHF/UHF and AUX inputs.
GUIDE When the remote control is set to operate the satellite
receiver, press to display the program guide.
wh TV/SAT When the remote control is set to operate the satellite
receiver, press to switch between the satellite
receiver’s TV and SAT (satellite) inputs.
wj CH +/- Press to scan through channels. To scan quickly
through channels, press and hold down either CH
button.
wk
Press repeatedly to step through the Audio Effect
options. Also available in the Audio Menu. For details,
see page 64.
wl
MTS/SAP Press repeatedly to cycle through the Multi-channel
TV Sound (MTS) options: Stereo, Auto SAP (Second
Audio Program), and Mono. Also available in the
Audio Menu. For details, see “Using the Audio Menu”
on page 64.
Button Description
AX1X.book Page 45 Wednesday, June 30, 2004 9:21 AM


