


6
1.
1
2
L
3
2.
4
3.
5 A
B
6 C
7 D E F
F
B
8
9 G H F
H
C C
C
Installing the speaker
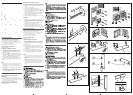
1.Removing the front/surround speakers
1 Remove the cover, and then remove the speaker cord.
2 Remove the speaker from the pole. (In the case of the
surround speaker (L), remove the cover of the plate and then
the AC power cord (mains lead).)
3 Remove the cover and the speaker cord.
2.Removing the center speaker
4 Remove the stand.
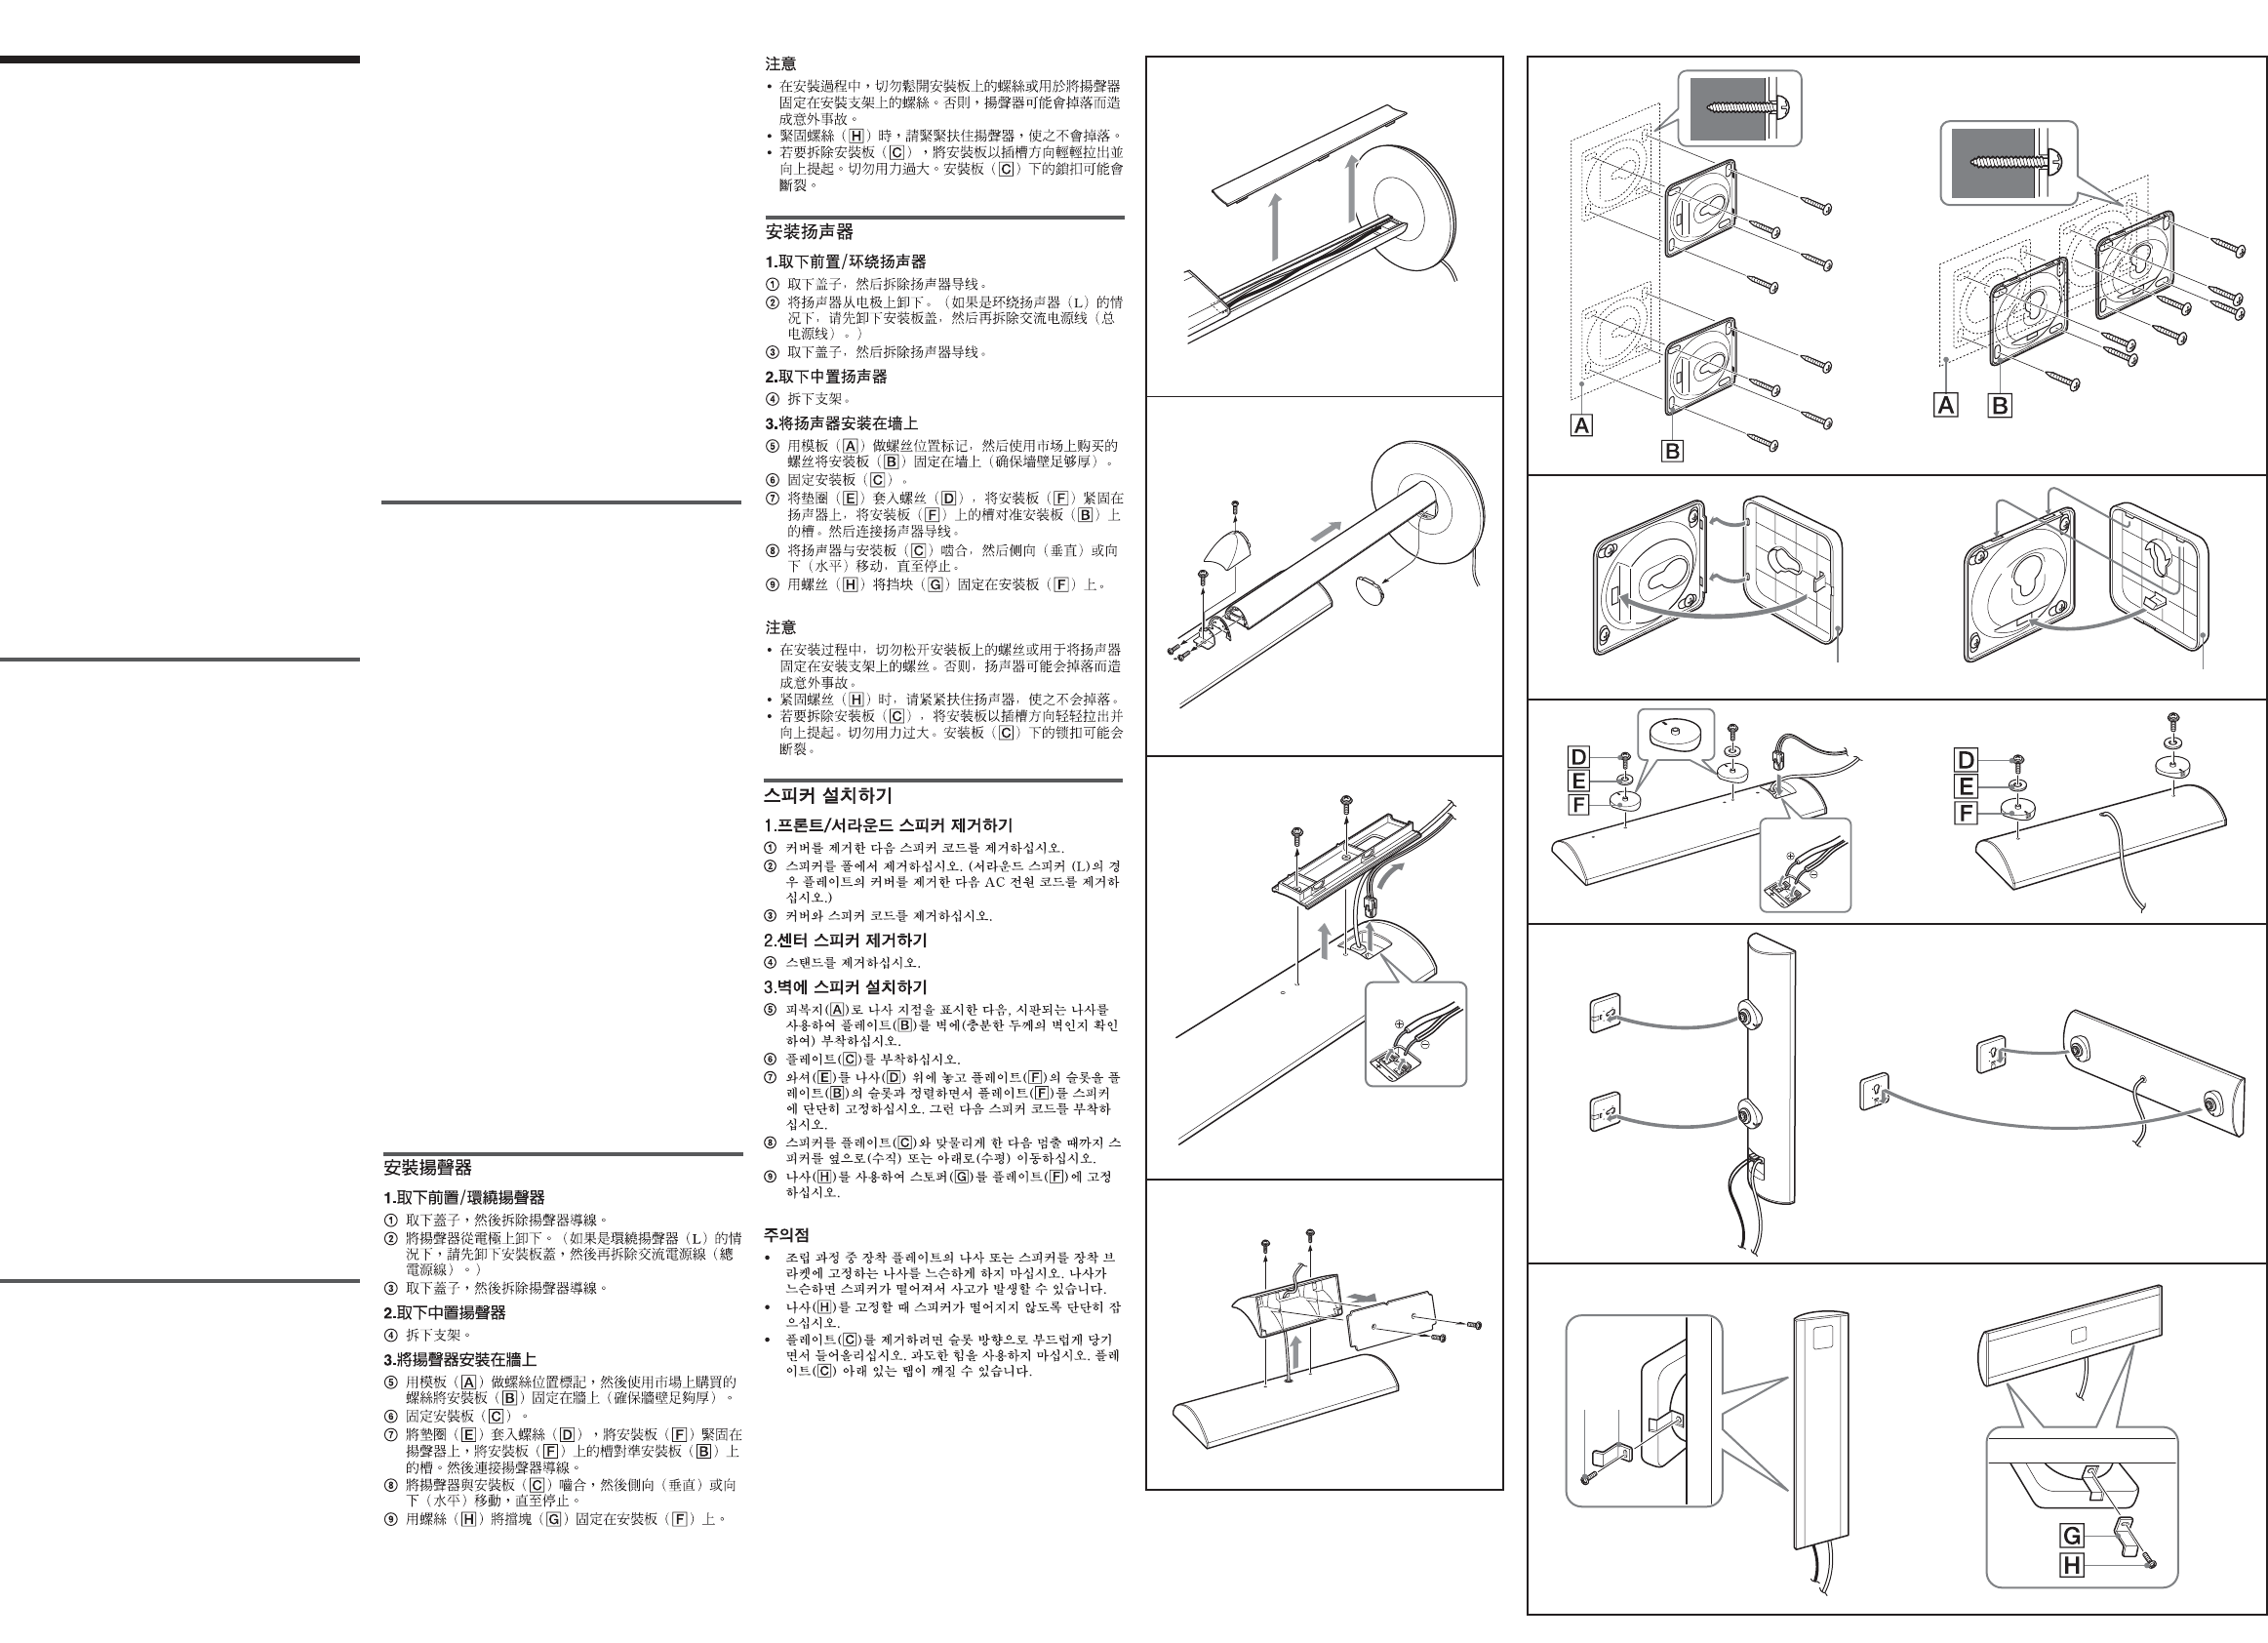
3.Installing the speaker to the wall
5 Mark the screw point with the template (A), then attach the
plate (B) to the wall (making sure that the wall is
sufficiently thick) using commercially available screws.
6 Attach the plate (C).
7 Put the washer (E) on the screw (D) and tightly secure the
plate (F) to the speaker, aligning the slot on plate (F) with
the slot on plate (B). And then attach the speaker cord.
8 Engage the speaker with the plate (C), then move it
sideways (vertical) or downwards (horizontal) until it stops.
9 Secure the stopper (G) to the plate (F) with the screw
(H).
Notes
• Do not loosen the screws at the mounting plate or the screw
to secure the speaker to the mounting bracket during the
assembly process. If you do, the speaker may drop, causing
an accident.
• When securing the screw (H), hold the speaker tightly so as
not to drop it.
•To remove the plate (C), lift it up while pulling gently in the
direction of the slot. Do not use excessive force. The tab
under the plate (C) may be broken.
Installation du haut-parleur
1.Démontage des haut-parleurs avant/
d’ambiance
1 Démontez le capot, puis le cordon du haut-parleur.
2 Retirez le haut-parleur de la colonne. (Dans le cas d’un haut-
parleur d’ambiance (L), retirez le capot de l’applique, puis le
cordon d’alimentation CA (secteur).)
3 Démontez le capot et le cordon du haut-parleur.
2.Démontage du haut-parleur central
4 Démontez le support.
7
3
C
C
GH
8
9
1
2
5
3.Installation du haut-parleur au mur
5 Reportez les emplacements des vis au mur à l’aide du gabarit
(A), puis fixez l’applique (B) au mur (assurez-vous que ce
dernier est assez épais) à l’aide de vis disponibles dans le
commerce.
6 Fixez le cache-applique (C).
7 Mettez la rondelle (
E
) sur la vis (
D
) et serrez
convenablement le support (
F
) au haut-parleur, en alignant
la fente du support (
F
) sur la fente du support (
B
). Ensuite,
refixez le cordon du haut-parleur.
8 Engagez le haut-parleur dans les appliques (C), puis faites-
le glisser latéralement (montage vertical) ou vers le bas
(montage horizontal) jusqu’à la butée.
9 Fixez l’arrêt (G) à l’applique (F) à l’aide de la vis (H).
Remarques
• Ne dévissez pas les vis de fixation de l’applique au mur ni les
vis de fixation du haut-parleur à l’applique pendant le
montage. Le haut-parleur risque de tomber et de provoquer
un accident.
• Lorsque vous fixez la vis (H), tenez convenablement le
haut-parleur afin de ne pas le laisser tomber.
• Pour retirer le support (C), soulevez-le tout en tirant
délicatement dans la direction de la fente. Ne forcez pas.
Vous risqueriez de briser la patte située sous le support (C).
Instalación del altavoz
1.Quitar los altavoces delantero/surround
1 Quite la cubierta y quite el cable del altavoz.
2 Quite el altavoz del poste. (En el caso del altavoz surround
(L), quite la cubierta de la placa y luego el cable de
alimentación de CA (principal).)
3 Quite la cubierta y el cable del altavoz.
2.Quitar el altavoz central
4 Quite el soporte.
3.Instalar el altavoz en la pared
5 Marque el punto de atornillamiento con la plantilla (A), y
fije la placa (B) a la pared (asegúrese de que la pared es
suficientemente gruesa) utilizando tornillos disponibles en
tiendas.
6 Fije la placa (C).
7 Introduzca la arandela (E) en el tornillo (D) y fije bien la
placa (F) al altavoz, alineando la ranura de la placa (F)
con la ranura de la placa (B). A continuación, conecte el
cable del altavoz.
8 Fije el altavoz a la placa (C) y muévalo lateralmente
(vertical) o hacia abajo (horizontal) hasta que se detenga.
9 Fije el tope (G) a la placa (F) con el tornillo (H).
Notas
• No afloje los tornillos de la placa de montaje o el utilizado
para fijar el altavoz al soporte de montaje durante el proceso
de montaje. Si lo hace, el altavoz puede caer y provocar un
accidente.
• Cuando apriete el tornillo (H), sujete bien el altavoz para
que no se caiga.
•Para extraer la placa (C), levántela mientras tira suavemente
en la dirección de la ranura. No aplique demasiada fuerza
porque la lengüeta de debajo de la placa (C) podría
romperse.
4
Front (L) (R)
Surround (R)
Front (L) (R)
Surround (R)
Surround (L)
Surround (L)