10
6.6 Video Quality
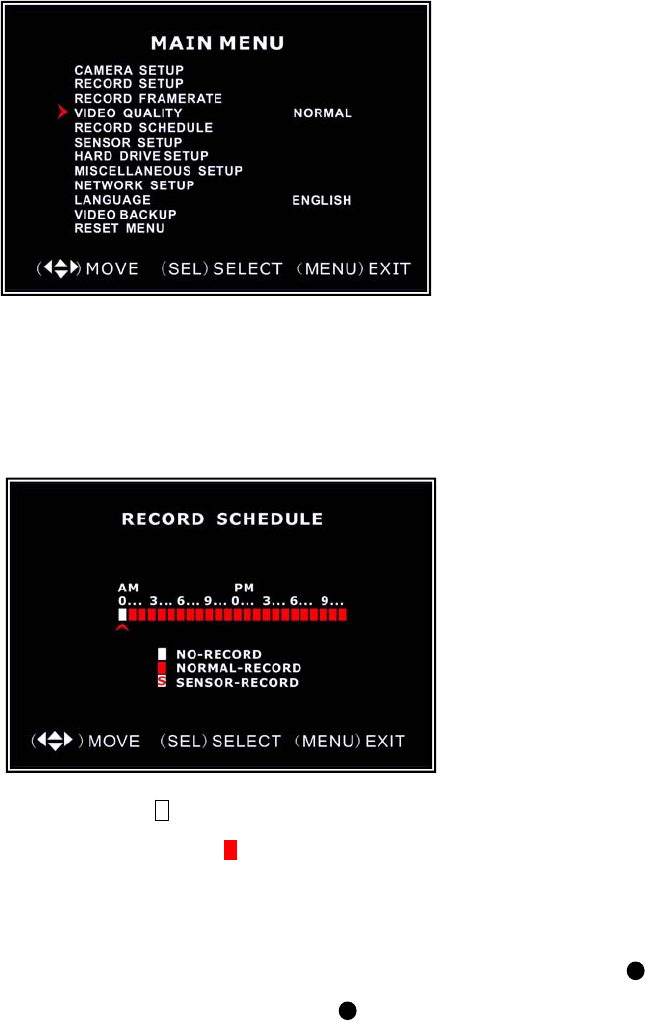
6.7 Record Schedule
Setting the Record Schedule allows you to customize the type of recording depending
on the time of day.
NO-RECORD [ white]: DVR will not record during this time.
NORMAL-RECORD [ red]: DVR will record continuously.
SENSOR-RECORD [S]: DVR will record when sensor or motion is triggered.
NOTE: In order to activate the record schedule press the [] record button when viewing
the cameras. After pressing the [] record button if schedule is set to “NORMAL-RECORD”
the DVR will start to record immediately; if the schedule is set to be “SENSOR-RECORD”
the DVR will not start recording until a motion is detected by the DVR or an installed sensor
is triggered.
Video Quality has 4 different settings:
Highest, High, Normal and Low.
The higher the video setting the better
quality images, however higher quality
images require more hard drive space.
Press [SEL] to change the quality
setting.
The time line indicates 24 hours of a day
based on AM/PM (0 = 12).
Press ▲, ▼, ◄ or ► button to select a
time point, press [SEL] to modify the
recording mode.
