


81
CONTENTS
Document
imaging camera
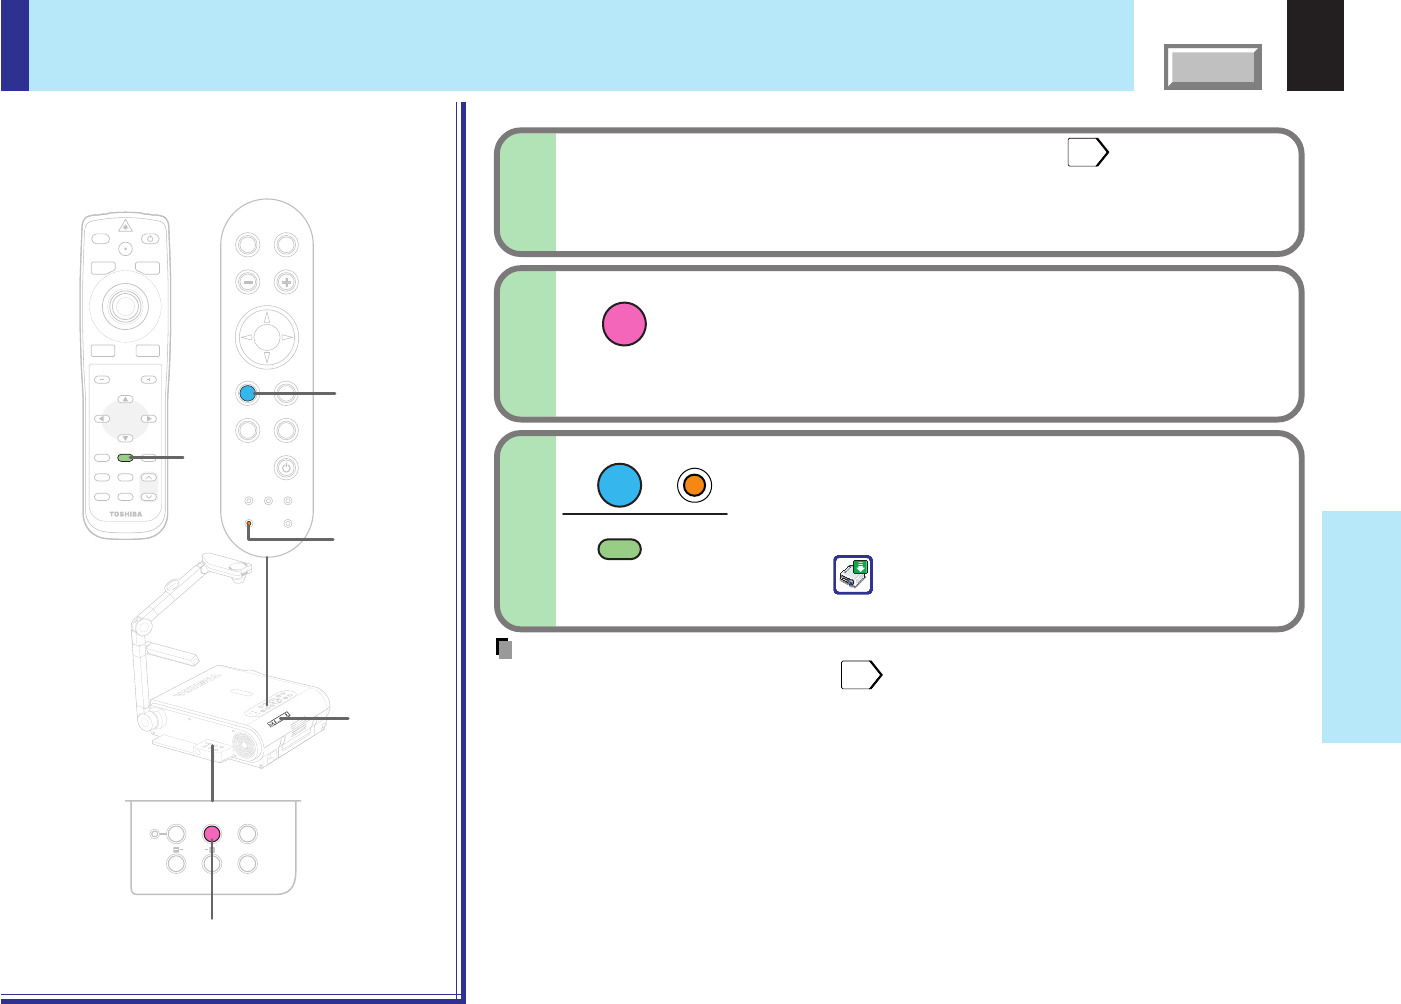
Store the camera images into the memory card
STORE IMAGE
ENTER
ENTER
BUSY
MENU
ON/STANDBYINPUT
L-CLICK R-CLICK
ENTER
KEYSTONE
AUTO
SET
EXIT
PIP
FREEZE
MUTECALL
RESIZE
VOLUME/ADJUST
3
LASER
TEMP LAMP ON
BUSY FAN
KEYSTONE
SET
AUTOAUTO
EXIT
ENTER
MENU
INPUT
VOL/ADJ.
ON/STANDBY
T
E
M
P
L
A
M
P
O
N
B
U
S
Y
F
A
N
O
N
/S
T
A
N
D
B
Y
K
E
Y
S
T
O
N
E
S
E
T
A
U
T
O
A
U
T
O
E
X
IT
E
N
T
E
R
M
E
N
U
IN
P
U
T
V
O
L
/A
D
J
.
STO
RE
CA
M
ERA
A
R
M
L
IG
H
T
LO
CK
W
.B
A
L
A
N
C
E
G
AIN
F
O
C
U
S
2
1
3
3
LOCK
STORE IMAGE
CAMERA
ARM LIGHTW.BALANCE
CAMERA
GAIN
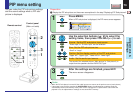
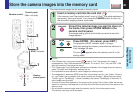
Document camera images can be stored on memory cards.
1
Notes
• If the “Screen size” in the menu screen
54
is set to “Full”, the camera’s full image is
compressed to 1280 x 960 dots before it is stored. If it is set to “Thru”, only the 1024 x 768
dots at the center of the image are stored.
• The “Camera gain” and “Sharpness” settings are reflected on the images stored on memory
cards; “Contrast” and “Brightness” settings are not.
• It is impossible to store resized or frozen images on memory cards.
• The image data is stored as JPEG format files in the memory card’s “_tlpx” folder. If there is
no “_tlpx” folder, one is created in the memory card’s root directory. Stored files are named
“Tlpx001.jpg” to “Tlpx999.jpg”. If there is already a file named “Tlpx999.jpg” in the folder, no
more images can be stored.
• The size of stored files depends on the content of the image. The number of files that can be
stored on a memory card depends on the size of the files and the amount of free space of the
memory card.
• Do not save the camera image when the memory card is in the write-protect mode.
The memory card may not be accessed.
2
3
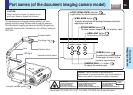
Remote control
Control panel
(Main unit side)
Camera
control panel
BUSY indicator
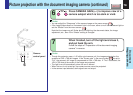
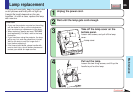
Insert a memory card into the card slot.
41
If the memory card “Input select mode” is set to “Auto.”, the mode switches to
the memory card input mode. If so, press the CAMERA button to return to
the document imaging camera input mode.
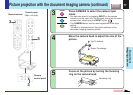
Project the camera image you want to store on
the cards, then press STORE IMAGE in the
camera control panel.
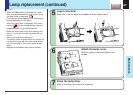
A message asking you to confirm that you want to store the
image appears.
Press ENTER. (To cancel, press EXIT.)
The projector’s BUSY indicator lights in orange.
Note that ejecting the memory card while the indicator is
lit will damage the data.
The icon
appears when the memory card is in the
storing mode.