


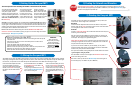
2) Wiring the Carryout MP1
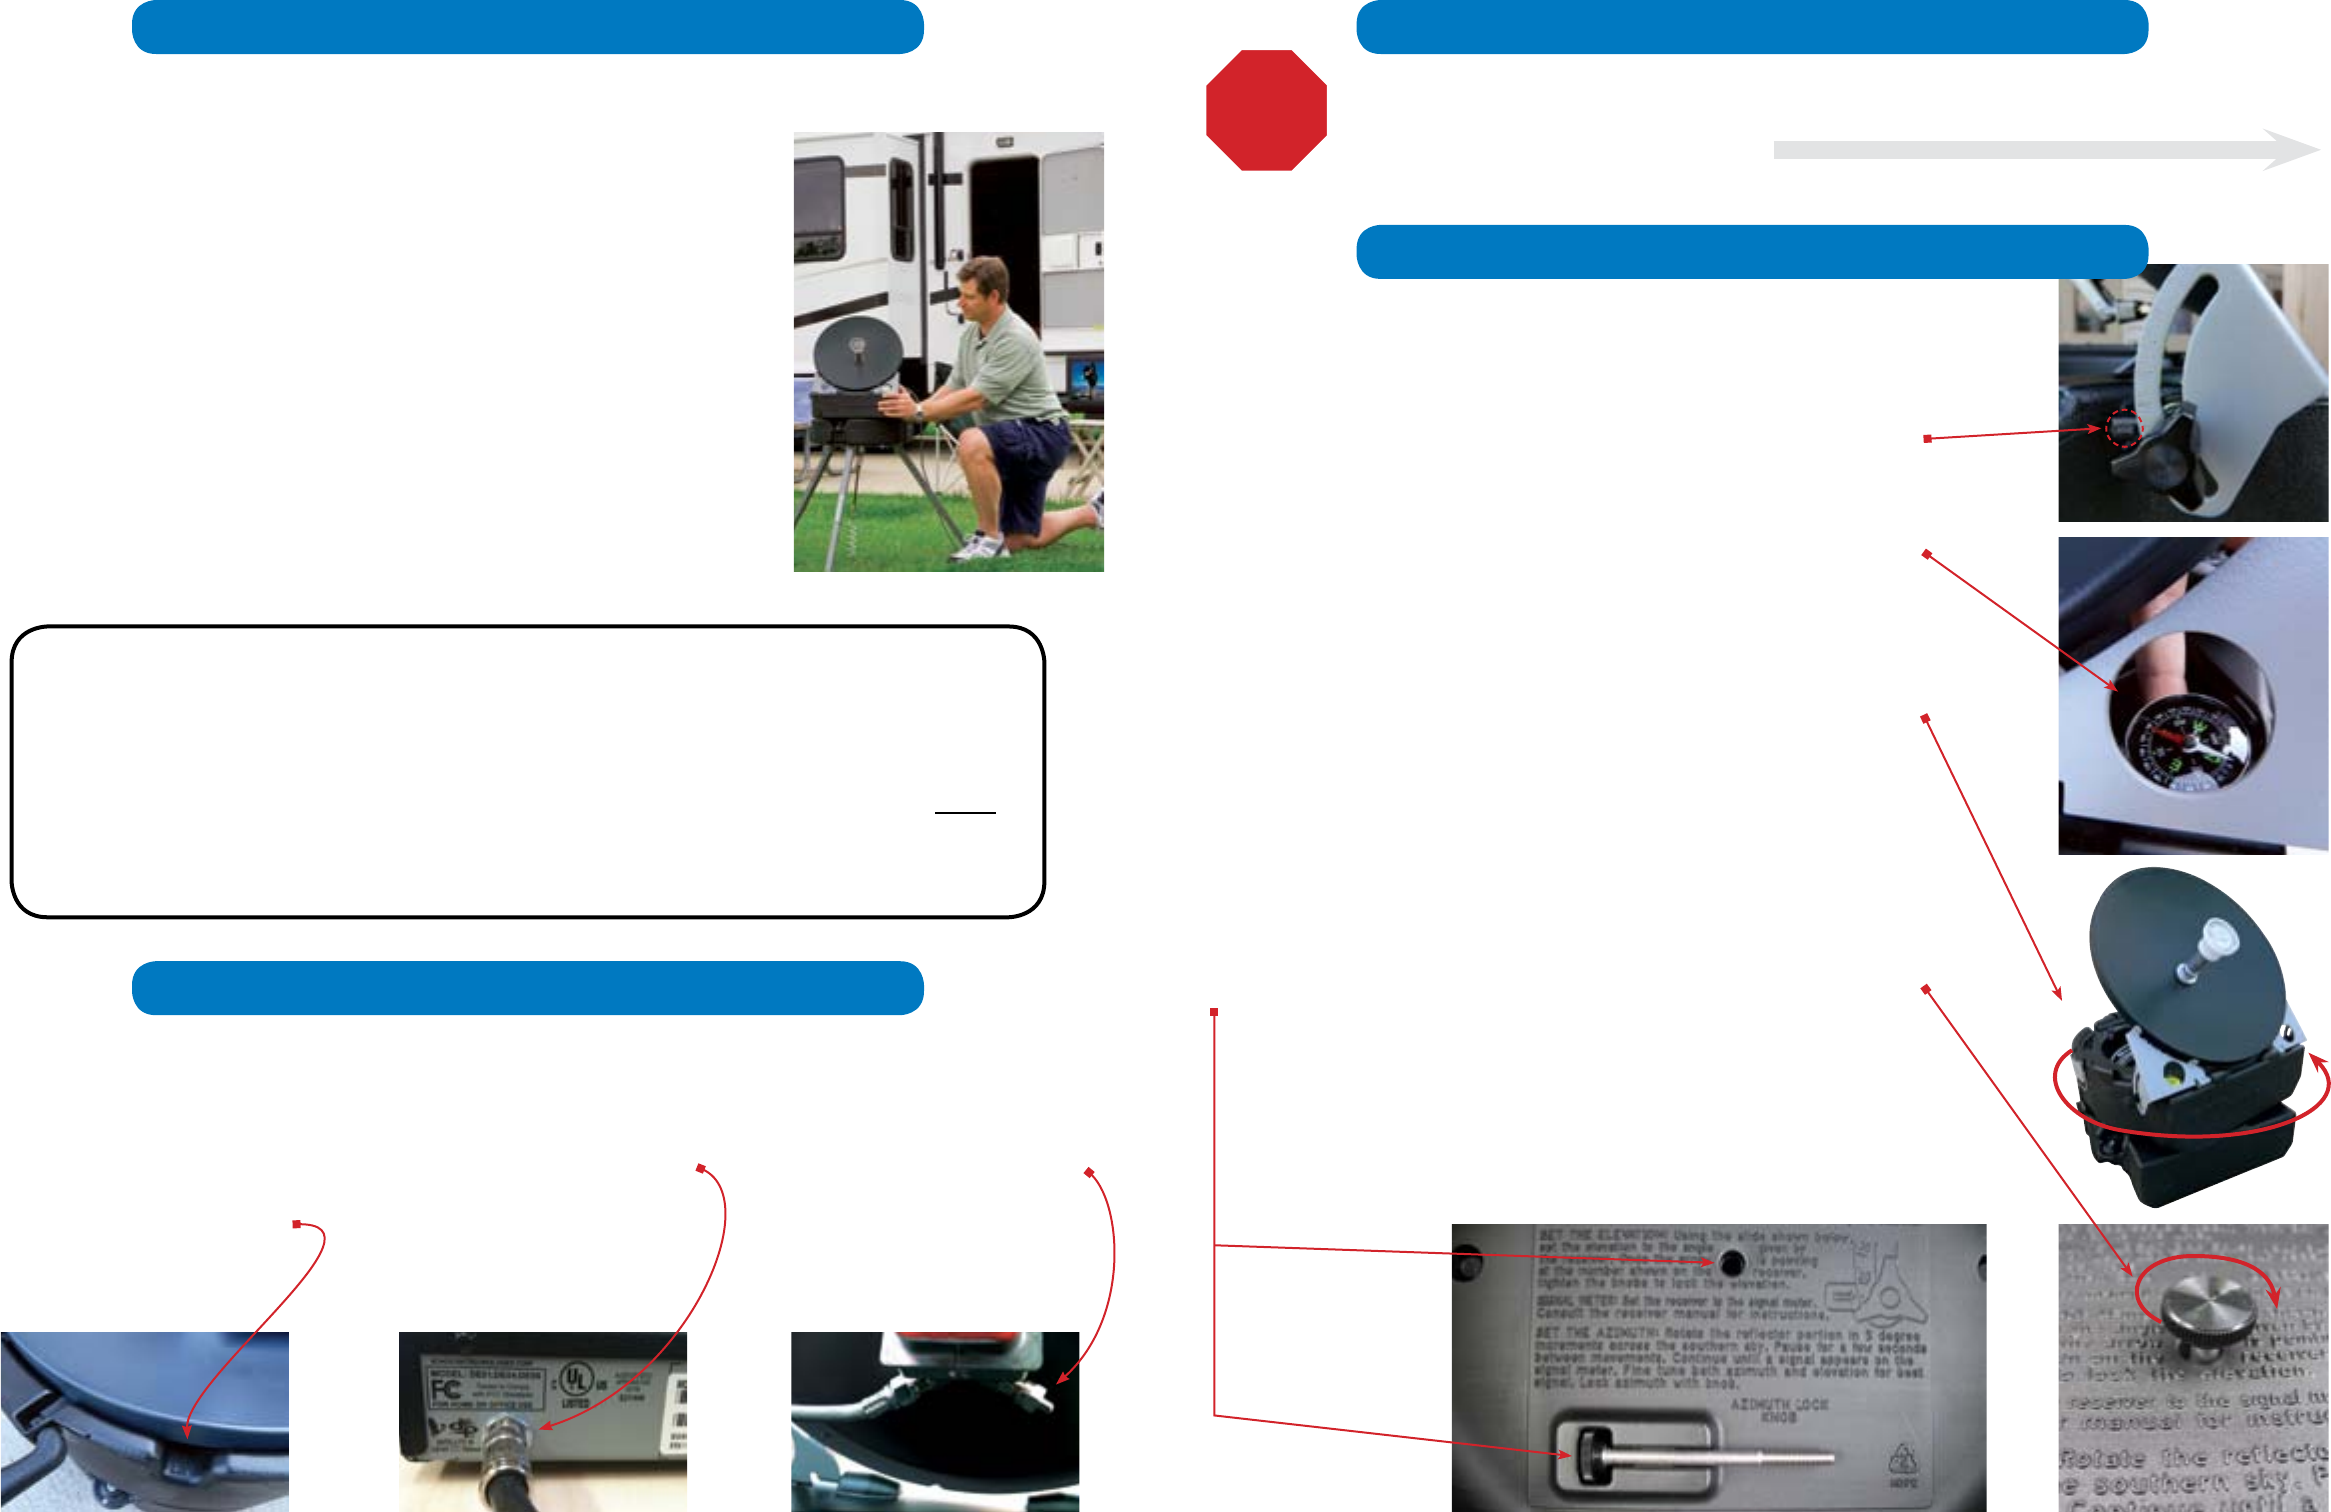
Loosen the Elevation Adjustment Knobs
and raise the reflector up enough to
access the coaxial cable. Do not lift from
the LNB, use the notch on the edge of
the reflector near the handle to lift the
reflector.
The Coaxial Cable needs to run DIRECTLY
to the Satellite In port on the back of
the Satellite Receiver.
*If wiring through a Wall-Plate on the side of
a coach, consult Using Outside Receptacle
steps on the back of this guide.
To add a 2nd Coaxial cable, just remove
the cap on the 2nd output of the LNB
(behind the reflector) and connect a 2nd
coaxial cable (sold separately) to the LNB.
Also run that coaxial cable directly to
your 2nd satellite receiver (or 2nd input on
Dual Tuner)
.
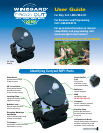
1) Setting Up the Carryout MP1
The satellite receiver powers the LNB by sending voltage up the coax cable. This voltage can damage many cable TV systems. Therefore,
many things are designed to block this voltage, items such as splitters, video switches and many wall plates will stop the satellite signal.
For this reason, it is important to run the cable directly from the satellite receiver to the MP1 when searching for a signal.
•Remove the Azimuth lock knob and reinsert it into its holding slot inside the top half
of the MP1 case.
•Disconnect the coax from the receiver and carefully coil the coax back into the
space under the reflector.
•Loosen the elevation knobs and lower the reflector.
•Tighten the elevation knobs to lock the reflector in place.
•Remove the twist off cap and empty the water or sand from the top half of the unit.
•Replace the cap and remove any stakes holding the unit down.
•Set the top half on the base and lock the two halves together.
When Packing Up the MP1
IMPORTANT:
When preparing the
Carryout
®
MP1
™
for storage,
be sure to tighten both
elevation knobs to lock the
reflector in the DOWN
position. This will help
protect it while you travel.
The next thing to be aware
of is traffic. How likely is
someone to disturb the MP1
by tripping over or driving
into it? Does the coax cable
cross a walking path or will
people drive over the cable?
Finally, try to select a
location that will allow the
MP1 to sit level. The closer
the unit is to level, the more
accurate the look angles are
for each search. This makes
finding a satellite much
easier.
Separate the two halves of the MP1. For increased stability, remove the twist off cap located on
the top half of the MP1 and fill with water or sand. This will provide enough weight for the unit to
stay on signal in most conditions. However, it is recommended that the unit be filled with sand in
situations where the temperature could stay below freezing for more than a few hours. The case can
be damaged if water is allowed to freeze inside the unit.
Place the TOP half with the reflector facing UP on the base. DO NOT use the LNBF or the
reflector as a handle. Lift the reflector by placing a finger in the notch at the edge of the reflector.
Continue to step 2 - Wiring the Carryout MP1.
The most important factor in finding the satellite is the location of the antenna.
This is because the satellite signal
will not pass through solid objects.
Trees, plants, people, vehicles,
buildings, signs and even glass will
all block the satellite signal. Because
of this, it is vital to select a location
with a clear, unobstructed view of
the southern sky.
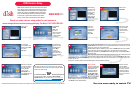
3) Finding the Azimuth and Elevation
You should now have your elevation and azimuth based on the zip code of your
current location. The first angle to set is the elevation.
Elevation
Loosen the elevation adjustment knobs and raise the reflector to the specified
elevation angle. Use the arrow to the left of the knob to know where the elevation
is set. Re-tighten the knobs to lock in the elevation.
Azimuth
It is best to remove the compass from the base and hold it behind and away from
the dish to get the azimuth angle.
Align the compass so that the RED arrow points towards the “N” (north) on the
compass. Find your specified azimuth angle using the numbers on the outside of
the compass. This will give you a general starting place.
Slowly rotate the dish by moving it 3 degrees at a time and then pausing, while
monitoring the signal meter on the screen. It is usually best to scan a wider area
until you determine exactly where the satellite is.
If you do not come across a satellite on your first attempt, you may need to
change the elevation angle up/down a couple degrees. Continue to make SLOW
scans of the sky until you have located the satellite.
Once you find the satellite, make slight adjustments to both elevation and azimuth
to get the signal as strong as possible.
Once the satellite is located, insert and tighten the azimuth lock knob to secure
the unit from rotating side-to-side.
Now return to where you left off in the Receiver Setup section of this guide to
finish the setup (step 11 for DISH or step 10 for DIRECTV).
Before Pointing the Carryout MP1, you will need the elevation and azimuth angles from your receiver.
Please proceed to your programming choice (DISH
®
or DIRECTV
®
) on the following Receiver Setup pages
and return to this page at the specified step.
STOP
4) Pointing the Carryout MP1