6
Setting Up
Power Supply
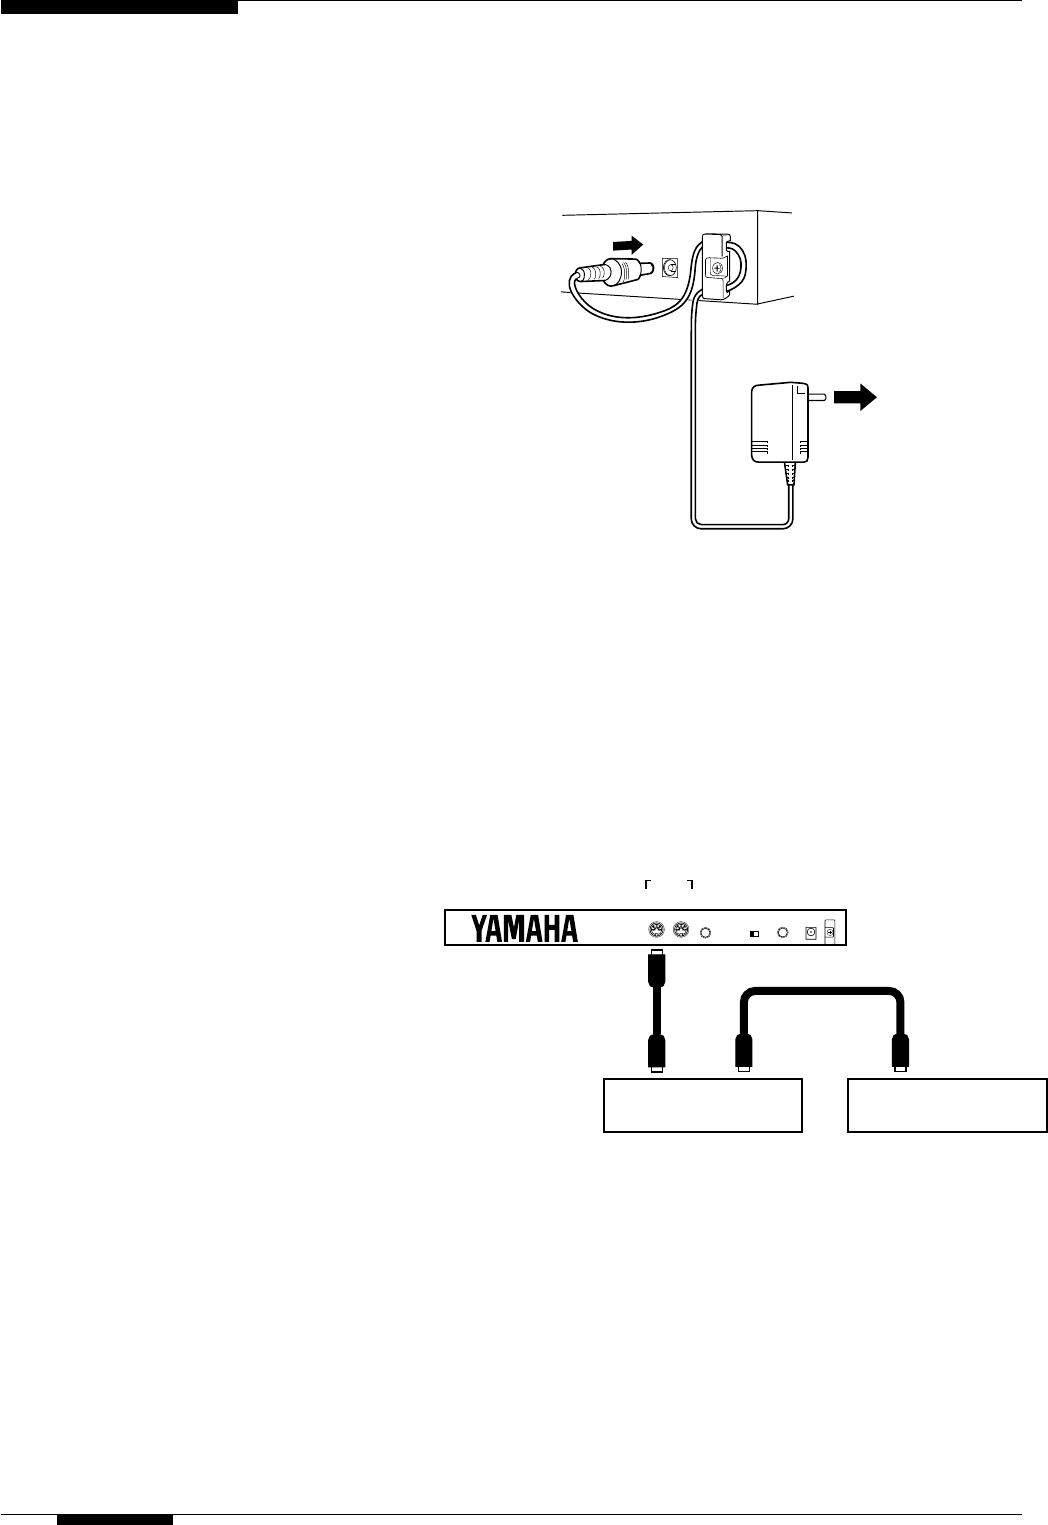
Plug the DC output cable from the AC adaptor into the
DC IN jack on the rear panel, then plug the adaptor into a
convenient wall AC power socket. It is also a good idea
to clip the adaptor’s DC cable into the cable clip on the
G50 rear panel to minimize the possibility of accidentally
unplugging the cable during operation.
■
CAUTION
• Turn your tone generator on before turning on the G50.
This is necessary to ensure that the initial pitch bend, tune,
and other setup parameters transmitted by the G50 at
power-on are received by the tone generator.
• Do not attempt to use an AC adaptor other than the
supplied unit or an appropriate replacement provided by
your Yamaha dealer to power the G50. The use of an
incompatible adaptor may cause irreparable damage to the
G50, and might pose a serious shock hazard!
• Be sure to unplug the AC adaptor from the AC mains socket
when the G50 is not in use.
Tone Generator Connection & MIDI Setup
The G50 can drive just about any external tone
generator or synthesizer, although Yamaha
particularly recommends the MU80 or MU50
XG (GM compatible) tone generators for out-
standing AWM sound, or the VL1-m Version 2 or
VL70-m if you want the extraordinary sound of
Yamaha’s revolutionary Virtual Acoustic Synthe-
sis tone generation system.
Connect the G50 MIDI OUT connector to the
MIDI IN connector of a single external device,
or the first in a “chain” of devices you want to
control. The MIDI THRU connector of the first
device in the chain should then be connected to
the MIDI IN connector of the second device, and
so on. See below for details on setting the G50
MIDI transmit/receive channel(s).
■
NOTES
• Always use high-quality MIDI cables when connect-
ing MIDI devices, and avoid cables longer than
about 15 meters — longer cables can pick up
electrical noise that can cause data errors.
• Keep to turned the power off before the install-
ing.
MIDI
THRU
MIDI
IN
MIDI
IN
MIDI
OUT IN
G50
1st MIDI Device 2nd MIDI Device
Setting Up
D
C
-IN
DC-IN
PA-3B
AC Power Socket


