10 En
Connections
HDMI jack
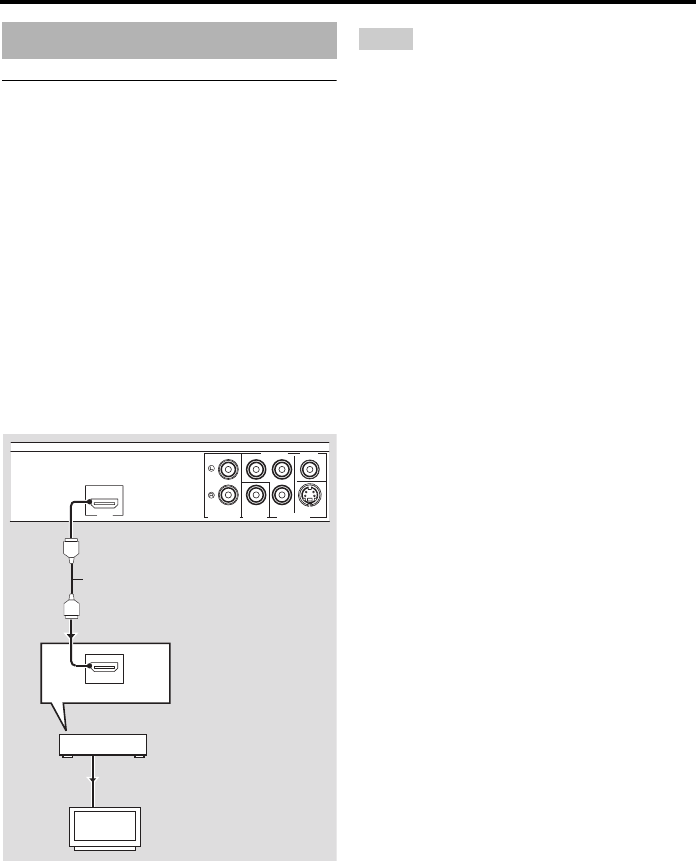
HDMI provides high quality digital audio and
video on a single connection.
Connect the HDMI jack of this unit to an
HDMI input jack of your AV receiver, and
then to that of your TV using a commercially
available HDMI cable.
If your receiver does not have an HDMI input
jack, you can achieve a better video image by
connecting the HDMI jack of this unit directly
to the HDMI input jack of your TV.
This unit can display High-Definition JPEG
images (720p or 1080i) when you connect this
unit to an HDTV via the HDMI jack. For
details, see “HD JPEG” on page 31.
• You need to set [HDMI AUDIO] (see page 26)
and [HDMI VIDEO] (see page 30).
• You need to make an appropriate audio
connections if the connected component does not
output audio signals (see “Audio connections” on
page 8).
• This unit is not compatible with HDCP-
incompatible HDMI or DVI components.
• You need a commercially available HDMI/DVI
conversion cable when you connect this unit to
other DVI components. In this case, the HDMI
jack of this unit does not output any audio
signals.
• Depending on the connected DVI component,
black and white in the image may not be distinct.
In that case, adjust the picture setting of the
connected DVI component.
• Do not disconnect or turn off the power of the
HDMI/DVI component connected to the HDMI
jack of this unit while data is being transferred.
Doing so may disrupt playback or cause noise.
• When connecting an HDMI component, refer to
the manual supplied with your component.
HDMI connection
AUDIO OUT
COMPONENT VIDEO
HDMI
S VIDEOCOAXIAL
P
R
PB
Y
VIDEO OUT
DIGITAL OUT
HDMI IN
HDMI OUT
HDMI IN
HDMI cable
TV
This unit
AV receiver
Notes


