107 Speech Intelligibility
STI-PA results screens
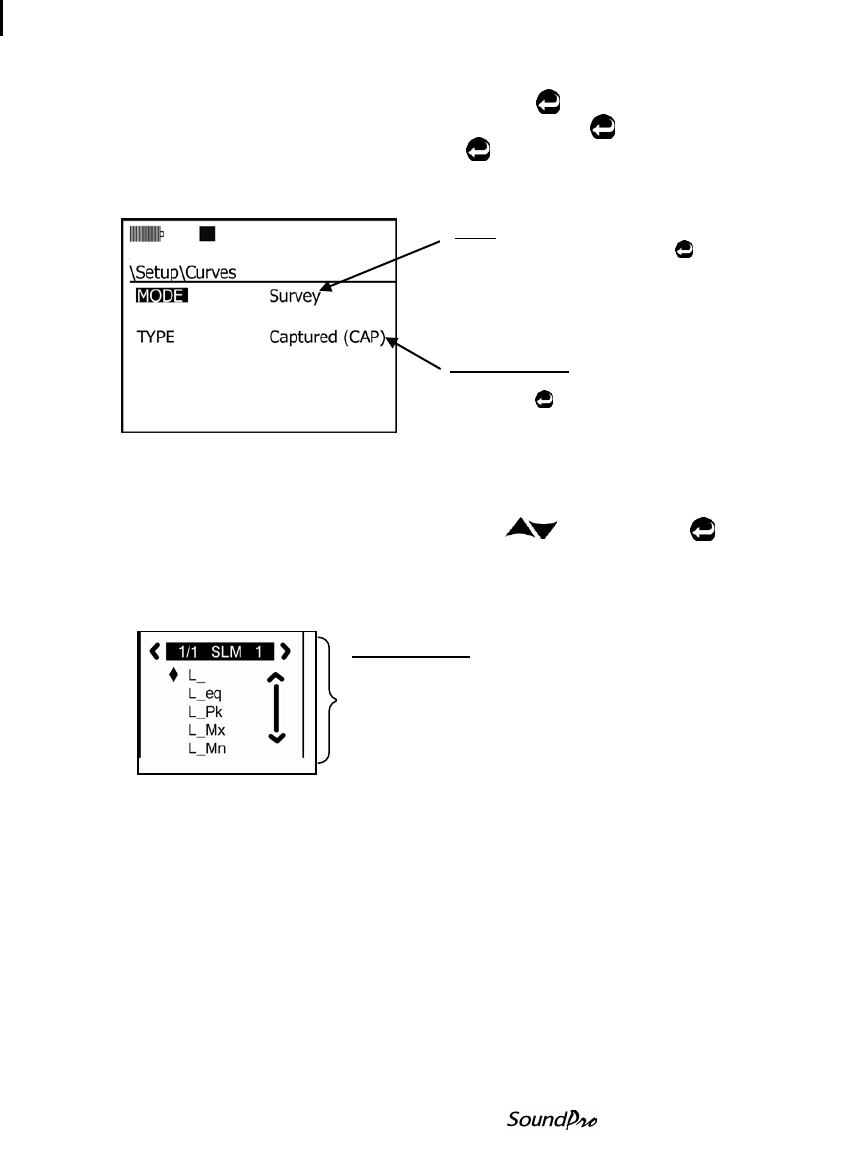
2. Setting up Curves: Select Setup and press Enter .
• Select Options (via the Down Arrow and press Enter ).
• Curves will be highlighted, press Enter .
• Choose Survey as the Mode and Captured (CAP) as the Type and then
press On/Off/Esc repeatedly to return to the Start screen.
Figure 6-25: Captured curve/background noise setup for STI-PA testing
3. Capturing curve/background noise: (See Figure 6-26 below.)
• Select View Session by pressing Up/Down and press Enter .
• Note: it is recommended to capture either the SPL or the Leq level. To
change the measurement displayed, press the Lookup softkey and select
either L_ or L_eq. (For more information, please see “Changing displayed
measurements”.)
• In the broadband/RTA screen, press Altf key. (This will expand the softkeys
and Cap will appear.)
• When the level is stabilized, press the “Capture” key. (See Figure 6-26.)
4. Optional: To capture additional background levels, change the 1
st
softkey to
either (Cap-1, Cap-2, Cap-3, Cap-4) and then press the Capture (2
nd
) softkey.
Repeat this step as needed. (You can store and apply up to 4 background noise
SPL levels.)
To select the Type field press down arrow.
Press Enter repeatedly to select
Captured (CAP).
When highlighted, press Enter
continuously to toggle through the
menu options and select Survey.
NOTE: Survey/Eval. mode will
compute the same results.
This appears when lookup softkey is
pressed.
• The diamond symbol u indicates
which measurement is selected.
(L_ denotes SPL). Press Enter key
to confirm new selection.
