6
Viewing Image Location Information
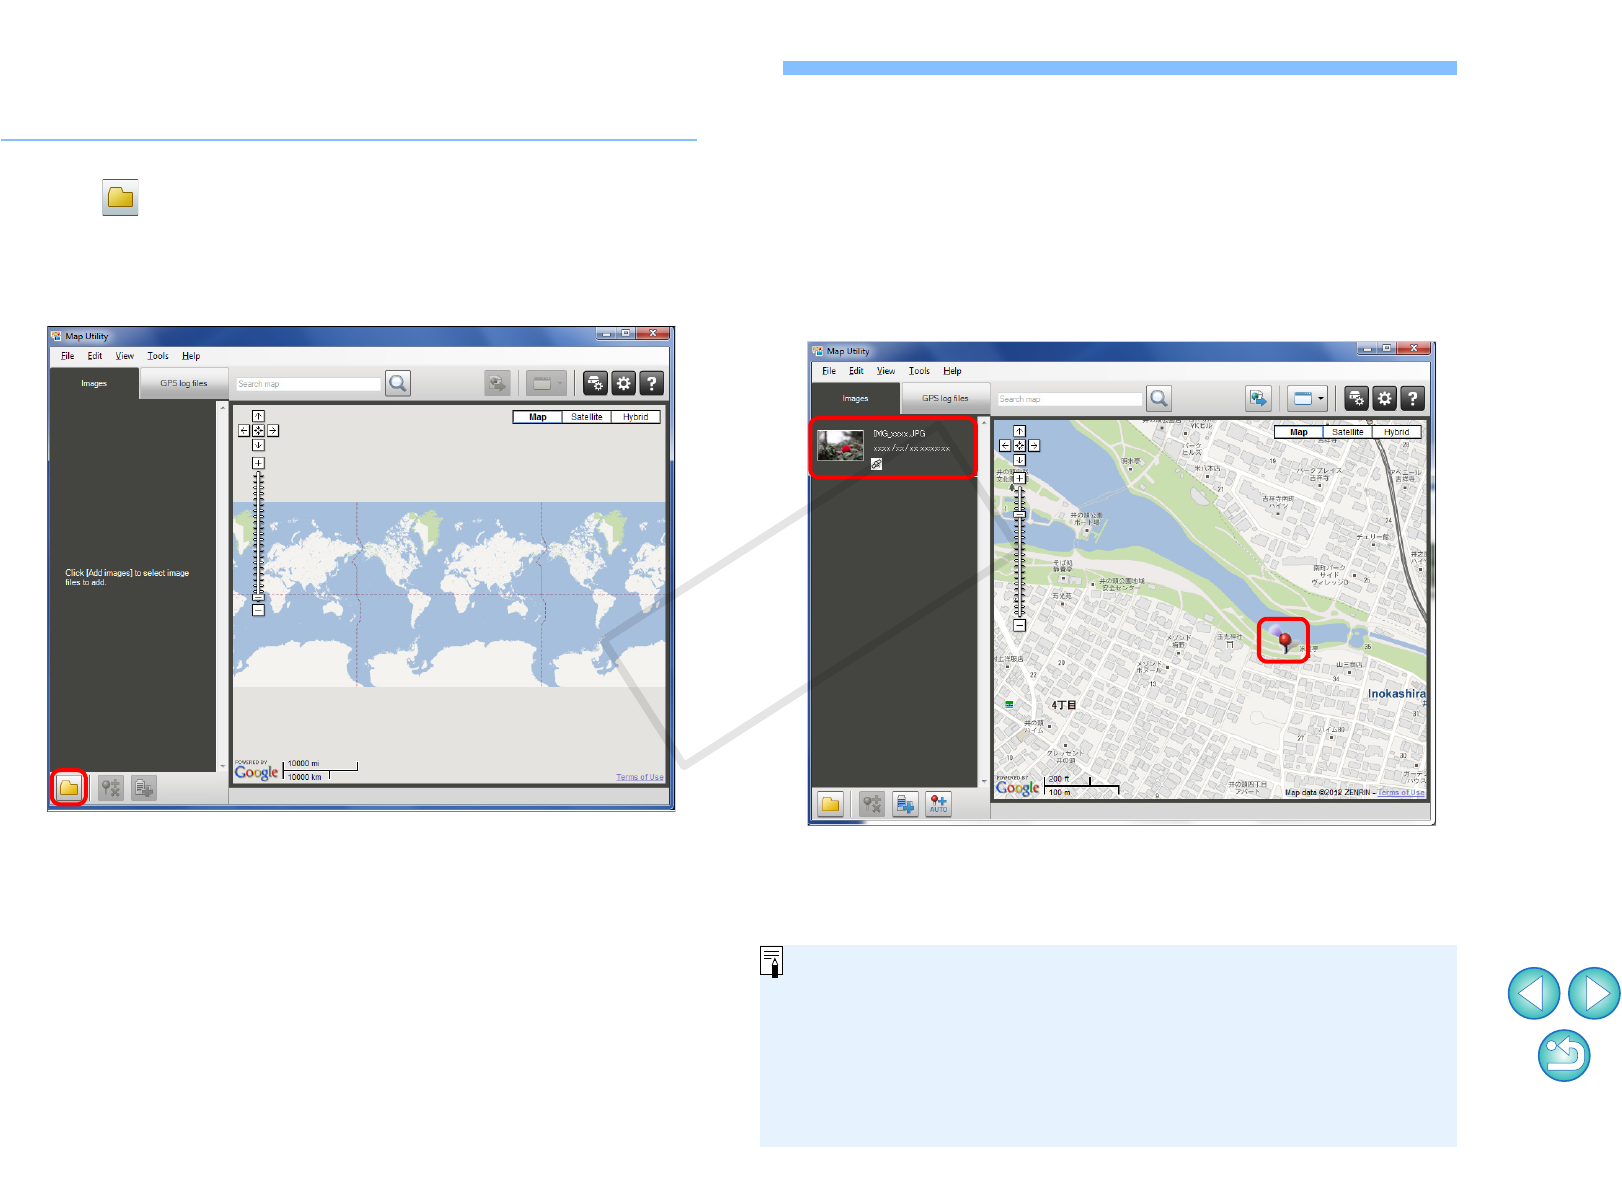
Import images into Map Utility and view location information.
1
In the main window, select the [Images] tab and click
the [ ] button. On the screen displayed next, select
image files by specifying the storage location or
entering the file names, and then click the [Open]
button.
➜Image files are imported and added to the image list on the
[Images] tab. Image shooting locations are indicated by red pins
on the map.
● To view images on the map with their location, click an image file
on the image list or a pin on the map.
● Images on the image list may be tagged with times that match
the times for GPS log files on the GPS log file list. In this case,
clicking a pin will show the route the GPS log file has traveled.
● For image files tagged with the shooting direction, pins indicating
the shooting directions are displayed.
● To magnify an image, double-click the image file on the image list
or the thumbnail image shown on the map. For movies (MOV
movie files), a separate window will open for playback. For
movies (MOV movie files), a separate window will open for
playback.
●
To view location details of images, select image files on the image
list and select [Display location information details] in the [View]
menu.
Map data ©2012 ZENRIN -
● You can add image files to the image list by directly dragging and
dropping them on the list.
● You can also import image files by selecting the image files in
Digital Photo Professional (version 3.11 or later) and then starting
up Map Utility from Digital Photo Professional.
• Map Utility maps are not displayed unless your computer is connected
to the Internet.


