93
Before Use
Basic Guide
Advanced Guide
1
Camera Basics
2
Auto Mode
3
Other Shooting Modes
5
Playback Mode
6
Setting Menu
7
Accessories
8
Appendix
Index
4
P Mode
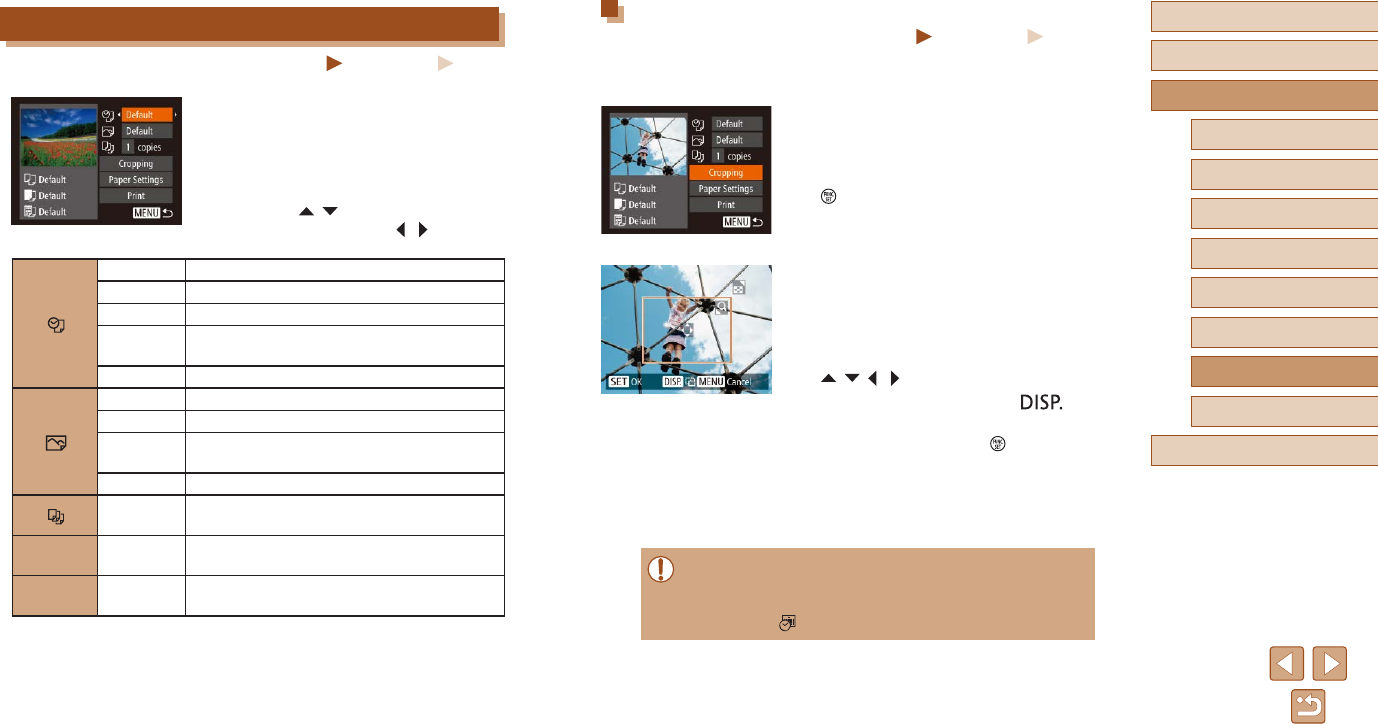
Cropping Images before Printing
Still Images
Movies
By cropping images before printing, you can print a desired image area
instead of the entire image.
1
Choose [Cropping].
● After following step 1 in “Conguring Print
Settings” (
=
93) to access the printing
screen, choose [Cropping] and press the
[ ] button.
● A cropping frame is now displayed,
indicating the image area to print.
2
Adjust the cropping frame as
needed.
● To resize the frame, move the zoom
lever.
● To move the frame, press the
[
][ ][ ][ ] buttons.
● To rotate the frame, press the [
]
button.
● When nished, press the [
] button.
3
Print the image.
● Follow step 7 in “Easy Print” (
=
92)
to print.
● Cropping may not be possible at small image sizes, or at some
aspect ratios.
● Dates may not be printed correctly if you crop images shot with
[Date Stamp
] selected.
Conguring Print Settings
Still Images
Movies
1
Access the printing screen.
● Follow steps 1 – 6 in “Easy Print”
(
=
92) to access this screen.
2
Congure the settings.
● Press the [ ][ ] buttons to choose an
item, and then press the [ ][ ] buttons to
choose an option.
Default Matches current printer settings.
Date Prints images with the date added.
File No. Prints images with the le number added.
Both
Prints images with both the date and le
number added.
Off
–
Default Matches current printer settings.
Off
–
On
Uses information from the time of shooting to
print under optimal settings.
Red-Eye 1 Corrects red-eye.
No. of
Copies
Choose the number of copies to print.
Cropping
–
Specify a desired image area to print
(
=
93).
Paper
Settings
–
Specify the paper size, layout, and other
details (
=
94).


