28
46-inch Decks
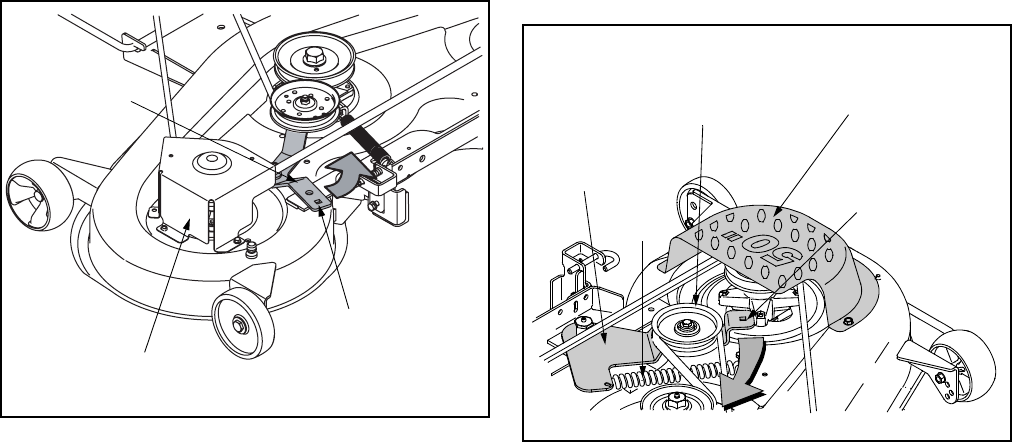
• Insert a 3/8”-drive ratchet wrench (set to loosen)
into the square hole found in the idler bracket on the
left side of the deck’s surface. See Figure 25.
Figure 25
• Grasp the ratchet’s handle and pivot it toward the
tractor’s right side to relieve tension on the belt.
• With belt tension relieved, carefully remove the
belt from around the left-hand spindle pulley.
50-inch Decks
• To ease in removing the belt in later steps, loosen,
but do not remove, the bolt which secures the
pivoting idler pulley to the idler bracket.
See Figure 26.
Figure 26
• Insert a 3/8”-drive ratchet wrench (set to tighten)
into the square hole found in the idler bracket on the
left side of the deck’s surface. See Figure 26.
• Grasp the ratchet’s handle and pivot it toward the
tractor’s right side to relieve tension on the belt.
• With belt tension relieved, carefully remove the
belt from around the left-hand spindle pulley.
All Models
IMPORTANT:
Carefully allow the ratchet to pivot
rearward before removing it from the square hole.
• Remove the deck belt from around all pulleys,
including the deck idler pulley(s) and the electric
PTO clutch.
NOTE: The idler pulley(s) may have to be loosened,
but not removed, in order to remove the belt from
around them.
• Route the new belts (deck belt first) as shown on
the following page.
• Remount the belt guards removed earlier.
3/8” Square Hole
Belt Guard
Idler Bracket
3/8” Square Hole
Spring
Belt Guard
Idler Bracket
Pivoting Idler Pulley


