ENGLISH
30
USING THE ON-SCREEN
DISPLAY
18
(1) Operating using the disc information OSD
2 Use this function to display and change information on the
disc (titles, chapters, time, etc.)
ENTER
MODE
MENU
FUNCTION
DISPLAY RETURN INPUT MODE SURROUND
TV/VCR
CH
VOL
SLEEP
ON
OFF
2
3
4
56
8
9
CLEAR
CALL
0
+10
7
1
VCR POWERVCR POWER
TV POWERTV POWER
TV
VCR
POWERPOWER
CH
CH
CH
3
2
1
Before operating the
remote control unit!
• Be sure to set the
DVD mode using
the remote control
mode selector
buttons.
DVD
1
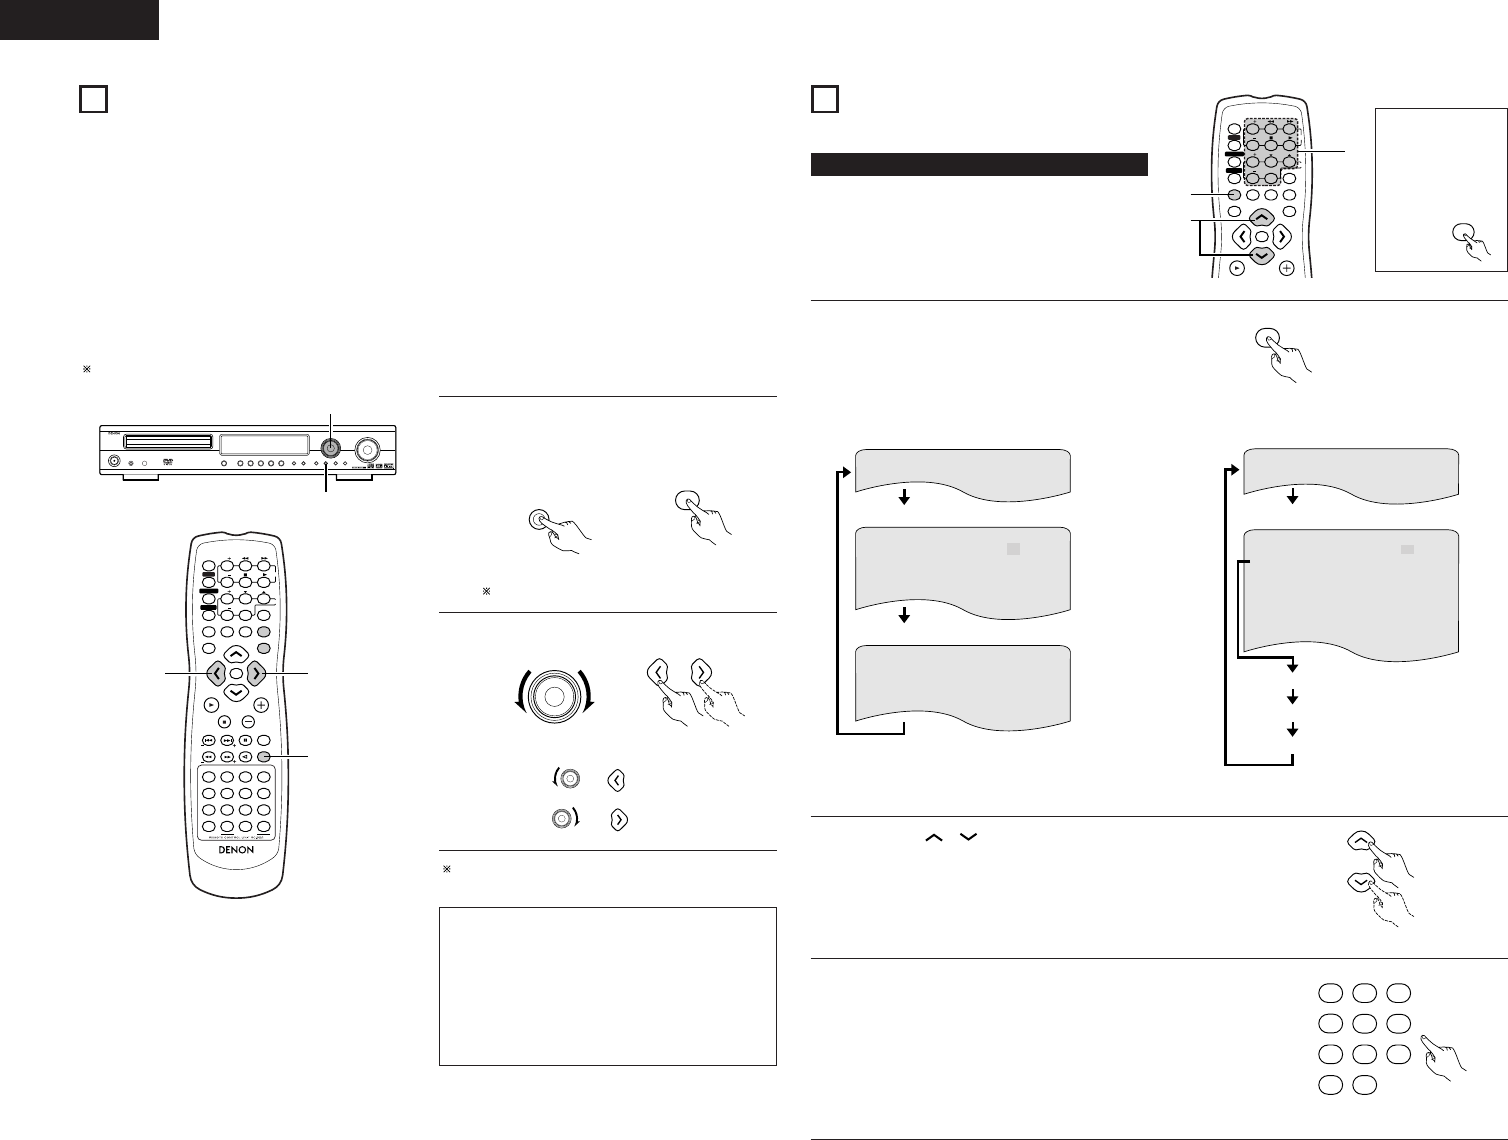
In the play mode, press the DISPLAY button.
• The On-Screen Display appears.
• The picture on the TV screen switches each time the
button is pressed.
• The items displayed differ from disc to disc.
Example: For DVDs
Remote control unit
Example: For video and music CDs
S I NGL E E LAPSED 0 1 : 26
PLAY MODE NORMAL
A–B REPEAT OF F
AUD I O MODE L / R
REPEAT OFF
TRACK 02 / 10
S I NGL E REMA IN 0 3 : 1 7
TOTAL ELAP SED 06 : 1 5
TOTAL REMAIN 3 2 : 05
• Normal playback screen
• Disc information screen
• For the on-screen display for video CDs and music
CDs, only the disc time changes.
T I TL E 0 1 / 05
CHAPTER 0 2 / 0 8
T I TL E ELAPSED 0 : 26 : 1 1
P I CTURE MODE STANDARD
SUBT I TLE 01 / 0 3 ENGL I SH ON
AUD IO 01 / 03 ENG
DOL BY D3 / 2/.1
• Normal playback screen
• Disc information screen
• Disc information screen
2
Use the and , cursor buttons to select the item you wish to
change.
• The selected item is displayed with a yellow frame.
q For DVDs
“TITLE”, “CHAPTER”, “TITLE ELAPSED” can be selected.
w For video and music CDs
“TRACK” can be selected.
Remote control unit
3
q Changing the elapsed time
Input using the number buttons, then press the ENTER button.
Example: For 1 minute 26 seconds / “00126”
w Changing the title, track or chapter
• For DVDs
Input using the number buttons, then press the ENTER button.
(For some discs it is not possible to change the title or chapter.)
• For video and music CDs
Input using the number buttons. Playback starts from that track.
Remote control unit
ON-SCREEN DISPLAY
17
• The ADV-1000 is equipped with an on-screen display (“OSD”) function that displays various types of information on the surround
functions and the disc on the screen when the function is set to DVD.
q Setup screen
• This is used to select the speaker system being used (quick system setting) and to change the function of the ADV-1000
and various settings when playing discs (system setting change and DVD setting change).
• The setup screen can be used regardless of the currently set function, but it cannot be operated while a disc is playing. Set
the stop mode first.
w Display of disc information
• When the function is set to DVD, the OSD displays information on the disc and appears when various playback functions
are operated.
e Display of surround function
• When the function is set to DVD, information on the surround amplifier is also displayed and can be operated.
• The OSD for the surround function (AV OSD) can be turned on and off.
(The OSD for the setup screen and DVD disc information cannot be set to
“
OFF”.)
Set to “ON” upon shipment from the factory.
VOLUME
ENTER
BAND
MODE
MENU
FUNCTION
DISPLAY RETURN INPUT MODE SURROUND
TOP MENU
SETUP
SDB/TONE
MUTE
SURR.PARA
SUB TITLE ANGLE
AUDIO
SHIFT
CH.SELECT
CH
T.TONE
TU
PROG/DIRECT
REPEAT A-B
REPEAT RANDOM
DVD
TV/VCR
CH
VOL
SLEEP
ON
OFF
REMOCON MODE
2
3
4
56
8
9
CLEAR
CALL
0
+10
7
1
STATUS
CDR/MD/TAPE
TUNER/TV/VCR
VCR POWERVCR POWER
TV POWERTV POWER
TV
VCR
NTSC/PAL
MEMO
POWERPOWER
CH
CH
CH
1
2
2
1
With the function set to DVD, press the STATUS button
for at least 2 seconds.
•“AV OSD ON
0:1 OFF” is displayed.
Remote control unit Remote control unit
2
Turn the AV OSD on or off.
Main unit Remote control unit
The current setting is displayed in green.
or :ON
or :OFF
After several seconds, the display turns off and the setting
is made.
NOTES:
• Depending on the disc being played, the picture may be
disturbed when the OSD turns on. This is not a
malfunction.
If this should happen, set the AV OSD to “OFF”.
• The OSD is also output to the VCR video output
terminals.
Do not perform setup or OSD operations while
recording with a video deck.


