6
TV componentsDX-L24-10A
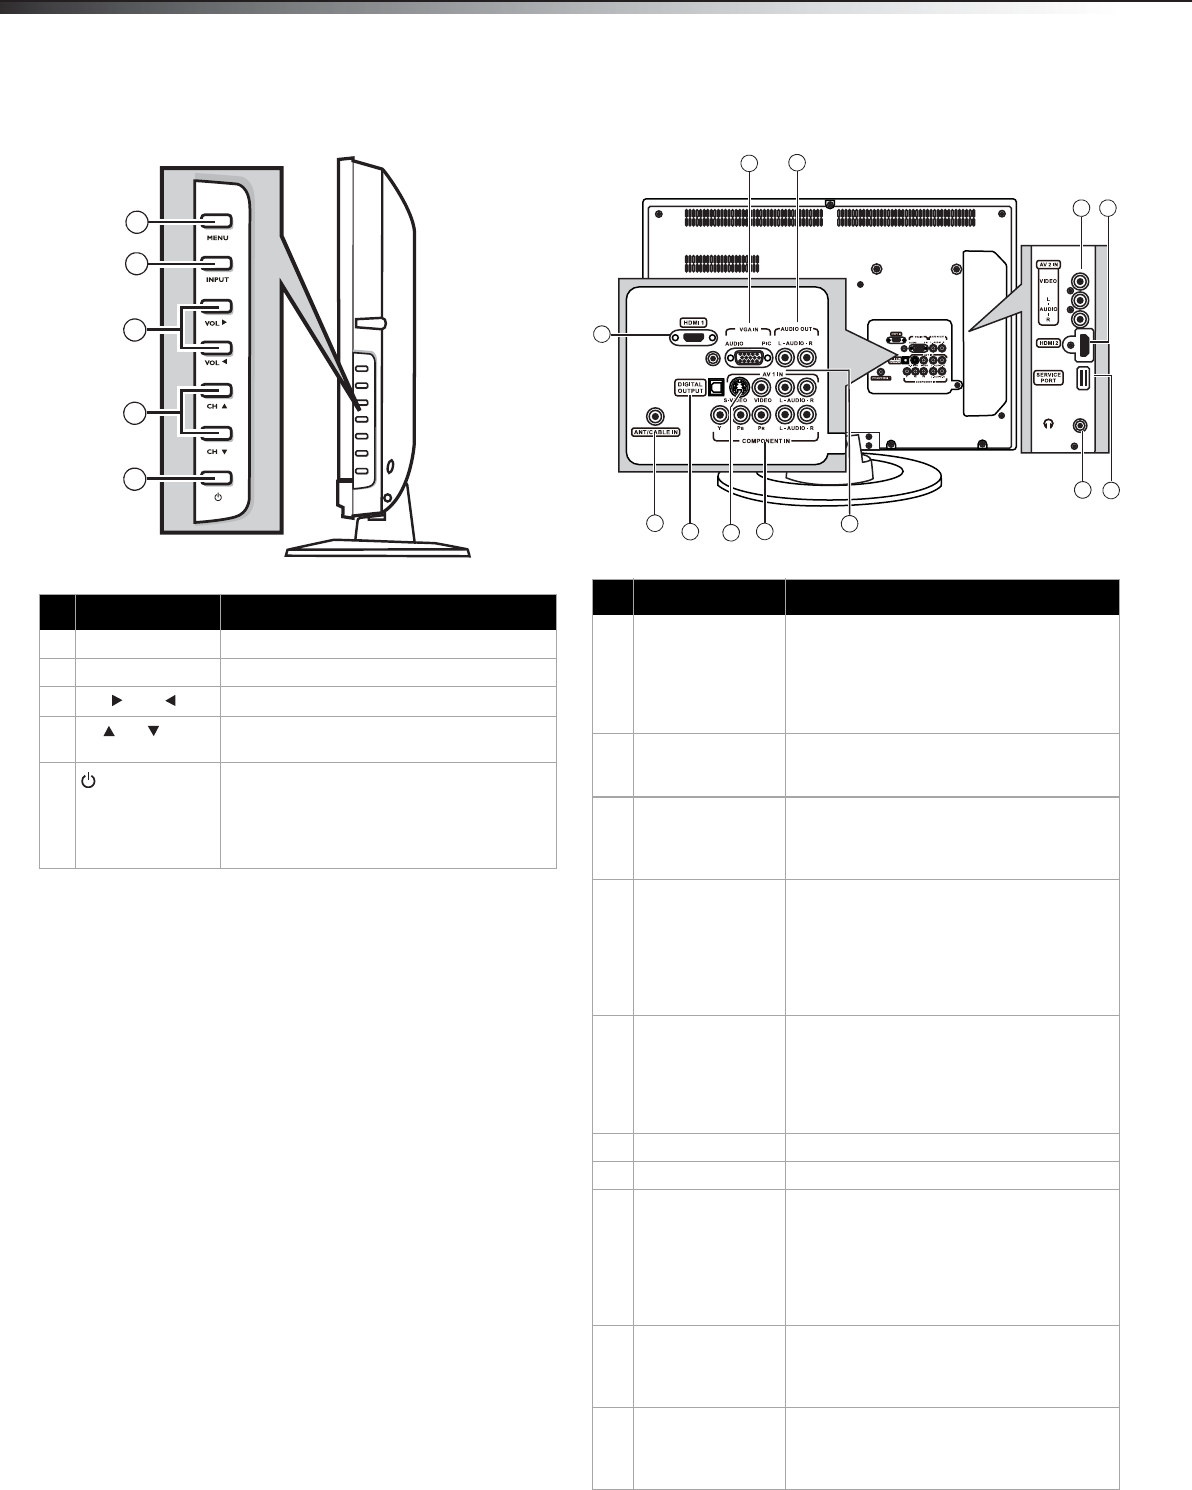
Side Back and side
# Component Description
1 MENU Press to open the on-screen menu.
2 INPUT Press to select the video input source.
3
VOL /VOL
Press to increase or decrease the volume.
4
CH /CH
Press to go to the next or previous channel
in the channel list.
5
(Power) button
Press to turn on your TV, or wake the TV up
from DPMS mode. Press again to put your
TV in standby mode.
For more information, see “Turning your TV
on or off“on page 12.
1
2
3
4
5
## Component Description
1 HDMI1 jack Connect an HDMI device, such as a cable
box or DVD player, to this jack. An HDMI
cable carries both video and audio, so you
do not need to make an audio connection.
For more information, see “Connecting an
HDMI device” on page 10.
2VGA IN AUDIO/
VGA IN PIC jacks
Connect a computer to these jacks. For
more information, see “Connecting a
computer” on page 11.
3 Audio out jacks Connect an analog sound system, such as
an analog audio amplifier, to these jacks.
See “Connecting an audio receiver or Dolby
Digital 5.1 sound system” on page 11.
4 AV2 IN jack Connect an AV device (video and audio) to
these jacks. Match the color of the
connectors to the color of the jacks (yellow
for video, red for audio right, and white for
audio left). For more information, see
“Connecting a camcorder or game” on
page 10.
5 HDMI2 jack Connect an HDMI device, such as a cable
box or DVD player, to this jack. An HDMI
cable carries both video and audio, so you
do not need to make an audio connection.
For more information, see “Connecting an
HDMI device” on page 10.
6 Service port For software update only. Do not use.
7 Headphone jack Plug headphones into this jack.
8 AV1 IN jacks Connect an AV device (video and audio) to
these jacks. Match the color of the
connectors to the color of the jacks (yellow
for video, red for audio right, and white for
audio left). For more information, see
“Connecting a camcorder or game” on
page 10.
9COMPONENT IN
jacks
Connect a component video device to
these jacks. For more information, see
“Connecting a component video device” on
page 11.
10 S-VIDEO jack Connect an S-Video device to this jack.
S-Video does not carry an audio signal, so
you will need to connect audio cables from
the device to the AV1 audio jacks.
12
3
6
7
9
10
11
1
2
4
8
5
DX-L24-10A_10-0348.book Page 6 Monday, March 22, 2010 4:26 PM


