Part Names and Functions
58
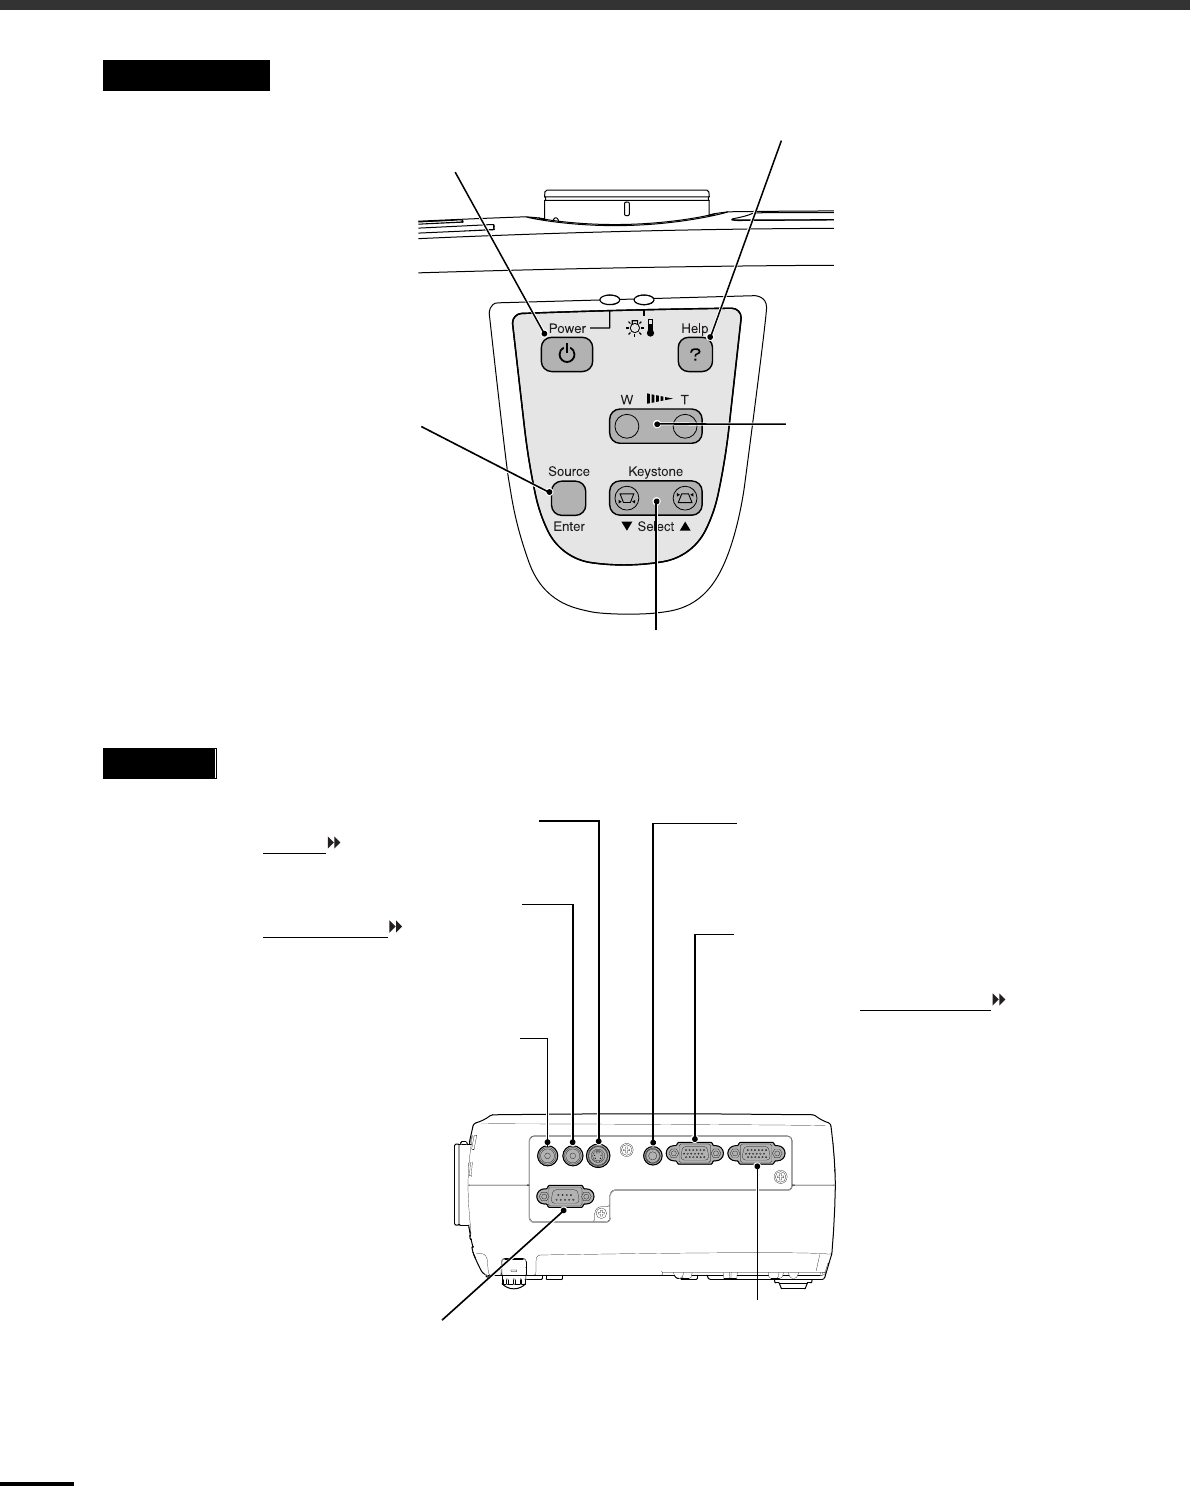
Control Panel
Left Side
•
[Power] button (p.9
,
10)
Turns the projector power on and off.
•
[Source] button (p.9)
Switches the input source
between the Computer/
Component Video port, S-Video
port and Video port each time the
button is pressed.
When pressed while a help menu
is displayed, it accepts the menu
item that is currently selected.
(p.34)
•
[Keystone] button (p.14)
Press to correct keystone distortion in the image.
When pressed while a help menu is displayed, it
selects items in the menu. (p.34)
•
[Help] button (p.34)
Displays the online help menu.
•
Zoom button (p.12)
Press to adjust the size of the
projected images.
When pressed to the W side, the
image becomes larger.
When pressed to the T side, the
image becomes smaller.
•
Video port (
Quick Setup
poster)
Inputs composite video signals to the
projector from other video sources.
Use the RCA video cable for this
connection.
•
S-Video port (
Quick Setup
poster)
Inputs S-Video signals to the projector
from other video sources.
•
Control (RS-232C) port
Connects the projector to a
computer using an RS-232C cable.
This port is for service use and
should not be used by the customer.
•
Audio port (Quick Setup poster)
Inputs audio signals from a component
video or computer equipment.
Connect using a stereo mini jack.
•
Monitor Out port (
Quick Setup
poster)
Outputs the projected analog video signal from
a computer to an external monitor. This feature
is not available for video equipment signals.
The connection surface is colored black.
•
Computer/Component Video port
(
Quick Setup
poster)
Inputs analog video signals from a
computer and component video
signals
from other video sources.
The connection surface is colored blue.
•
Audio port (Quick Setup poster)
Inputs audio signals from a video source.
Connect using an RCA audio cable.


